Subscription features (Classic experience)
Acrobat Reader is a free application that you can use to open, view, sign, print, annotate, search, and share PDF files. However, you need to purchase subscription services to be able to use the following premium features:
Adobe Acrobat Premium
It provides you access to the above listed premium features.
You get access to all the above listed premium features on Acrobat Reader mobile app.
You can access most of the premium features on mobile, desktop, and web application of Acrobat Reader. The Edit and eSign functionalities on Web and Desktop app are not available for Acrobat Premium subscribers. For more details, see Adobe Acrobat DC Plans & Pricing.
You will be automatically charged monthly or annually, based on your subscription terms.
If you accept a free 7-day trial offer for an annual subscription, you’ll get an email when your trial is about to end. At the end of your free trial period, you will be automatically charged for the amount in your subscription terms. To avoid charges, cancel the subscription before the trial period ends.
See also
Are you seeing a different interface? If yes, you are using our new and more intuitive product interface. To learn how to use the premium features on the new interface, refer to our New experience help. If no, continue reading.
Create PDF
Subscribers to Adobe Acrobat Premium or Adobe Acrobat Pro can convert many document types to PDF format. This online service requires an internet connection.
To convert an unopened file to PDF:
Log in to Adobe Cloud Storage and open a file list (Home, Files, Shared).
For any file, tap
 > Create PDF. Alternatively, tap
  > Create PDF.

Tap any file location and navigate to a file. Next, select a non-PDF file.
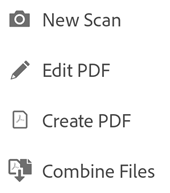
To quickly scan a page and save as PDF, tap Adobe Scan. It opens the Adobe Scan app in capture mode. The captured page opens in the Acrobat Reader.

The app automatically converts your file to PDF. Local files save to Adobe Cloud Storage. Other files save to their original location.
To convert an image file on your device to PDF:
Open an image file in your photo gallery or any other image file on your device.
Tap

Select Adobe Acrobat app (Convert to PDF).

Export PDF to other formats
With subscription to Adobe Acrobat Premium or Adobe Acrobat Pro, you can export unshared PDF files to the following different formats:
Document formats: DOCX, DOC, RTF, XLSX, and PPTX
Image formats: JPEG and PNG
When exporting PDFs to document formats, you can also convert scanned text into actual text via optical character recognition. Acrobat supports many export languages. OCR recognition is not applicable to export to image formats.
To export a PDF:
Log in to Adobe Cloud Storage.
Open an unshared PDF and tap
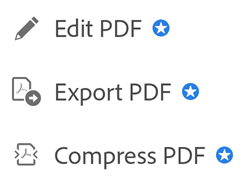
 > Export PDF.
Alternatively, from any file list, tap
 > Export PDF for the file that you want to export.
In the Export PDF page that opens, select Document or Image as the export option, as required.

To export the PDF to a document format:
Select a file format from the list under Document.
To change the language, tap Language and select a different language. By default, the export language is the same as your installed app. Acrobat iOS supports many export languages.
Tap Export.
To export the PDF to an image format:
Tap Image and then select one of the two image formats: JPEG or PNG.

In the page that opens, tap the pages that you want to export as images. Or, tap Select all to select all the pages.

To share the exported pages, select Share images from the bottom and complete the workflow.
To save the exported pages to the device, select Save to Photos. It displays a permission dialog if Acrobat is accessing your Photos for the first time. From the dialog, select an appropriate option to continue.
Once the images are exported and saved in the device Gallery, you see a confirmation message.

Edit PDF
Subscribers to Adobe Acrobat Premium or Adobe Acrobat Pro can edit PDFs on phones and tablets. The edit feature allows you to:
Add text and images
Delete, move, and resize text blocks as well as edit text
Change the font style, size, weight, color, and alignment
Convert text to a bulleted or numbered list
Delete, move, rotate, and resize images
Undo and redo actions
Copy and paste text to and from a PDF
To enter edit mode, tap ![]() > Edit PDF.
> Edit PDF.
In edit mode:
To edit text or an image, simply tap it.
To add a text box or an image, tap
 or
or 

Refer to Edit PDFs for more details.
Organize pages in a PDF
To organize pages:
Log in to Adobe cloud storage.
For any unshared file, tap
 and then tap
  Organize Pages.

Select one or more pages and choose any of the following actions as required:
To rotate pages: Tap
 or
or 
To reorder pages: Long press a page and then drag it to a new location.
To delete pages: Tap
 and then confirm the action.
To extract pages: Tap
 . The extracted pages are automatically saved to your device as “Pages from <file name>”.
To insert pages: Tap
 and then choose one of the following options:
Another file: To insert another file.
Blank page: To insert a blank page.
New page(s) from Adobe Scan: To quickly take a scan and insert the scanned page(s) into the PDF. It opens the Adobe Scan app in capture mode.
When prompted, choose before or after. The app automatically saves the file.

Note
You can undo and redo any action by tapping ![]() and then
and then ![]() .
.
Combine files
With subscription to Adobe Acrobat Premium or Adobe Acrobat Pro, you can combine up to 12 files into a single PDF. You can also combine files from any integrated file location such as Dropbox and Drive.
Note the following limitations in combining files:
You cannot combine files that are shared for review.
You must log in to Adobe Cloud Storage.
It requires an internet connection.
You need Acrobat Reader subscription.
To combine files:
From the list of files, long press a file until a check mark appears.
Tap one or more files as needed. You may select up to 12 unshared files.
Tap
 > Combine Files. If you select non-PDF files, Acrobat instantly converts them to PDF.
Note
Alternatively, from the list of files, you can tap ![]() > Combine Files. Or, you can open a file and tap
> Combine Files. Or, you can open a file and tap ![]() > Combine Files. Next, navigate to a file location, select files, and tap Next. Then, follow the steps below.
> Combine Files. Next, navigate to a file location, select files, and tap Next. Then, follow the steps below.
In the dialog that opens, take one or more of the following actions as needed:
To reorder the files, tap
 and drag a file up or down.
To remove a file from the combine list, tap
 next to the file.
To rename the file, tap
 next to the file title and enter a new name. The file’s default name is “Combine + (current date)”.

Tap Combine.
The combined file is automatically uploaded to Adobe Cloud Storage.
Compress files
With premium subscription, you can compress files to reduce their size. Compressed files consume less bandwidth, and are easier and faster to work with. You cannot compress files that have been previously compressed.

To compress a file, tap ![]() > Compress PDF. Optionally, tap Open to open the file.
> Compress PDF. Optionally, tap Open to open the file.
The compressed file saves at the same location as that of the original file.
Note
File compression is only available for files which have not already been compressed in any app (including desktop Acrobat). Attempting compression on a file which has already been compressed results in an error.
Password-protect PDFs
Subscribers to Adobe Acrobat Premium or Adobe Acrobat Pro DC can password protect PDFs by setting a document open password.
When you create a password for a PDF, note the following:
The app creates a file copy named “<the file name>_protected” and saves that file to the Adobe Cloud Storage. It does not protect or change the original file.
Actions which change the file are blocked on mobile devices, including Fill & Sign, commenting, and editing.
You can use the restricted features with desktop Acrobat.
You can remove the password with desktop Acrobat (you must know the original password).
There is no separate password for edit. If a user can open a file, they can edit the file.
Currently, Acrobat Reader mobile app does not support printing of password-protected PDFs.
To password protect a file from within an open PDF or from any file list:
Tap

Tap


Enter a password and confirm it. Use only supported characters.
Tap Set Password.

Supported characters
When you create a password to password-protect a PDF, you must only use letters, numbers, and the supported characters listed below. Passwords with unsupported characters show an error dialog.
Supported characters: !, “, “, #, $, %, &, ‘, (, ), *, +, ,, -, ., /, 0, 1, 2, 3, 4, 5, 6, 7, 8, 9, :, ;, < , =, > , ?, @, A, B, C, D, E, F, G, H, I, J, K, L, M, N, O, P, Q, R, S, T, U, V, W, X, Y, Z, [, \, ], ^, _, `, a, b, c, d, e, f, g, h, i, j, k, l, m, n, o, p, q, r, s, t, u, v, w, x, y, z, {, |, }, ~
Open a protected file
To open a password protected file, you must know the password.
Note
There is no way to retrieve a forgotten password.
Open a protected file.
Enter the password.
Tap OK.

Forgotten Passwords
The password feature is designed to secure your docs against malicious attacks and unwanted viewing. For this reason, there is no way to retrieve a lost password. Note the following:
DC mobile product password protection works identically on the desktop.
It’s always a good idea to backup your password in a secure manner if you think you could forget it.
When you password protect a file, Acrobat Reader creates a new file. The original file is not password protected, and you can always retrieve that file from your device.