|
Create and apply a custom stroke
In this section you'll create a custom stroke type and apply it to a line that will serve as the pen in the logo.
Draw a line and modify its points
First you'll use the Line tool to draw the line that will become the pen in the logo. You'll modify the line's angle and length by dragging its end points with the Pointer tool.
| 1 |
In the Tools panel, click the Line tool (or select it from its pop-up menu).
 |
| 2 |
Drag from the center of the square upwards to draw a vertical line. Don't worry about its exact length or positioning. |
| 3 |
Click the Pointer tool in the Tools panel. |
| 4 |
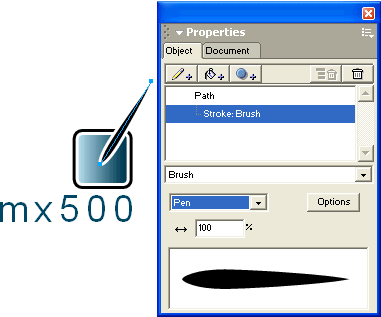
Drag the points at each end of the line to the positions shown in the following illustration.
 |
 |
|
Create a custom brush
Next, you'll create a custom brush. Brushes are based on symbols in the library. You'll create a new library symbol and use it as a brush in your document.
The library is a powerful feature because it allows you to create a graphic once, modify it, and have that change reflected in all instances of that graphic in the document. You can even share symbols between documents by importing and exporting them.
| 1 |
If the Library panel is not already displayed, select Window > Library. |
| 2 |
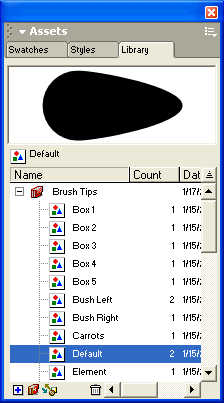
In the List view area, click the plus icon (Windows) or the arrow icon (Macintosh) beside the Brush Tips group folder. The folder expands to show its contents. |
| 3 |
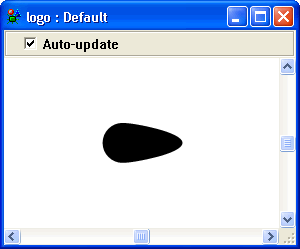
Locate the Default symbol in the Brush Tips group folder, and double-click the icon beside it.
 |
|
An editing window appears with the brush tip displayed. If necessary, zoom in so you can better see the object in the window.
 |
| 4 |
Using the Pointer tool, select the brush tip in the editing window. |
| 5 |
Select Modify > Brush > Create Brush. Click Copy in the dialog box that appears. |
| 6 |
In the Edit Brush dialog box, name the brush Pen and click OK.
 |
| 7 |
Close the editing window for the Default brush tip. |
|
A new symbol called Graphic-01 appears at the bottom of the Library panel. You may need to scroll the List view area to see the new symbol. |
| 8 |
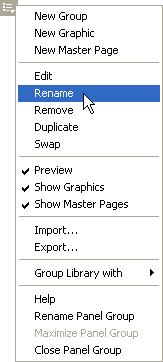
Select the Graphic-01 symbol, and then click the Library panel's Options menu control to display the Options menu. Select Rename.
 |
|
The brush name is highlighted in the List view area of the Library panel. |
| 9 |
Type Pen Brush as the new symbol name, and press Enter (Windows) or Return (Macintosh). |
| 10 |
Double-click the icon beside the Pen Brush symbol in the Library panel, and select the brush tip in the editing window that appears. |
| 11 |
In the Object panel, click the Add Stroke button. |
| 12 |
Set the stroke width to 3 in the Object panel, and press Enter (Windows) or Return (Macintosh). |
| 13 |
From the Tools panel, click the stroke color box and select White from the color palette. |
| 14 |
Close the editing window to apply your changes to the new brush. |
 |
|
In the next procedure you'll see this new brush listed as a custom brush in the Object panel.
Apply the new brush
Here you'll apply the new brush to the line that you drew earlier.
| 1 |
With the line still selected in the Document window, select the Stroke property in the Object panel. |
| 2 |
Select Brush from the stroke type pop-up menu in the Object panel. |
|
The options in the bottom portion of the panel change to reflect the new stroke type you selected. |
| 3 |
From the brush pop-up menu, select Pen. This is the new brush you created in the previous procedure. |
|
The line in the document changes to reflect the custom brush you applied.
 |
 |
|
You have performed a variety of tasks, including creating a custom brush and working with Library symbols. You've also used the Line tool to draw a path. In the next section you'll discover another way to draw a path. You'll also apply a live effect and explore the power of property hierarchies in the Object panel.
Note: This is a good time to save your document.
|