| 1 |
Shift-drag the Rectangle tool to draw a square. |
| 2 |
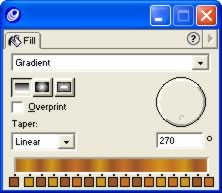
Use the Fill inspector to create and apply a multi-colored linear gradient using the Wood Light, Wood Medium, and Wood Dark swatches. Apply each swatch several times in random order to create a realistic wood effect.
 |
| 3 |
Select the square and choose Modify > Transform > Scale. Use the following settings in the Transform panel: |
 |
Deselect Uniform. |
|
Enter 100 for the horizontal dimension. |
|
Enter 55 for the vertical dimension.
 |
| 4 |
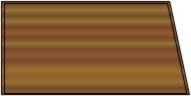
Click Scale to convert the square to a rectangle by scaling disproportionally. |
| 5 |
Choose Modify > Ungroup to edit the points of the rectangle. |
| 6 |
To distort the rectangle, select the lower right point and Shift-drag it slightly to the right. |
|
Note: Distorting the rectangle by increasing the width of the bottom edge produces a more realistic perspective effect in the final image.
 |
| 7 |
To prevent further editing of the points, choose Modify > Group. |
| 8 |
To create a copy of the object and make it smaller, select it and choose Modify > Transform > Scale. Use the following settings in the Transform panel: |
|
Select Uniform. |
|
Enter 97 for the scale percentage. |
|
Enter 1 for Copies.
 |
| 9 |
Click Scale. |
| 10 |
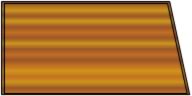
To simulate a beveled edge by lightening the wood tones of the second polygon, choose Xtras > Colors > Color Control. Use the following settings in the Color Control panel: |
|
Select the HLS color model button. |
|
Enter 10 for lightness (L).
 |
| 11 |
Select both polygons and group them. |
| 12 |
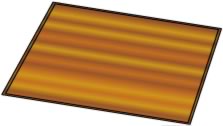
To simulate perspective by skewing the polygons, select the group, and then choose Modify > Transform > Skew. Use the following settings in the Transform panel: |
|
Enter 29 for horizontal skew angle (h). |
|
Enter -9 for vertical skew angle (v).
 |
 |
|


