| 1 |
Use the Polygon tool to draw a three-sided polygon (triangle) at the bottom center of the cone outline. |
|
Tip: Hold Shift while drawing the three-sided polygon to constrain the bottom segment horizontally. For more information on using the Polygon tool, see the appropriate section in FreeHand Help.
 |
| 2 |
With Snap to Point on (View > Snap to Point), use the Pointer tool to drag the uppermost point of the triangle to the top of the cone outline.
 |
| 3 |
Double-click the triangle to display its transform handles, and then drag the rotation point to the top of the triangle. |
| 4 |
Place the pointer near the outside of the lower left transform handle, and drag to rotate the triangle until it overlaps the left side of the cone outline. Before you release the mouse button, press Alt (Windows) or Option (Macintosh) to convert the rotated triangle into a duplicate, leaving the original in place.
 |
| 5 |
Double-click the first triangle again to display its transform handles, and drag the rotation point to the tip of the triangle. |
| 6 |
Place the pointer near the outside of the lower right transform handle and drag to rotate the triangle until it overlaps the right side of the cone outline. Before you release the mouse button, press Alt (Windows) or Option (Macintosh) to convert the rotated triangle into a duplicate, leaving the original in place.
 |
| 7 |
Apply the Cone Highlight swatch to the left triangle. |
| 8 |
Apply the Cone swatch to the center triangle. |
| 9 |
Apply the Cone Shadow swatch to the right triangle. |
| 10 |
Use the Stroke inspector to remove the stroke (if any) from the three triangle objects.
 |
| 11 |
Select the rightmost triangle and choose Modify > Arrange > Send to Back to place the object behind the cone outline. |
|
Tip: The stacking order of objects in FreeHand determines their blending order, so different stacking orders can produce different results. Sending the rightmost triangle to the back ensures smooth shading in the next step. |
| 12 |
Select all three triangles and choose Modify > Combine > Blend to create smooth shading for the cone.
 |
| 13 |
Choose Edit > Cut to remove the blended object group from the drawing area and place it on the clipboard. |
| 14 |
Select the cone outline, and choose Edit > Paste Inside to place the blended object group inside the cone outline.
 |
| 15 |
Use the Stroke inspector to remove the stroke (if any) from the cone outline object. |
| 16 |
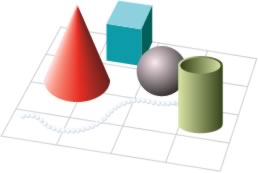
Place the cone on the simple grid in the approximate location in the sample image.
 |
 |
|