Tattoos have existed for centuries and last forever, but fashions change frequently. Before taking a seat at your nearest tattoo parlor, learn how graphic artist Erica Larson uses Adobe Photoshop to apply a virtual tattoo in a few simple steps.
Erica Larson dreams up inspired designs every day as an Associate Creative Director on the Adobe Studio team. She makes stuff that makes others want to make stuff.
style
xl spacing, two up
layout
1 | 2
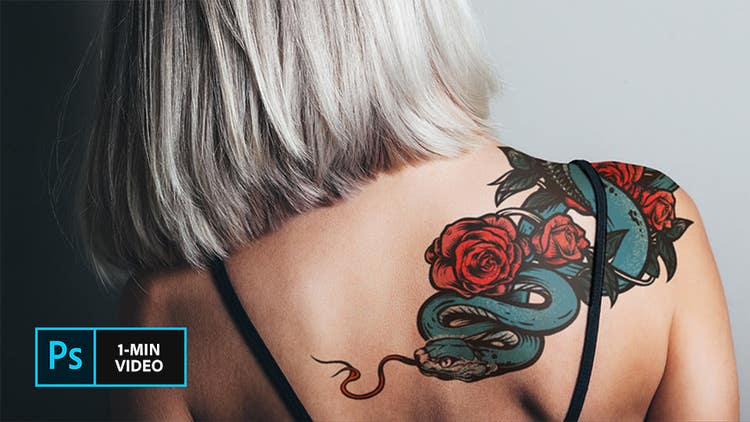
Take a quick one-minute look at Larson’s composite technique in the steps below.
Start by opening the model photo in Photoshop and move the tattoo art wherever you’d like. In the Layers panel, Larson set the Blend Mode of the tattoo layer to Multiply and reduced the opacity to meld the tattoo onto the model’s shoulder.
Step 2: Clean up
Next, Larson added a layer mask to the tattoo. With the layer mask selected, she used the Brush tool and painted with black to hide those areas of the tattoo that are off the shoulder.
Step 3: Realistic lighting
To create a realistic lighting effect on the tattoo, Larson reduced the brush opacity to 10 percent and painted with black over the part of the image she wanted to highlight.
Step 4: Wrap around
Fitting the tattoo around the model’s contours is key. First, unlink the tattoo image from its mask. Next, click on the tattoo thumbnail to edit the image independently of its mask. To finish, select Edit > Transform > Warp, and drag the grid and handles to warp the tattoo wherever you want.
Step 5: Blend in
To make the tattoo look as realistic as possible, Larson selected the tattoo layer and chose Filter > Blur > Gaussian Blur. She then adjusted the radius to create a subtle blur.
New skills, new tats?
Experiment with tattoo designs like Larson’s to see how they’ll look on you or your clients—no needle required.
Note: Project files included with this tutorial are for practice purposes only.
Tattoos have existed for centuries and last forever, but fashions change frequently. Before taking a seat at your nearest tattoo parlor, learn how graphic artist Erica Larson uses Adobe Photoshop to apply a virtual tattoo in a few simple steps.