TUTORIAL ARTICLE
Intermediate
5 min
- Sketch the outline
- Fill the sketch with color blocking
- Add color and detail
- Apply a gradient for blending and transformation for proportion
- Liquify the features and adjust the final color
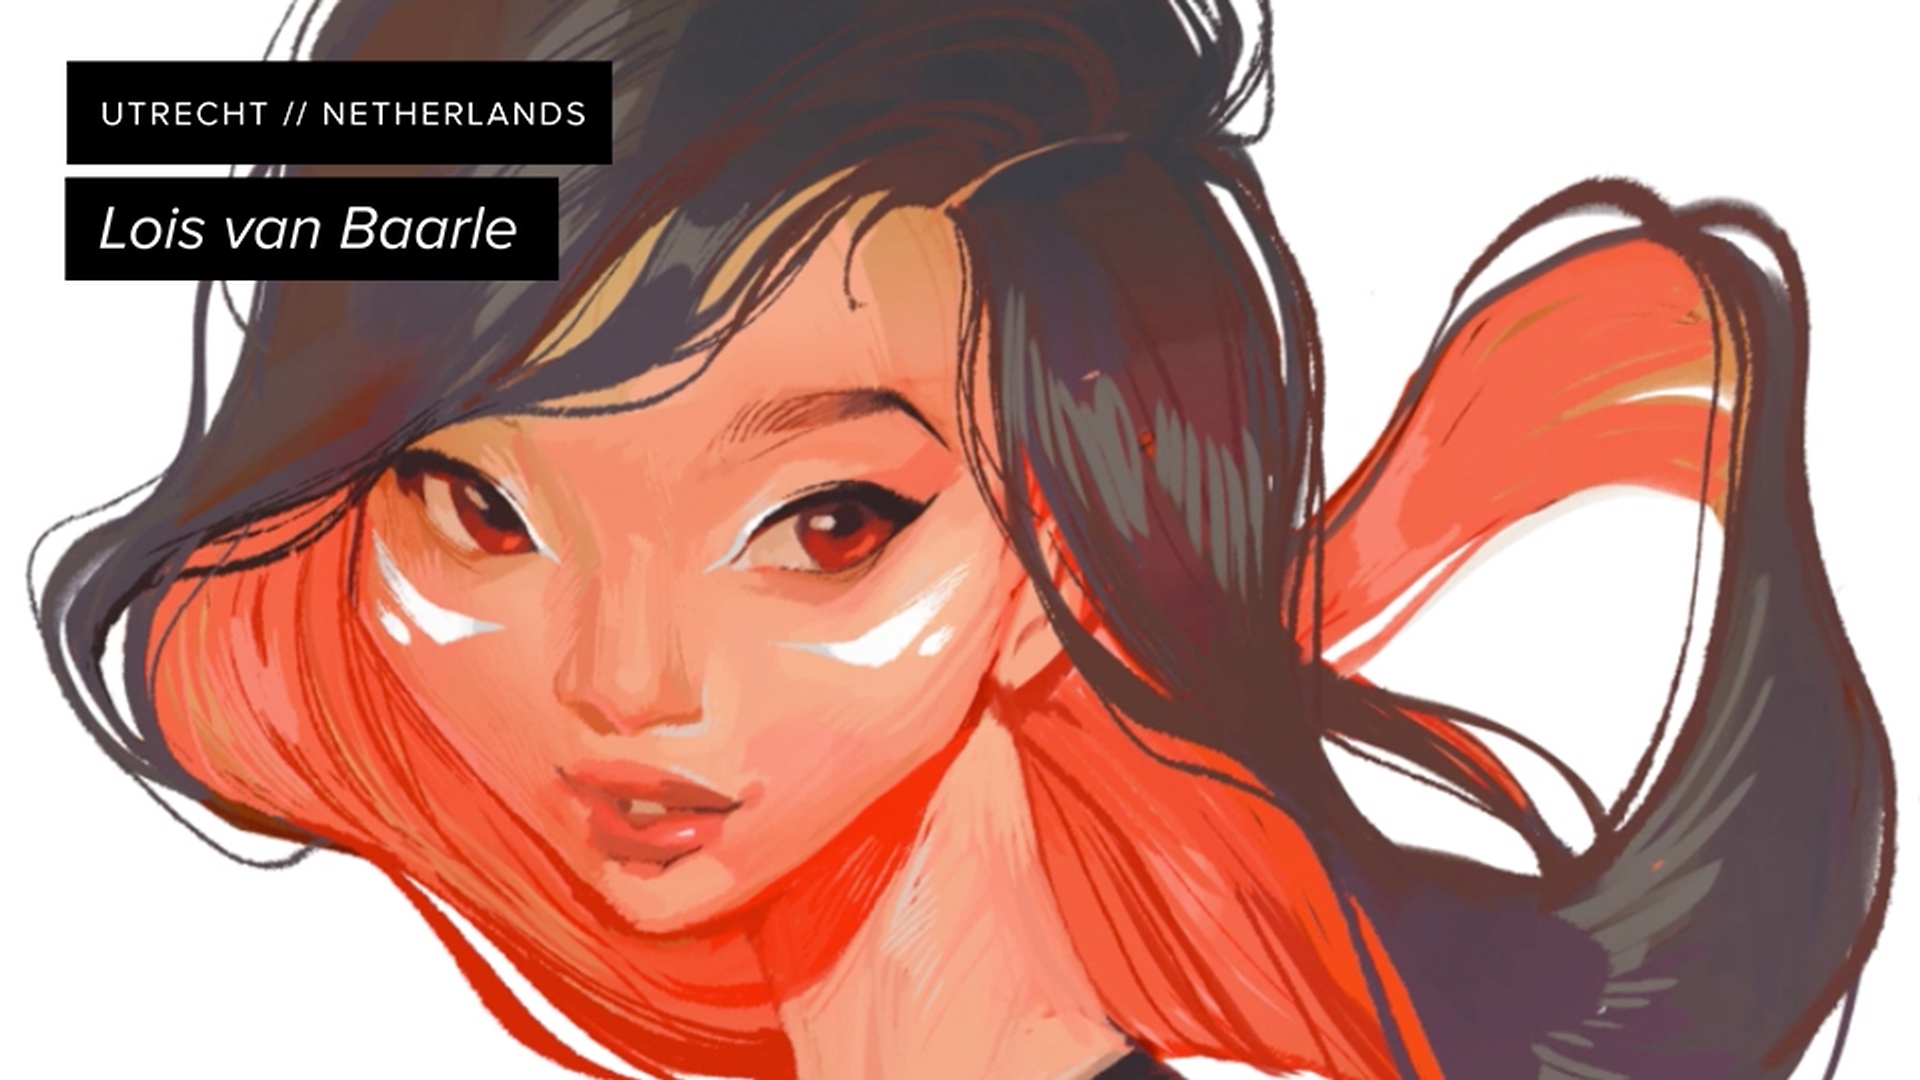
How Lois van Baarle created “Red”
You might think Dutch artist Lois van Baarle has brushes where the rest of us have fingers. Influenced by her appreciation of anime, French comic art, and art nouveau, she has developed a style that’s all her own. See how Lois uses brushes in Adobe Photoshop to sketch, color, blend, and refine her digital paintings.
View tutorial in Photoshop
Lois starts with a rough sketch she created using a pressure-sensitive stylus and tablet and paints over it. She selects a color and chooses a rough brush to create an outline of the face and neck. She alternates brush sizes to create different width strokes — broader strokes for the face, thinner ones for the finer details of the hair. Once she’s done, she changes the layer opacity to 13% and creates a new layer. With the new layer selected, she refines the sketch by tracing the outline with a slanted, darker brush.

Lois then prepares to apply the first pass of color. In this multistep process, Lois groups the two outline layers and creates a new layer. Then, she uses a custom oil pastel from the Tool Presets and traces the outer edges of the sketch.

Lois finds it more intuitive to paint on just one layer. With no need to keep track of different colors on multiple layers, she’s able to maintain an easy flow of drawing.
Lois applies the key colors without focusing on blending just yet. She fills the hair and clothing with orange, then fills the areas of skin with a pale peach using a soft round brush. She uses Replace Color to modify the Fuzziness, Hue, and Saturation of the peach to define the highlights on the face. Then, she highlights the hair with blue and locks the transparent pixels on the top layer to change the color of the faded edges of the hair without “spilling” the color onto the rest of the canvas.
Throughout this phase, she alternates brush sizes for refinement and uses the Eraser tool for cleanup as needed.

In the final step to distinguish the parts of the picture, Lois changes the color of her brush and gives depth to the cheeks and color to the lips. She uses the Magic Wand tool to select the pink color of hair surrounding the face and then applies a paler peach color to that area using a brush set with low opacity so the strokes overlay each other. Then, she blocks the clothing with a darker color using a wide, soft brush.

Lois perfects the colors through intuition and experimentation. She starts by choosing colors, then plays with sliders to tweak the Hue/Saturation/Lightness and Selective Color until she’s happy with the result.
Lois periodically duplicates a layer and works on a new one to track the progress of her drawing. The previous layer shows the image at an earlier stage and allows her to make sure the project is progressing the way she wants.

Lois uses the Gradient tool to create a blur between the different color tones of the cheeks for a smoother blend. She then selects and transforms the eye to resize and reposition it. Lois continues to refine features, colors, and textures of the face with more brushwork and adds cheek and eye highlights on a new layer.

At this point, Lois does a lot of brushwork to finesse the details. Rather than using shadows and highlights, she likes to use different colors to give dimension to the hair, skin, and eyes.


In the final stages, Lois uses the Liquify filter to drag and pull parts of the eye, mouth, chin, nose, and hair to create subtle but realistic changes to those features.

She finishes the painting by using Selective Color adjustments to fine-tune the hair and skin color.

About the artist
Lois van Baarle has been drawing since before she can remember. She took some art classes along the way through elementary and high school, and a bit in college, but is mostly a self-taught artist who finds inspiration in artwork she finds while browsing the Internet, watching movies and animated films, and taking walks through nature.
Lois likes to keep it simple and doesn’t add too many tools that could disrupt her progress. When choosing brushes for a project, she usually picks one and sticks with it, since switching brushes takes her out of her flow.
Lois practices sketching and speed painting to continue improving her skills as a digital painter. Sketching allows her to place more emphasis on flow and expression than on anatomical precision, and it reduces stiffness in her final drawings. Early on, she liked to use mechanical pencils (nothing fancy), art markers, colored pencils, and brush pens for inking. More recently, she’s been happy with her drawing tablet so she can create anywhere she happens to be. Lois focuses mostly on character design. But she’s worked with animation, both personally and professionally, and is currently in the process of producing two animated shorts.
