Use Adobe Photoshop to remove and add objects.
Using Adobe Photoshop to add elements to, or remove them from, an image is a fundamental skill—but the results can be anything but basic. See how visual artist Gabriel Isak creates abstract and surreal images by adding, moving, and deleting elements in his photos.

Based in Sweden, Gabriel Isak is a visual artist who focuses on themes related to psychology and dreams in his work. He received his BFA in photography from San Francisco’s Academy of Art and has since exhibited his work around the world.

Take a one-minute peek into Gabriel Isak’s process for removing and adding objects in Photoshop in the steps below.
Before you start.
Use these sample images or practice with your own.
Step 1: Add mystery with the patch tool
Isak wanted to add mystery to this photo by removing the footprints. To do this, he drew around a set of footprints with the Patch Tool—making sure Source was selected in the Options bar. He then moved that selection to an area where he could sample replacement sand and repeated this step until all footprints were gone.

Step 2: Make space
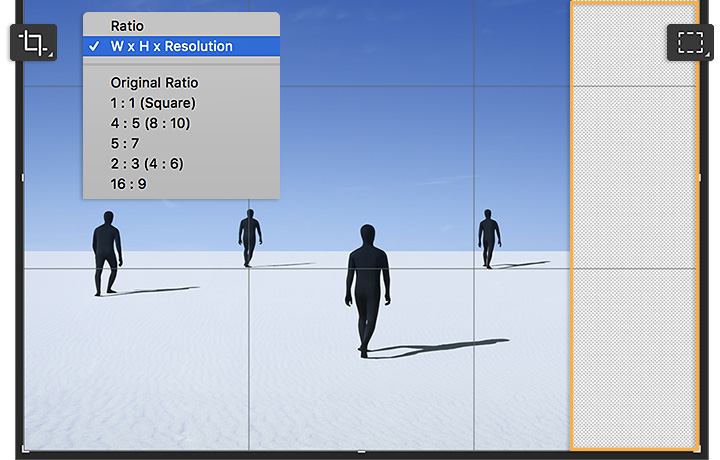
To balance the composition, Isak chose the Crop tool, set it to Unconstrained in the Options bar, and dragged to extend the canvas to the right. He then used the Rectangular Marquee tool to select the newly created empty canvas.

Step 3: Fill the void
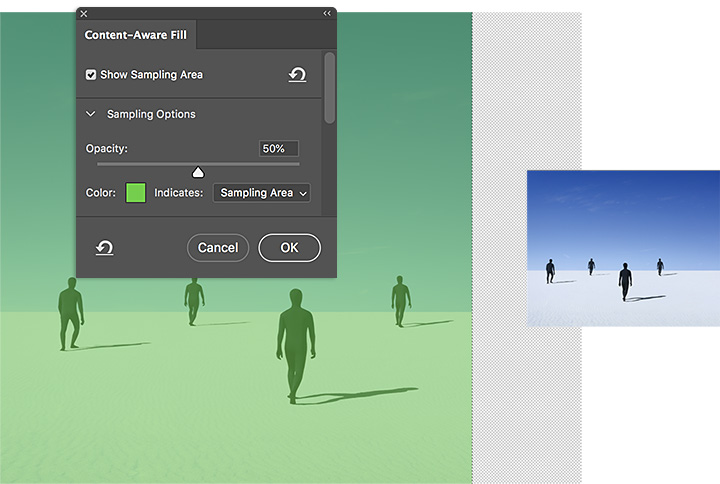
Isak chose Edit > Content-Aware Fill to fill the void, making sure the Sampling area highlighted the original image area. When you do this, check the preview to make sure the empty space will fill correctly before you click on OK.

Step 4: Add more
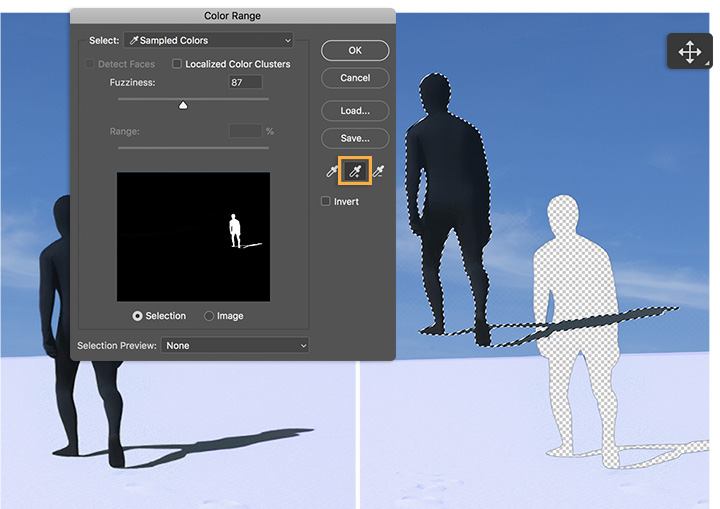
Next, Isak added another figure to the composition. He opened the Photoshop document with the solitary figure and chose Select > Color Range. He selected the Add To Sample eyedropper icon, then clicked on the figure and its shadow to select them both. Using the Move tool, he added the selection on the original image, dragging the selection over the other file tab and holding it for a few seconds until that file came to the forefront. He then moved the selection into position.

Step 5: Join the group
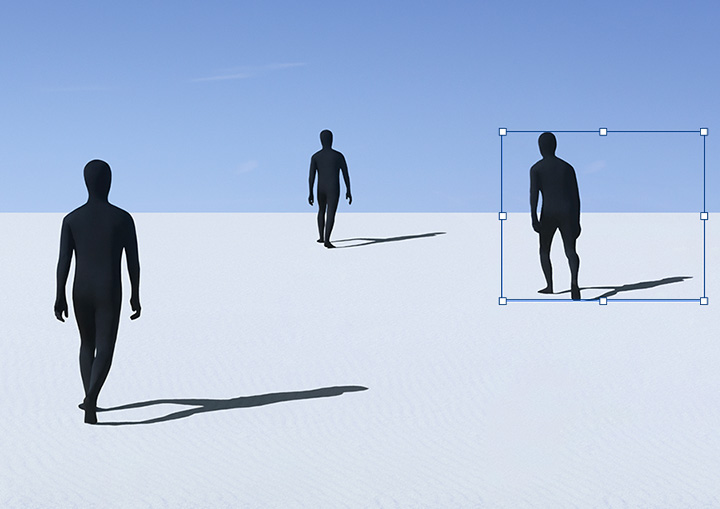
Isak dragged the figure into position and used the transform tools to scale it to the perspective of the scene.

Assemble your crew.
Try removing and adding objects to your images to play with balance and perspective.

Note: Project files included with this tutorial are for practice purposes only.
Do more with Adobe Photoshop.
Create beautiful images with Photoshop brushes, Content-Aware Fill, Photo effects, Neural Filter, Sky replacement, and the many tools photographers rely on.
Explore the Photoshop family of apps.
You might also be interested in…
Learn to create surreal images by compositing two photographs.
Brush out your photos rough spots for cleaner, clearer images.
Get your glow on with this simple technique.
Blend distorted text with your images for a 3D finish.


