How to optimise your images for the web.
Balancing image quality with site speed is a familiar tightrope for many digital creatives, developers and brands to walk.
A website might be chock-full of photos and graphics that dazzle the eyes — but if they slow-down that site, users will head elsewhere.
To get the best results, you need to think fast.
In this guide, we’ll go through the basics of optimising your images — so you can balance amazing creative endeavours with speedy results.
What does image optimisation mean?
Image optimisation is all about finding the sweet spot between image data — which can slow down page load times — and image quality, which can enhance a brand or website visually.
It can also involve tweaking certain details to make your images more searchable and accessible. Tying together these different strands is essential to a high-performing and visually appealing website.
How image optimisation works — the key methods.
When you’re optimising images for a website, reducing file size is a key priority. Most web-based image formats feature some form of compression to help with this.
- Lossless compression reduces file sizes without losing any significant data. To do this, the compression algorithm stores certain details of the image elsewhere, so you can revert back to the original file later. Some examples of common lossless picture files include PNG and RAW.
- Lossy compression is the opposite. It permanently discards image data to make it easier to save, store and transfer a file. You’ll get a far smaller file size than lossless equivalents — but this comes at the cost of a gradual (and irreversible) decline in image quality. JPEGs are a common lossy picture file type.
Aside from reducing file size, there are a few other ways you can optimise your images for the web too.
- Image dimensions are important in providing a smooth user experience on different devices. You’ll need to appropriately re-size and scale your images to mobile, desktop and tablet-friendly sizes.
- Image descriptions are stored in the metadata of each file. You can optimise these to improve SEO (search engine optimisation) performance.
- Image alt text provides a text-based description of your image to make it more accessible to different users, particularly those with visual impairments.
Why do I need to optimise images for the web?
Optimised images lead to a better overall website performance and user experience. This could mean more traffic, sales and enquiries. Here are some of the key advantages:
- Smoother user experience. As the name suggests, user experience – or ‘UX’ – is all about fulfilling the needs of the user. Making your site easier to browse can boost customer loyalty and lead to smoother conversions. If you have poorly optimised images that take an age to load, or don’t display on different devices, your site could be in impacted. If you choose relevant, user-focused keywords for images (and throughout your website), you can climb to the top of the results. An online survey conducted in 2018 found that 70% of online businesses fail because of bad site usability. Mirroring this stat, 70% of consumers admitted that page speed affects their willingness to make a purchase.
- Improved SEO performance. It’s believed that around 68% of all online journeys, whether business or personal, start with a search engine. Optimised image descriptions can help play their own part in helping users find pages within your site search function. With descriptions that target keywords and accurately depict pictures shown, you stand a better chance of being in the right place on the search engine when users start looking for terms related to your brand.
- Better accessibility. By making your website more accessible, you can ensure all potential users can access your content — including those with disabilities and users in developing countries. Adding in things like images with alt text, to help screen readers describe the pictures to those who are partially sighted can make your pages more inclusive. Using Accessible Rich Internet Applications (ARIA) on your site can also help screen readers identify page structures, interactive elements and divide pages into sub-categories, in order to make it more accessible. Doing things like this are not only essential to inclusivity and equal access, but improves user satisfaction and website reach too. In some cases, accessibility measures are even required by law.
- Easier storage and retrieval. Optimised images are also far easier to manage at the back end. Smaller images take up less space on your server, hard drive and cloud storage. This makes them easier to upload and download. Plus, you can store far more of them than data-heavy high-res images.
Image optimisation: key tips and things to consider.
There’s a lot to learn when it comes to optimising pictures. Here are a few things to think about before you start.
Image size and scaling.
Though great for print, or flashy billboard advertising, high-res images are often poorly suited to the web.
The commonly held standard for web-optimised images is 72 pixels per inch (PPI). This should look great on different devices, and keep your page loads sharp. If you’re displaying your images on a HD screen, meanwhile, you can go higher.
Getting your image dimensions right is also important. For the most part, they should be relatively similar to the size at which they will be displayed. Generally, photos and graphics of around 1000 pixels wide should sit nicely on different devices. But logos and icons should be considerably smaller — normally between 100-600 pixels wide.
Want to know more about pixel density how it affects your images? Check out our complete guide to pixels per inch (PPI resolution).
Compression.
You’ll need to think about the compression methods of your images. Lossy compressed images are likely to load faster, but the image quality may suffer over time. Lossless files, on the other hand, may weigh heavily on your site speed.
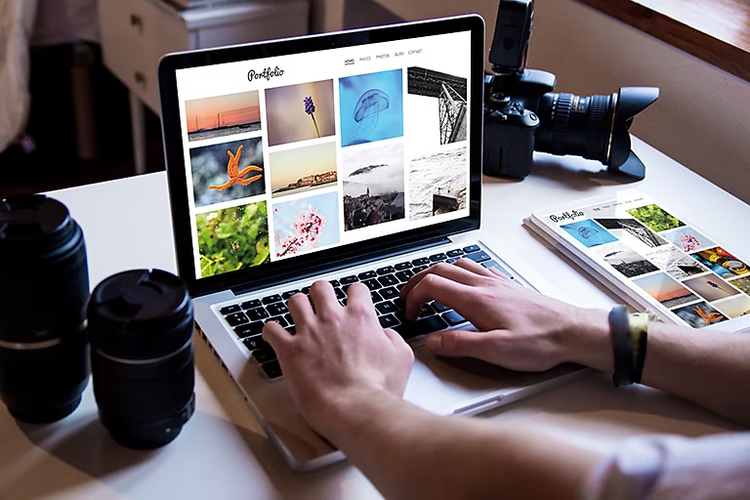
As a rule of thumb, if you’re prioritising your creative flair — say, for a digital photography portfolio — it’s best to use lossless compression. This will not only provide better image quality, but will ensure you can quickly revert to your original images when needed. You can also use lossless files for smaller images that need particular sharpness and clarity, or need to display well on different backgrounds. For example, PNGs are a common choice for logos.
For general website use (especially for pages with large numbers of photos), choose lossy. Your users will be able to see your images clearly, and they won’t be left waiting to do so. Similarly, if you’re sending a suite of images over email, you’ll need to compress these as lossy files to reduce the file size.
For the full lowdown of the pros and cons of different compression methods, check out our complete guide to lossless vs. lossy compression.
File types.
There are a huge range of different image file types out there that could affect your site performance. They fall into the category of raster or vector.
Logos, graphics and animations are often better suited to vector file types. These can expand infinitely without losing resolution — and they won’t bog down your site with large file sizes either.
However, vector files can generally only capture line-based images, so aren’t a good choice for photos. They also take specialist skills to create, open and edit.
Here are a few common vector file types to watch out for:
- SVG is a popular tool for 2D graphics and illustrations on websites.
- AI is the native Adobe Illustrator file type. Expect high levels of detail for more complex digital creative.
- PDF from Adobe Acrobat is the world’s go-to file type for digital documents. Perfect for storing pages online ready for print.
If you’re displaying digital photography, meanwhile, you’ll need a raster file. These contains millions of tiny pixels, which combine to display amazing levels of detail. However, loading all this data takes time. Optimising your photos to 72 PPI can help speed things up.
There’s a whole host of raster file types out there to choose from. Here are some common choices:
- JPEGs are the everyday image file you find on browsers and smartphones the world over.
- GIFs are ubiquitous online due to their ability to create a simple animation of several images. They’re perfect for simple graphics and social media memes.
- PNGs support transparency. They’re a great choice for logos and graphics on different pages and backgrounds.
- WebP files are becoming more and more popular. These allow for quality images online, using relatively small file sizes.
Find the right file for the job. Learn more about the difference between raster and vector files.
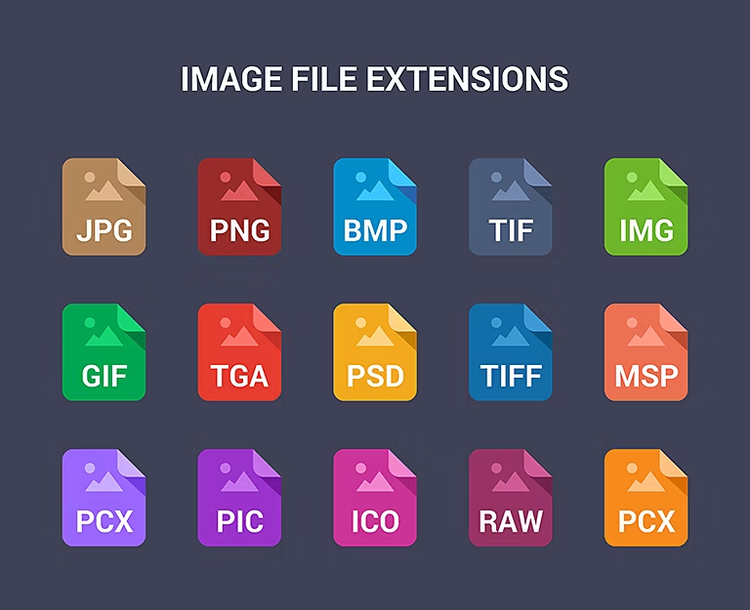
Image purpose.
Understanding the purpose of your images makes it easier to choose your file type, compression method and image size – all key aspects of website image optimisation
For example, a product image should have sufficient resolution for users to zoom in and out, but simple thumbnails will need far less data.
Remember to think carefully about where and why you’re using a particular image — and be sure to use pictures that are directly relevant to the intended audience.
Alt titles and tags.
Alt titles and tags can help you climb to the top of Mt. Google and other search engines.
Key to this is writing alt titles and tags that correlate to what your target audience are searching for. To get a handle on this, you’ll need to do some careful keyword research.
There is also help available if you need to create accessible PDFs, for example.
Want to learn more about image resolution?
Discover how to measure it, change it and more with our complete guide.
How to optimise images for a website with Adobe.
Optimise for web.
After you’ve created, downloaded or edited a raster image on Adobe Photoshop, it’s easy to optimise the picture for web performance.
- Open your file and click File > Save for Web.
- To optimise for a specific file size, click Optimise to File Size. Enter your file size or select your file type. You can also use the current settings image to optimise to your current file.
- You can also specify a compression level from Low, Medium or High, or enter a specific value between 0-100 in the Quality box.
- Select Progressive to preview how each of your optimisations affect your image.
You can also use web editing software like Adobe Dreamweaver to experiment further with optimisation techniques. Dreamweaver lets you preview different file formats, as well as settings for animation, transparency and other effects.
Compress your images.
On a basic level, you can compress a native .PSD Photoshop image simply by saving it in a compressed format, like JPEG. Likewise, if you wanted to save your image in a lossless format, you could choose RAW, TIFF or PNG.
You can also use Adobe Creative Cloud programmes to compress your images to specific levels.
- To do it, open your file in Adobe Photoshop or {{lightroom}}.
- Spend some time experimenting in File Sizes, Image Settings and Image Options.
- You can balance image quality, pixels, resolution and file size until you hit the happy medium.
Resize your images.
You’ll also need to make sure to size your images correctly for different devices. For example, a narrow image might sit well on a mobile device, but it will stretch and become blurry on desktop.
To edit image dimensions and resolutions:
- Open your image in Photoshop.
- Select Image > Image Size.
- Use the Fit to drop-down menu to quickly choose common web and print sizes. Alternatively, you can change the width and specifications to get them exactly how you want.
- Using the Chain link next to the width and height fields will lock your proportions. You can unlock this to change the size of your canvas.
- Use Resample to adjust your resolutions without changing the file size.
- Next, click save – and you’re done!
Write accessible alt text.
Not everyone who visits your website will be able to see your photos, logos and images – and image optimisation is not just about how a picture displays or loads.
People may rely on assistive technology and screen readers to understand the content of a web page. Because alt text also displays when images fail to load, it can be useful for those with poor internet connections.
To make sure your site is accessible to as wide an audience as possible, you’ll need to write descriptive alt text for your images. These descriptions should be as helpful, succinct and clear as you can make them. Keep them to 125 characters max.
Take this image below:

Here, an example of helpful alt text could be: three people sit in a classroom with bags, laptops and notepads.
A more vague, unhelpful example of alt text could be: a picture of a classroom.
Here are a few tips.
- Describe the information, not the picture. If you were writing alt text for a logo, be sure to say that it’s your company’s logo, rather than describing the logo itself. This is more helpful to the user.
- Use punctuation correctly. This helps screen readers understand the alt text.
- Prioritise informative images. Decorative photos aren’t as important for accessibility.
Alt text is stored in the HTML of your site, not in the image itself. If you’re using Adobe Experience Manager as your CMS platform, you can head to Advanced image properties > Description to make edits.
Create search-friendly descriptions.
It’s important to use audience-relevant keywords for your image titles — not just the titles your camera assigns to the file.
Using analytics tools like Moz, Google Analytics or SEMrush can help you research keywords and find a title that fits with your audience’s search habits. For example, if your website sold wool scarves, you could name a given image red-woollen-scarf, rather than DCMIMAGE22.jpg. This not only describes the image, but will help search engines and your on-site search functions find your image.
Simply save your file on Adobe Photoshop with the name of your choice. To rename an existing file, you can use the Organiser window.
- Select File > Rename from the Menu.
- In the dialogue box, type your file name into the New Name field
- Click OK.
Convert your files.
If you’ve got a high-res image that’s slowing down your site performance, it’s easy to convert it to a smaller file. To do this, you can use a number of Adobe Creative Cloud programmes, including Photoshop, {{lightroom}} and Adobe Express.
To convert a PNG to a JPEG file on Adobe Express:
- Simply select a PNG file from your photo library.
- Upload it to our free converter tool.
- Download your new JPEG to your desktop.
Optimise images with Creative Cloud.
Adobe Creative Cloud can help you get the best from your images.
- Photoshop is your go-to image editor for in-depth optimisations. Consider image size, quality and pixel density to strike the perfect balance.
- {{lightroom}} combines best-in-class editing software with project management. Use optimised image titles to keep track of your photos in large databases.
- InDesign is perfect for vector art, logos and graphics. Using vector files can reduce your load times.
- Adobe Express. The perfect place for beginner design and quick file conversions without a subscription.
Optimising images: FAQs.
How do I optimise a JPEG for the web?
You can optimise a JPEG with Adobe Photoshop simply by clicking Optimise for web when you save your image. However, Photoshop and other Creative Cloud programmes also offer a wealth of more detailed optimisation options — where you can toggle image size, resolution and quality too.
What is the most optimised image size for websites?
When it comes to image file sizes, 200KB to 500KB is generally held to be the largest range you should use for websites. In terms of proportions, images can be as large as 2400x1600px if you want them to fill the screen, but 1000x1500px max is generally considered a fair limit for pictures on the web.
Which is the best image optimiser?
Adobe Creative Cloud programmes like Photoshop have the ease and precision you need to get your images to exactly the right level of optimisation. For quick conversions and easy image editing, you can also choose Adobe Express.