Discover how to measure it, change it and more with our complete guide.
DPI resolution: your complete guide.
Quality and image resolution are two essential things to consider when it comes to editing photos and creative assets. If your images are going to be printed, more specifically, you’ll also need to understand how DPI can affect your project.
Whether you’re new to photography and design or just revising your knowledge, read on to learn what DPI is and how it applies to your digital images.
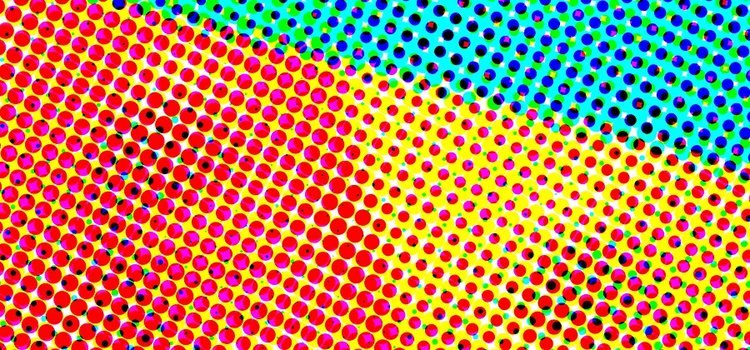
DPI meaning and definition.
What does DPI stand for?
DPI stands for Dots per Inch, referring to the number of ink droplets a printer will produce per inch while printing an image. The more dots of ink per inch the picture has, the more detail you will see when printed.
What’s DPI used for?
DPI is used for printer resolution, to indicate the clarity and detail of an image on paper. It’s an important measurement for photographers and designers, as it will determine the quality of a printed asset – whether for a poster, a brochure or a glossy magazine.
- DPI is what makes an image look crisp and high-quality. The higher the number, the more ink droplets are tightly bunched together.
- This also goes for scanning. Like a printer, scanners also measure quality in DPI, meaning the number of points of data the scanner and computer picks up from the image.
- DPI can also vary depending on the printer. Your average inkjet or laser printer can produce images of at least 300 DPI, if not higher, whereas some professional printers may need to print images with a resolution of twice that number.
What is 300 dpi?
If an image has a resolution of 300 DPI, this means that every inch contains 300 dots of ink. Photographers and graphic designers typically use 300 DPI as a benchmark for printing high-quality images. However, larger images may require an even higher resolution.
How does DPI differ from PPI?
PPI (Pixels per Inch) refers to the number of pixels that make up every inch of a digital image. It’s used to describe image resolution on a screen, rather than in print. DPI, meanwhile, refers to number of dots in every inch and is generally used for print purposes.
PPI and DPI do however serve very similar purposes, indicating the overall resolution of an asset. This is also why PPI can be easily confused with DPI resolution.
How do I find the DPI resolution of an image?
Finding the DPI resolution of an image is straightforward when you use Adobe Photoshop. Photoshop measures resolution in PPI, but its ratio of PPI to DPI is 1:1, so you can still find out what the DPI of an image is.
Just follow these simple steps:
- Launch Photoshop on your laptop or computer.
- Navigate to File > Open and select your image.
- With your image open, click Image > Image Size.
- Select Pixels/Inch in the drop-down box besides Resolution. This will give you the resolution value.
Learn more about Image Size and Resolution on Photoshop.
How to find the DPI resolution in InDesign.
You can also find the DPI resolution of an image using Adobe InDesign. InDesign is professional page design software, perfect for editing and designing posters, magazines, prints and banners.
InDesign uses two terms to refer to resolution — Actual PPI and Effective PPI.
Actual PPI is the resolution of the image while at 100% of its original size, meaning when the image is at its original dimensions without being resized.
When you enlarge an image, the existing pixels are stretched to accommodate the new size. This is where Effective PPI comes in. This refers to the resolution of the image based on how it is placed on the InDesign page — showing how the final product would look if it was enlarged or reduced in size.
So, for instance, if you wanted to print an image at 300 DPI, you would need to make sure the image has an Effective PPI of 300.
Here are step-by-step instructions of how to do this on InDesign:
- Launch InDesign on your laptop or computer.
- Navigate to File > New > Document and select OK when you are happy with the page dimensions.
- To insert an image, select File > Place, then choose your image file by clicking Open.
- Click to place the image anywhere on the document.
- To find the resolution, navigate to the top bar and select Window > Links.
- This box will give you your image Dimensions, Actual PPI and Effective PPI. If you can’t see this information, expand the box using the Show/Hide triangle (>) to drop it down.
How to find the DPI resolution on Windows.
You can also find the DPI of an image on Windows. Just follow these steps:
- Open File Explorer and navigate to your image.
- Right-click on the image file and select Properties.
- Click the Details tab at the top bar.
- Scroll down to find image Dimensions and the DPI Resolution.
How to find the DPI resolution on Mac.
To find the DPI resolution of an image on Mac, you need to use Preview, the default app.
- Open Finder and navigate to your image.
- Right-click or control-click the file and select Open With > Preview.
- With Preview open, go to Tools > Show Inspector.
- Select General Info from the dialog box, this should be the first tab at the top.
- View the image information to find the resolution or click More Info in the second tab at the top to find the DPI.
What DPI should I use?
The ‘right’ DPI will vary, depending on your desired result and purpose.
When coming to the decision of what DPI to use, consider the following:
- Size. The larger the image that needs to be printed; the higher the ‘dot density’ it will require to look high-quality. Therefore, if you need to print a large image, you’ll need a high DPI to accommodate the size. The more ink dots per inch, the larger you can scale the image without sacrificing quality.
- Viewing distance. How far away the viewer will be standing from the printed image can affect your required resolution. The further away you stand, the less detail you need to see. This applies best to posters and certain art prints.
- Paper, printer and ink. The type of printer and materials used can also affect how crisp an image is when printed.
If the final product is a photograph, flyer or business document, the general benchmark to achieve a high-quality print is 300 DPI.
If you’re making a poster, depending on its size and distance from the viewer, you’ll need at least 100 DPI. You can also use lower DPIs for smaller images or test images if you like. This is something you can play around with on Photoshop, Illustrator and InDesign to find the best result for you.
For more professional magazine images, or exhibition-quality artwork, you may need 600 DPI or even higher to achieve pristine-quality results.
If you’re working for a client or organisation and you’re unsure what to use, it’s always best to confirm the exact DPI resolution they’re looking for to meet expectations.
Learn how to optimise images with Adobe.
How to change DPI on Photoshop.
It’s easy to change and customise DPI resolution using Photoshop. Just follow these instructions:
- Launch Adobe Photoshop on your laptop or computer.
- Navigate to File > Open and select your image.
- With your image open, click Image > Image Size.
- Here, you can adjust the Resolution, Image Size in Width and Height and Dimensions to your liking.
If you don’t want to change the pixel dimensions of your image, make sure to deselect Resample while you use these tools. Resampling can add additional pixels to your image artificially, which can degrade image quality and make it look worse than before.
Find out how to upscale and enhance images with Adobe.
Learn how to increase image resolution with Adobe.
Top tips.
- ‘Work backwards’ to find the right DPI for your project, by considering its final purpose. How will it be presented? Will it be viewed from afar? What size does it need to be?
- Check what resolution is required before committing to print. Then, double-check your settings to avoid unwanted surprises and wasting materials.
- Use the highest possible megapixel camera when taking photos. That way, you’ll capture as much data as possible to give you a higher resolution when you come to edit and print them. However, note that high-resolution images will also have a much larger file size, too.
- Take time to consider the right printer paper and ink type. This can all affect how premium the final product looks and feels. For example, will you need gloss, matte or silk coated paper? Some organisations may even want to use carbon-balanced paper which is more environmentally friendly.
Edit, optimise and resize your images with Adobe editing tools.
- Adobe Photoshop. The flagship software for professional image editing and design.
- Adobe InDesign. Breathe life into digital assets, create perfect page layouts and branded products for printing.
- Adobe Lightroom. A cloud-based photo editing software you can use anywhere.
- Adobe Express. Use creative templates and resize images for social media with ease.
DPI: FAQs
Is 72 or 300 DPI better?
The best resolution for your project depends on its purpose. For print resolution, 72 DPI is generally considered too low, and may be better suited to small icons that do not need to be high-quality. 300 DPI meanwhile is the printing standard for photos and professional brochures, which need to look crisp and detailed.
How do I make a picture 300 DPI?
The conversion of PPI to DPI is usually 1:1. This means if an image is 10 inches in width by 10 inches in height at 300 DPI, your pixel dimensions need to be 3000px x 3000px. In other words, you need to multiply the print size (width and height in inches) by 300 to find the right pixel dimensions (e.g. 3000px x 3000px) to provide 300 DPI.
Print size (inches) |
Pixel dimensions |
4 x 6” |
1200px x 1800px |
5 x 7” |
1500px x 2100px |
Is 600 DPI high resolution?
Yes, most industries would describe 600 DPI as high-resolution. If an image has a resolution of 600 DPI, the printer will produce twice the standard number of dots per inch. As the droplets of ink will be very tightly bunched together, this gives a much smoother, more detailed image which can be made larger without sacrificing quality.
Discover more about image resolution, editing and photography.