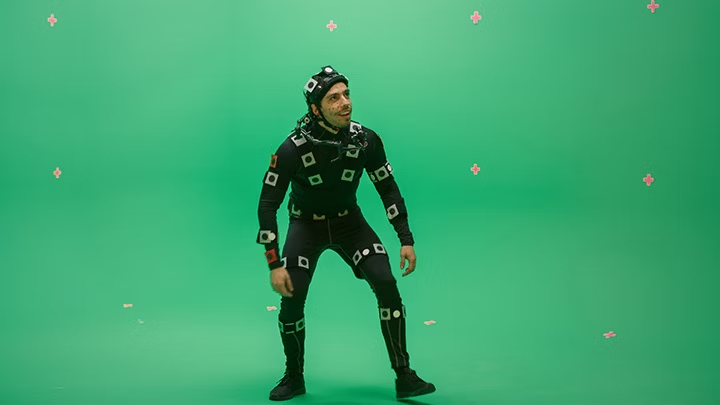
Rigging and skeletal animation: what it is and how it works.
Skeletal animation and rigging are two terms that generally describe the same thing - and bring the characters you create through computer animation to life. They are a technique for manipulating 2D and 3D models to add movement - whether you’re making a film, advert, game or project for fun. Discover everything you need to know about what rigging is in animation and how to get started, with this guide.
What is character rigging?
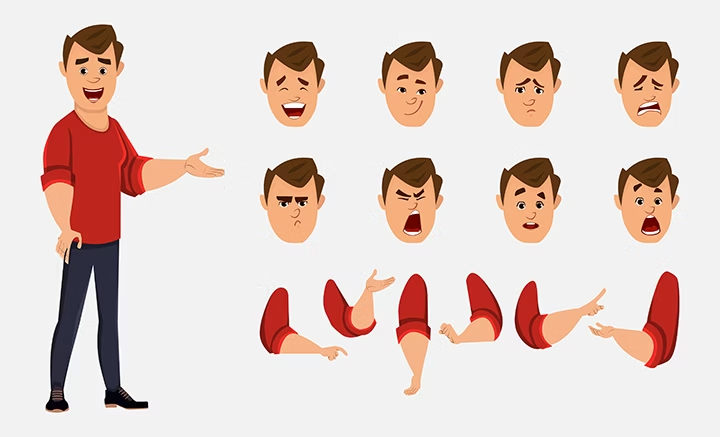
Character rigging is a technique used in skeletal animation where you add control to a model. It defines the range of movement for a character or object to define its actions, gestures and movement. A series of interconnected bones are applied to the 3D model so you can move and manipulate the static image in your desired manner.
What is skeletal animation?
Skeletal animation refers to the way in which the character or object is represented in two parts:
- Skin or mesh. The surface representation used to design a character.
- Skeleton or rig. A series of hierarchical, interconnected parts.
The term “rigging in animation” comes from the rig being the skeleton structure built to identify the virtual bones that allow the model to move. An easy way to envision it is like creating a virtual puppet.
You can use animation rigging for both 2D and 3D animations, which follow a similar path with a few small differences.
- 2D animation rigging. With 2D animation rigging you simply draw the character or object in 2D and then apply the desired bone structure to it. This will be simpler than a 3D model and restricted in movement.
- 3D animation rigging. A more common practice is 3D animation rigging. Here the full model can be rigged and posed within your scene, with the ability to create a much wider range of movement, whether animating a character or object.
How does rigging work?
In animation, rigging works by construction a series of bones (or skeleton) for your 2D or 3D model. This could be an animal or human character, but you can also apply it to an object you want to animate — such as an aeroplane or piece of fruit.
Using digital or computer animation software you can then adapt the position, scale and rotation of specific points of the skeleton (or rig) to introduce movement. Recording these changes through keyframing helps create your animation. Depending on the size, scale and complexity of your project, rigging can take anywhere from a few hours to a few days or longer.
Rigging is only a small part of the animation process. It’s one of the first steps you need to do before you can make your characters move. There are other animation techniques, but 3D skeletal animation is a popular method for both amateur animators and professionals working on Hollywood blockbusters, video games, TV shows, adverts and more.
The general step-by-step process for animation character rigging is as follows:
- Create a 2D or 3D model.
- Construct a skeleton for your character or object, whether replicating human bones or adding to an object.
- Determine a weight scale, which controls how much influence the movement of one bone has over a specific part of the mesh. Some software has an automatic option or you can finetune it yourself for accurate results.
- Transform these bones using digital animation software so you can change their position, scale and rotation.
- Add inverse kinematics to the bones where required. This is mainly for arms, legs and tails to ensure elbows and knees point the right way for a realistic movement.
- Apply any restrictions to certain bones where required, so they only move in one direction for smooth and realistic results.
- Record these bone movements along a timeline (keyframing)
Fascinated by the world of animation?
Keep learning by reading our beginner's guide to animation.
Rigging: pros and cons.
2D and 3D animation rigging aren’t the only options available to animators. To help decide if it’s the right technique for you and your project, consider the pros and cons of animation and rigging.
Pros of rigging in animation.
A few advantages of rigging as part of the animation process include:
- Independent and hierarchical movement. Bones can be moved on their own to create the desired effect for your character or object. Any related bones will also move through the hierarchical structure in the rig.
- Define animation in simple bone movements. When using a polygonal mesh, animators must define their animation vertex by vertex. With rigging you can do this by simple bone movements.
- Apply constraints. Create realistic motions by applying constraints to specific bones, whether for a character or object. This adds realism to your results, which can be saved for replicating in the future.
- Animators focus on large scale motion. Thanks to the hierarchical structure, animators don’t need to think about each little movement as relevant parts should move in tandem. This saves them time and means they can dedicate their efforts to the larger animation.
- Accurate weight painting. Add further realism to how the mesh and rig work together with weight painting. Adjusting the scale helps form an accurate weight distribution for your results.
Cons of rigging in animation.
Although there are various advantages of 3D and 2D animation rigging, there are two main drawbacks that make it less useful for some projects, such as:
- Bones only represent vertexes. Each bone within the rig only represents a set of vertexes or another specifically defined object. This means it cannot accurately represent the full complexity of the human body’s movements - or anything more abstract or conceptual.
- Unrealistic muscle movement and skin motio n. While the mesh and reg work together, it doesn’t provide realistic muscle or skin movement. This can be achieved but only through using special deformers, muscle controllers or introducing other secondary features.
How to rig a character in Adobe After Effects.
Adobe After Effects is great for both beginners and experienced animators trying out character animation rigging. It includes a wide range of features and tools to rig a character with ease. To rig a character in Adobe After Effects follow these steps:
- Create a character, object or model using your preferred software, such as Adobe Photoshop.
- Open your character in Adobe After Effects. Click the puppet pin tool (CMD+P on a Mac or CTRL+P on a PC).
- Add points to your character. You may need to introduce each individual body part separately, essentially constructing a series of bones so the mesh and bones move together.
- Click and drag to select all the points on a body part, creating the controllers. These represent different movements:
• Diamond. Rotation and translation usually for the centre of a model.
• Circle. Rotation, normally for the neck, pelvis and torso.
• Cube. Translates controls.
• Trapezoid. Uses for joints - often elbows and knees. - Add these points to the proper placement. You can also rename and rearrange each part for ease.
- Introduce weight painting to get a realistic scale for each part so they move naturally. If animating a person or animal character, add inverse kinetics and any constraints to relevant parts as well.
- Move the relevant points on your character to animate it how you want.
How to rig a character in Adobe Animate.
You can edit a character using rigs in Adobe Animate. Using the Asset Warp tool, it’s possible to rotate bones and warp joints for the poses you want and a smooth animation. Here’s how to rig a character in Adobe Animate:
- Open your character in Adobe Animate and select it. Then navigate to the tools panel and click the Asset Warp tool.
- Click the part of your character to apply the first joint, which will create a triangulated mesh.
- Select where to add your next joint and see where it adds bones automatically to your new joint. You can change this in the Warp Tool options to enable or disable automatic bone creation.
- When ‘create bones’ is enabled, ensure that you add a joint in an appropriate place each time.
- Add all the required bones to complete your rig.
- You can deform the mesh and rotate bones afterwards if required. Add a new keyframe and tween for a smooth animation.
- It’s also possible to then add or remove joints after setting a pose and Adobe Animate will automatically apply these across all keyframes.
There are various advance features you can also try out to enhance your animation when creating a character rig in Adobe Animate.
Skeletal animation FAQs.
What’s the easiest way to rig a character?
Using Adobe Animate is one of the easiest ways to rig a character. The Asset Warp tool makes adding a series of connected joints and bones to your character simple, with the option to enable or disable an automatic create bones feature. It also provides tools to change the bone type, mesh density, rotate bones and more.
How can I learn rigging?
Use the above steps for a rough overview of how to rig a character. There are lots of online guides and YouTube videos that also provide both simple introductions for amateurs and more detailed tips for experienced animators. You can also read Adobe Animate guides and follow the steps to learn how to rig your characters.
What’s the difference between animation and rigging?
Rigging is just one part of the wider animation process. The creation of a character is normally the first section, followed by the rigging of it. Then after a rig is applied the character or model can be edited and animated. The main difference is that rigging is a process within the larger animation project.