VIDEO
How to convert videos with Adobe Media Encoder & Premiere Pro.
Convert videos to any file format using Adobe Media Encoder or Premiere Pro. Learn the differences between each application to pick the best one for your project.


Convert it all with Adobe Media Encoder.
Unlike other video editing apps with conversion capabilities, Adobe Media Encoder (AME) was made for the sole purpose of converting and exporting footage to a wide variety of video formats. While it’s a heavyweight lifter that can handle large video file sizes with ease, it’s also a lightweight programme that lets you edit in other apps like Adobe Premiere Pro or After Effects while you convert. With a folder organisation system and the ability to set presets as well as do batch conversions, AME is a handy tool for all your encoding needs.
How to convert videos using Adobe Media Encoder
1. Select File or hit the plus “+” button in the top left corner of the rendering queue.
2. Choose a file and add it to the queue.
3. Select an export preset or choose customised settings.
4. Click the output file to set the output location and change the file name.
5. Press Start.
You can also follow along for a step-by-step visual.
Frequently asked questions about the encoding process.
Tutorials to jump-start your encoding.
How to fix errors when rendering or exporting.
Get answers for troubleshooting common issues when exporting your media.
How to export videos to share on social media.
You can seamlessly encode and upload videos to social media platforms right from AME. Save yourself a step next time you share to Twitter or upload a Vimeo or YouTube video.
Set up proxies and share comps.
Premiere Pro is great at rendering ultra-high-quality video, but throughout the editing process, it’s helpful to be able to quickly share smaller files that work on lighter-weight devices, like iPads or iPhones. Learn how to make lower-resolution versions of your videos with AME right from Premiere Pro and how to switch between HD video and proxies.
Complete your video conversions with Adobe Premiere Pro.
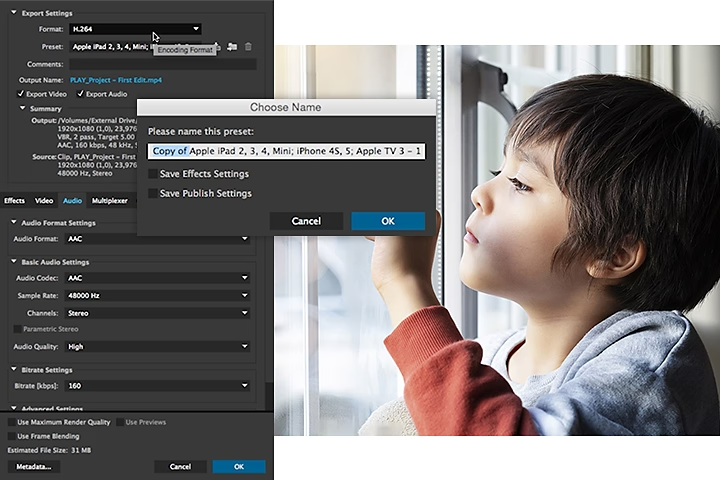
You can export media to AME from Premiere Pro and After Effects. Go to File, click Export and then select Media. Or hit Control+M (Windows) or Command+M (Mac). You’ll then be taken to the export dialogue box where you can choose your format and conversion presets. You can fine-tune your settings for a number of considerations, from the bitrate to the frame rate and image processing effects, like LUTs and timecodes.

Convert videos in Premiere Pro.
It’s easy to convert videos in Premiere Pro as well. Just open the export dialogue box and, instead of clicking Queue, choose the Export option. Your video will begin rendering from Premiere Pro.
Everything you need for the perfect playback.
Whether you’re drafting your first animation or putting the finishing touches on a feature film, take your video from raw footage to the final cut.
