Bring images to life with the Adobe Photoshop animated GIF maker.
The web is all about motion these days, so GIFs are ubiquitous. Adding motion to an image can help it tell a more complex story—and Adobe Photoshop makes creating a high-quality GIF easy. Your inspired creativity can make you a star on Giphy, Vimeo, Snapchat, or any venue you desire.

With work that incorporates nature, street photography, and even skulls, Kendall Plant is a designer, art director, and content creator who brings her unique creative approach to Adobe as an associate creative director.
Fill your GIF with avatars, emojis, webcam footage, and more. Flexibility coupled with ease. What more could you ask for? Watch a GIF creator in action below.
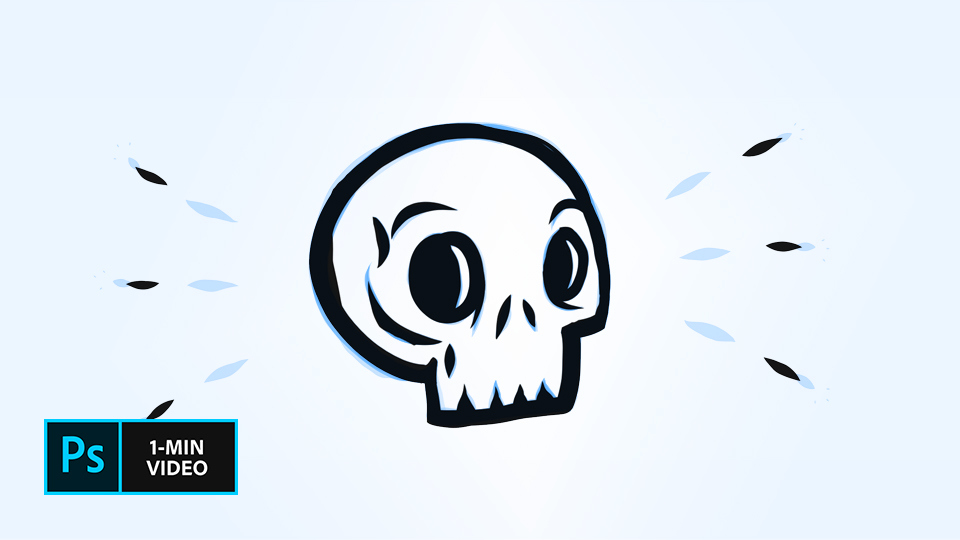
Watch Kendall Plant’s GIF-creation process in this quick one-minute video. The steps are written out below.
Creating the perfect GIF is quick and easy.
Here's how you do it.
The GIF editor provides full editing features in an easy-to-use workspace.
Filters and effects.
Retouch your gif images by adding appealing filters and effects to get your look just right.
Animation speed.
GIF animation goes at your speed by making frame rate adjustments using the Timeline panel.
Add text.
Layer text over your animation with font types such as TruType, OpenType SVG, or fonts inside Typekit.
Resize images.
Adjust image sizing while preserving sharpness using drag and drop simplicity.
Work with any file type.
GIF files can be created from bmp, jpg, png, and other image file types as well as video files such as AVI, FLV, and MP4.
See how GIF creation is done.
Watch designer and GIF creator Kendall Plant as she gives new life to one of her sketches by turning it into a GIF. Watch Kendall’s GIF-creation process in this quick one-minute video.
Her work incorporates nature, street photography, and skulls. Plant is a designer, art director, and content creator who brings her unique creative approach to Adobe as an associate creative director.
The steps she used are written out below.
Before you start.
Use these sample sketches or practice with your own.
Step 1: Sketch it out
Plant’s first step was creating variations of her initial drawing to show different states of motion and saving each variation as a separate file. Then she opened the first sketch in Photoshop and dragged the remaining files from her computer into the document, pressing return (or enter) to place each file onto its own layer. Next, she clicked on the Lock icon to unlock the original layer.
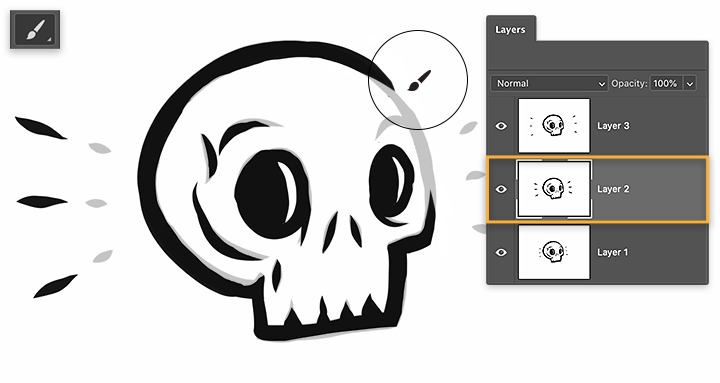
Step 2: Bring it to life
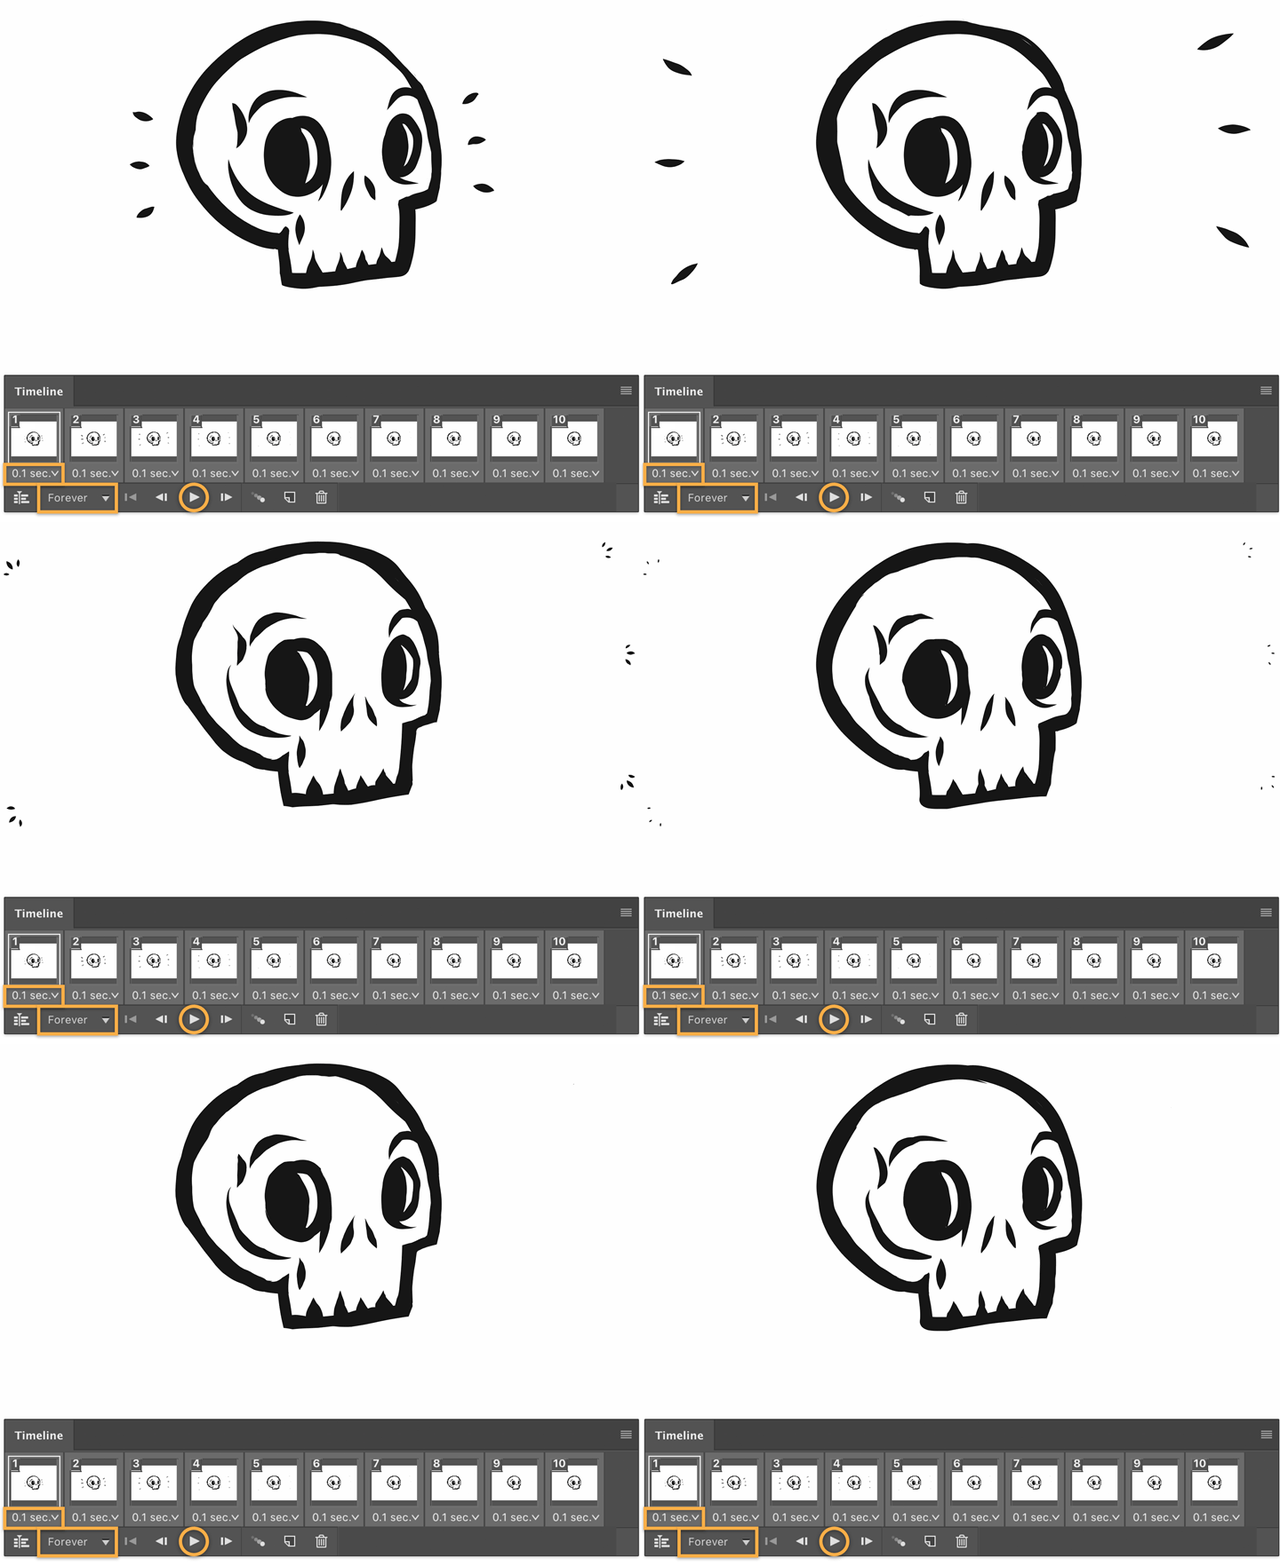
Ready to animate her sketches, Plant opened the Timeline (Window > Timeline), selected Create Frame Animation from the dropdown menu, and chose Make Frames From Layers from the flyout menu. If you have used the Timeline before, it may populate with empty frames by default. If this happens, click on the first frame and hold the shift key while clicking on the last one. Choose Delete Frames from the flyout menu. Then you can choose Make Frames From Layers.
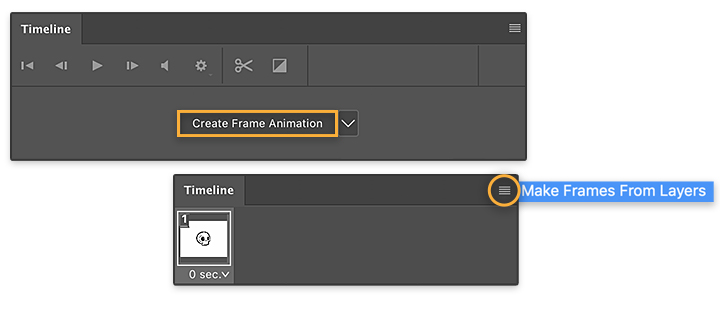
Step 3: Pace your animation
To give each frame the same timing, Plant clicked on the first frame in the Timeline and then clicked on the last frame while holding the shift key. You can click on the down arrow in one frame and set the interval to 0.1 seconds—this will update all of the selected frames. Next, Plant chose Forever from the dropdown menu below the timeline to make the animation loop continuously. You can preview the timing of your animation by clicking on Play.
Step 4: Export to GIF
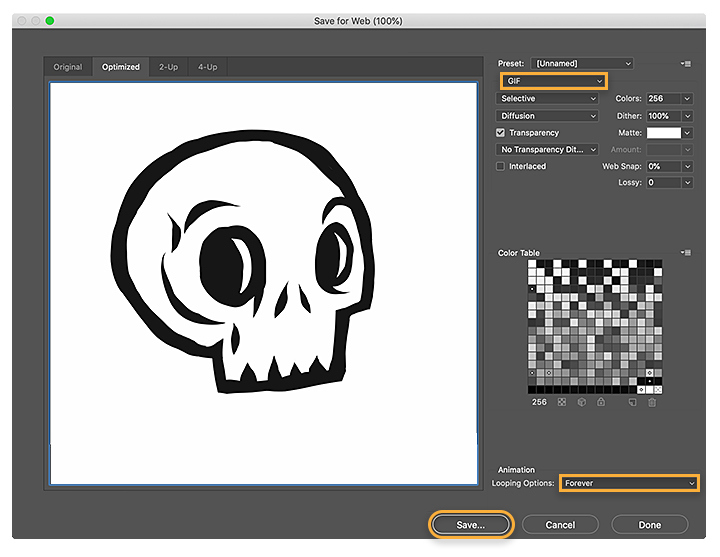
Choose File > Export Save for Web (Legacy). Set GIF as the Export Format and Forever as the Looping Option.
Share the GIF of animation.
Make your own GIF and share on your favorite social platform or with friends. And keep the creativity moving.

Note: Project files included with this tutorial are for practice purposes only.
Do more with Adobe Photoshop.
Create beautiful images with Photoshop brushes, Content-Aware Fill, Photo effects, Neural Filter, Sky replacement and the many tools photographers rely on.
Explore the Photoshop family of apps.
You might also be interested in…
Blend distorted text with your images for a 3D finish.
Before committing ink to skin, design the illusion of a tattoo.
Brush out your photos rough spots for cleaner, clearer images.
Get your glow on with this simple technique.
