How to make a complex selection in Adobe Photoshop.
Taking elements from multiple photos and using them to create a new image allows you to create beautiful and startling juxtapositions. It’s a technique that visual artist Temi Coker uses to great effect in his work. In this easy-to-follow tutorial, see how Coker isolated elements from two images to create a brand new composition in Adobe Photoshop.
Use the Quick Selection tool to take two different sections from several photos and combine them into a new creation—no matter how complex it is.
style
xl spacing, two up
layout
1 | 2
Former Adobe Creative Resident Temi Coker is a Nigerian-American visual artist who finds joy in merging photography and graphic design; his goals in life are to create and to educate others on how they can merge those media.
Start by separating the model from the background. Coker used the Quick Selection tool; then he chose Select And Mask. Once in the Select And Mask workspace, he set the View Mode to Overlay and used the Refine Edge Brush to enhance the details of the model’s hair. He then output his selection to a Layer Mask.
Step 2: Add more elements
Next, Coker dragged the flower image onto the model, rotated the image, and moved it into position. He chose the Quick Selection tool and used Select Subject to separate the flowers from the background. He then chose Select And Mask to clean up the selection.
Step 3: Get clear details
In the Select And Mask workspace, Coker brushed over the flowers with the Refine Edge Brush tool to remove the remaining bits of background. To get a better view of the composition while working, set the View Mode to On Layers.
Step 4: Arrange the design
Coker duplicated, rotated, flipped, resized, and moved the flowers layer two more times to create an arrangement around the model. He then added a Curves adjustment layer and modified the tones of the model.
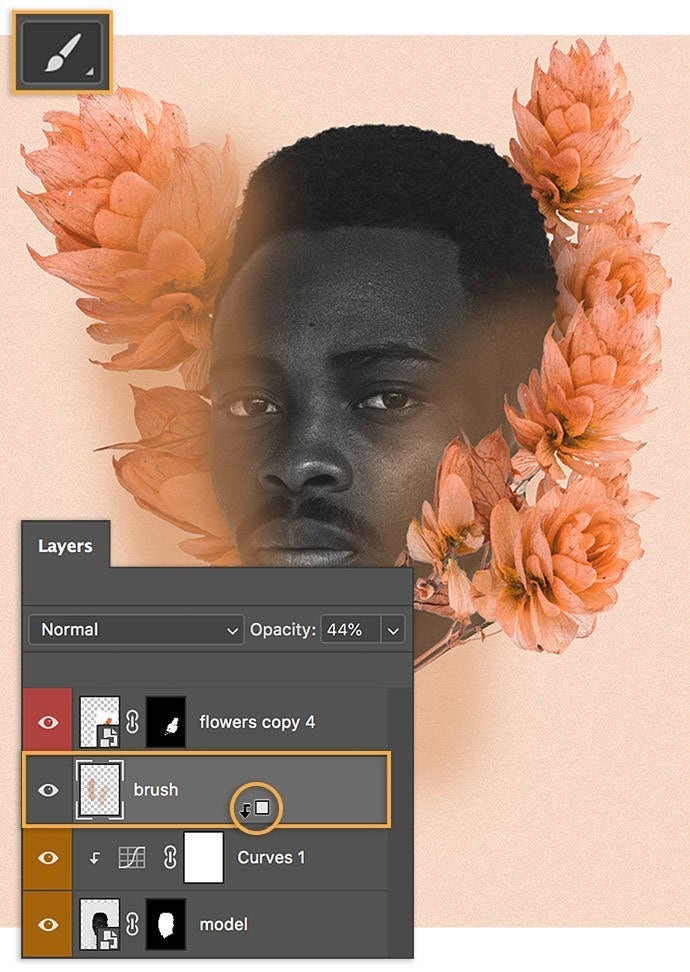
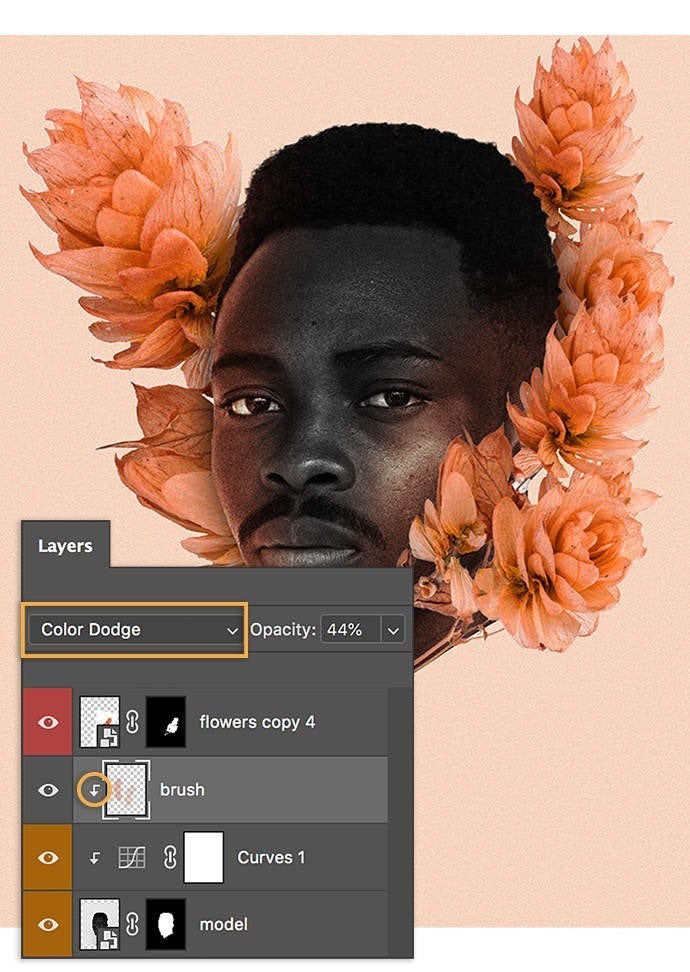
Step 5: Add more warmth
Coker added a new layer above the model layer. He then set the Brush tool to a color he selected from the flowers, and brushed the sides of the model’s face along the edge of the flowers. He blended this effect by option-clicking (or alt-clicking) between the new layer and the model layer to create a clipping mask, and set the Blend Mode to Color Dodge.
style
Two up
Keep your creativity blooming.
Experiment with the variety of tools in the Select And Mask workspace. You can make complex selections in a snap.
Note: Project files included with this tutorial are for practice purposes only.
Taking elements from multiple photos and using them to create a new image allows you to create beautiful and startling juxtapositions. It’s a technique that visual artist Temi Coker uses to great effect in his work. In this easy-to-follow tutorial, see how Coker isolated elements from two images to create a brand new composition in Adobe Photoshop.
cardImage
cardImageAltText
Complex selection
This Adobe site doesn't match your location
Based on your location, we think you may prefer the United States website, where you'll get regional content, offerings, and pricing.