Get started with lens flare photography.
Lens flare is a creative effect that can illuminate your photos with a unique starburst or soft bokeh look. Learn how to capture and control lens flare in your shots.
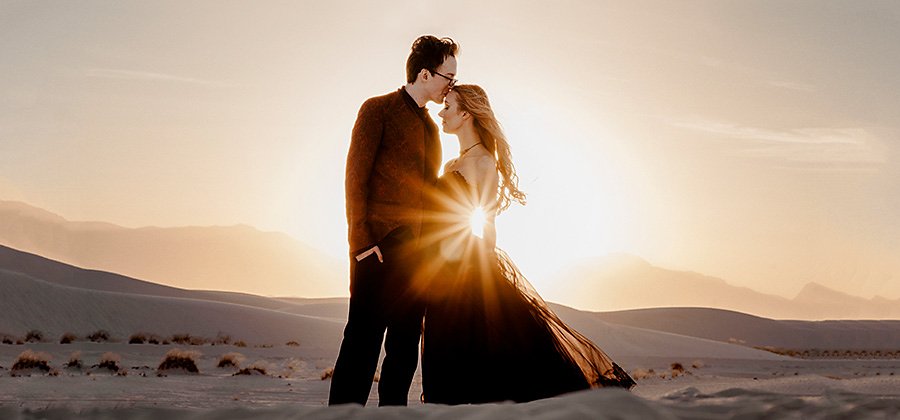
Image by Stephanie DeFranco
Add creative flair to your photos with lens flare.
Lens flare can happen when a bright light source hits your camera’s lens. This light can show up in the form of circles, rings, starbursts, or an all-over haze in your photo. Once considered an accident caused by flaws in a camera lens, lens flare has become a deliberate stylistic choice you can use to produce stunning results.
Lens flare can add a warm softness to backlit portraits, define landscape shots, and help you naturally achieve a cinematic or sun-drenched look. And, since every lens flare will turn out different, it’s a one-of-a-kind touch that can elevate your image.
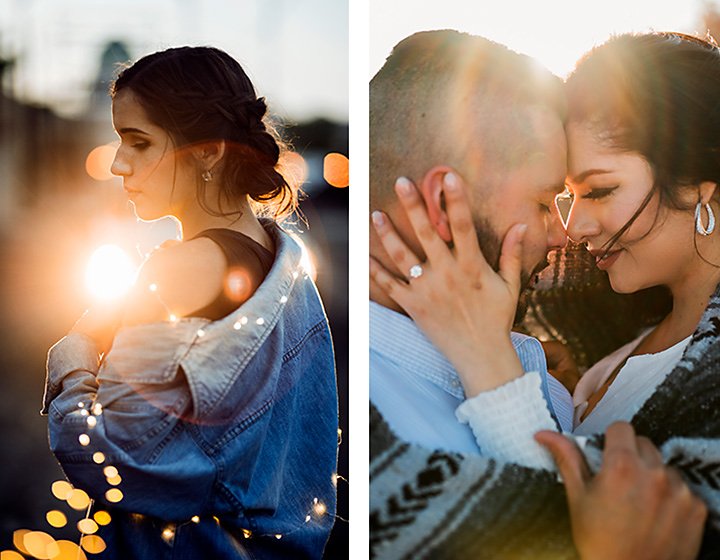
Images by Stephanie DeFranco
Types of lens flare.
Ghosting
Lens flare often appears in photographs as circles or rings that emanate from the light source. These visible spots, or artifacts, are called ghosting. Don’t confuse this with bokeh, which is a background blur effect created by your lens.
Veiling
In some cases, a haze of light covers the entire scene, which can result in washed-out, low contrast photos. This all-over haze is called veiling, and it occurs when the light source is out of the frame and to the side of your lens, but the rays still hit the lens’s front element. Veiling can be used intentionally to create a soft, warm mood for your photo. But if you overdo it, your photo could look so washed out that it’s unusable.
Starburst
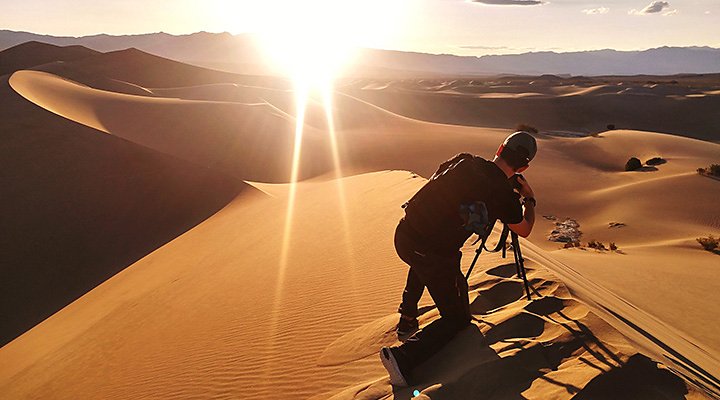
A starburst effect happens when you shoot with a smaller aperture, such as f/11 or f/16. Aperture is the adjustable lens opening that controls the amount of light allowed into the camera. At smaller apertures, less light gets through, which makes the sun appear as a small and star-like beam of light.
Anamorphic lens flare
Used in cinematography, anamorphic lenses capture a wider field of view without distortion. This is made possible, in part, by their square shape and horizontal lens elements. This shape is also what produces the distinct horizontal flares these lenses are known for. Director J. J. Abrams is well documented for his use of anamorphic lens flares. Look for them the next time you watch one of his films to see the effect in action.
How to get the lens flare effect.
To get lens flare, shoot directly into the sun or another light source. “The best thing you can do is shoot at a lot of different angles, so that even if some are blown out, you can see what works and what doesn’t work,” says photographer Martha Galvan. It may take some trial and error, since how your flare shows up is dependent on a number of factors. These include:
Camera lens and body
Different equipment produces different results when it comes to lens flare. For example, a Nikon 85mm lens renders lens flare differently than a Canon 16mm–35mm, just as a Sony mirrorless digital camera creates a different effect than a Leica film camera.
Most modern lenses come with an antireflective coating designed to avoid glare. Because of this, you may find more success capturing lens flare when you use an older lens. UV filters, polarizers, or neutral density filters can also reduce the amount of flare you pick up. Similarly, many lenses come with a lens hood (also known as a lens shade) to avoid flaring — so if you want to embrace the flare, you’ll need to lose the hood.
Focal length
Zoom lenses produce more sun flare effects, as the increased number of lens elements amplifies the number of internal reflections within the camera, which cause lens flare. Wide-angle lenses, on the other hand, make light sources appear smaller because of the shorter focal length.
Aperture
Aperture has a huge effect on the outcome of your flare. At wider apertures, the sun appears larger and more diffused, and the flares are softer shapes. If you choose to shoot wide open, watch for the narrow depth of field and make sure your subject is in focus. Smaller f-stops such as f/16 let in less light, which allows the lens to pinpoint the sun as a small, star-like pattern.
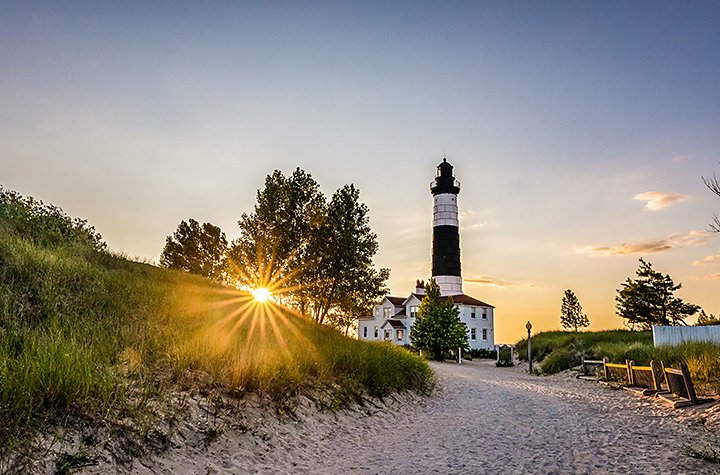
Image by Aubry Healy
Time of day
At sunrise and sunset, known to photographers as the golden hour, the sun is lower in the sky. During these times it’s easier to capture the sun in frame, and thus create a lens flare effect. Plus, the light is softer and naturally more diffused. “I always start my portrait sessions about an hour before the sun goes down,” adds photographer Stephanie DeFranco about how she takes advantage of the lighting effect from a sun lower in the sky.
How to create lens flare in the studio.
“In the studio it’s easier to create the lens flare you want because you have more control over the light and its intensity, color, and height,” says Galvan. To capture lens flare in outdoors shoots, you run the risk of capturing a washed-out, backlit, or silhouetted photo. But in a studio environment, you have the option to shine a light or reflector back onto the subject to balance the exposure.
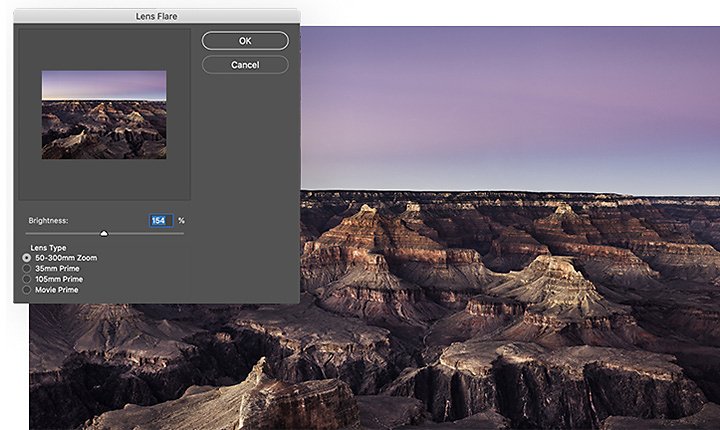
How to add a lens flare in Adobe Photoshop.
If you want to skip the trial and error altogether, you can make a high-quality artificial lens flare in the post-processing phase by following these easy steps.
1. Open your photo in Photoshop.
2. Create a new layer. Go to Edit › Fill, and fill it with 50% gray.
3. Set the blending mode to Overlay.
4. Go to Filter › Render › Lens flare. Select which type of lens flare you want to emulate.
5. Position your lens flare, then click OK.
To see this method in action, watch this tutorial on how to add and remove lens flares in Photoshop.
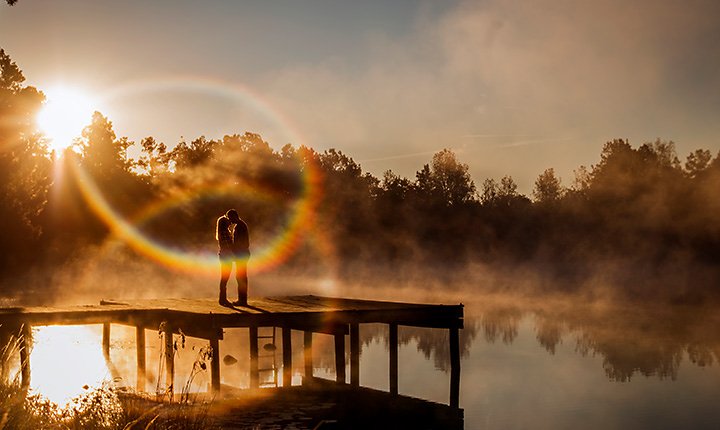
Image by Stephanie DeFranco
Nail the lens flare look.
Watch your exposure triangle.
When it comes to lens flare, aperture is the star of the show. How wide or narrow you set your aperture has the most impact on how your final shot turns out. This means you have to balance the other components of your exposure triangle — shutter speed and ISO — to make sure you properly expose your photo. Since you’ll typically want to keep your ISO as low as possible to minimize noise in your photo, shutter speed is going to be the factor with the most flexibility.
Make time for trial and error.
If you find yourself in the middle of a portrait session, it can feel like you don’t have time to dial in your settings. But DeFranco encourages photographers to overcome the impulse to rush. “Take time to stop and look at what you’re doing.” Taking a few extra seconds in the moment can save you hours of corrections or even avoid a memory card full of unusable photos.
How to minimize lens flare.
While lens flare looks great in some photos, it can be unflattering in others. In cases where the light is too intense, you can try to diffuse it. “It’s all about controlling your light,” says Galvan. “If there are trees, you can move your subject under them to partially block it.” Whether you use a diffuser or a natural obstruction to limit light, look for ways to make natural light work for you instead of against you.
You can also keep the light at bay a few other ways:
- Use a lens hood.
- Shoot with your back to the light.
- Make sure your lens is clean. Internal dust can cause veiling, while smudges on the front of the lens can create undesirable flares.
- Use a high-quality filter.
Whether you want to give your portraits a soft, dreamy look or bring a landscape photo to life with sun rays, experimentation is the key to capturing some flares of your own. Try new things and don’t be discouraged if you don’t get your desired effect immediately. And when you’re ready to edit your images to perfection, move them into Photoshop Lightroom to bring out the best in every shot.
Contributors
Do more with Adobe Photoshop.
Create beautiful images with Photoshop brushes, Content-Aware Fill, Photo effects, Neural Filter, Sky replacement, and the many tools photographers rely on.
Explore the Photoshop family of apps.
You might also be interested in…
Discover ways to select the ideal focal length for any and every photo.
An introduction to portrait lighting.
Learn the basics of portrait lighting to bring your subject’s story to life.
RAW vs. JPEG: Which format should you shoot in?
Dive into the differences between photographs taken in RAW and JPEG format.
Use tilt-shift lenses to get creative with depth of field effects and total perspective control.


