Photography (20GB)
RM47.96/mo (termasuk SST)
Lightroom on desktop and mobile, Lightroom Classic, and Photoshop on desktop and iPad. Learn more
See how you can use saturation adjustment layers for teeth whitening in various forms of professional photography.

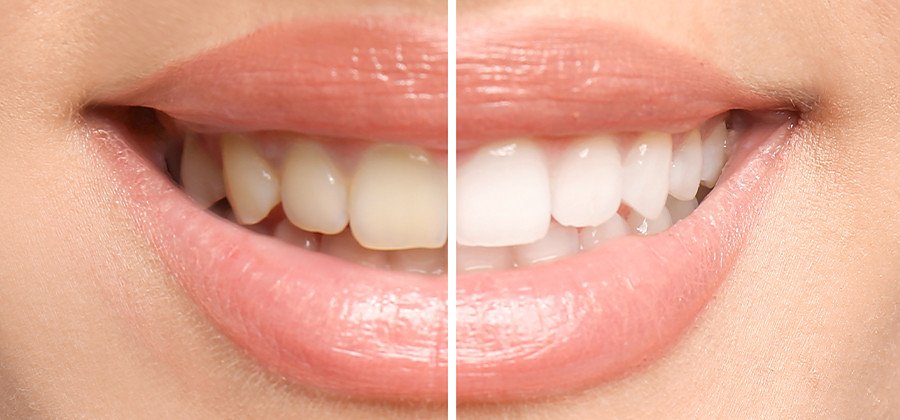
Make a good first impression with a professional headshot or pop the brightness of an athlete’s smile in commercial photography by learning how to adjust for white teeth in Photoshop — a skill that can help you combat years of subjects’ teeth-staining habits. Learn how to tweak a new Hue/Saturation layer to bring lightness to teeth and other objects to add impact to your photos.

Create a new adjustment layer over the original image so your work is a flexible adjustment. Make sure to check the Layers panel to ensure you’re working on the correct new layer.

Using the Lasso tool, make a selection that goes along the edges of the teeth. If you capture some of the lips or gums, that is OK.

In the adjustments drop-down menu, select the Hue/Saturation adjustment layer. Photoshop will automatically convert your selection into a layer mask.

In the Properties panel of your Hue/Saturation layer, click the options bar labeled Master and select Yellows, as that is all you’ll want to adjust to whiten teeth.

Decrease the Yellows in your selection by moving the saturation slider to the left.

If you notice a harsh edge to your selection, fix it in the Properties panel by selecting Masks. In the Masks panel, increase the feather slider to give your selection a soft edge.
Using this same method, you can edit pet photography to brighten a dog’s eyes against its darker fur. Simply select the eyes and then pull out the dark color to amplify the highlights.


Get started with editing tutorials on teeth whitening and build your skills with these editing photography tips.
By growing your knowledge with those tutorials, you’ll be ready to move on to more advanced tasks. See how you can use a brush tool and the Levels adjustments to brighten dark photos or learn more about using adjustment layers to pop different colors in photos — all foundational skills you can build upon by watching simple teeth-whitening tutorials.
Create beautiful images with Photoshop brushes, Content-Aware Fill, Photo effects, Neural Filter, Sky replacement, and the many tools photographers rely on.
Explore the Photoshop family of apps.
Get your glow on with this simple technique.
Brush out your photos rough spots for cleaner, clearer images.
How to enhance photos.
Balance the contrast, shadow, temperature, and clarity of your photos with these photo enhancing techniques.
Learn how to colorize black-and-white photos.
Colorizing photos can bring the past to life. Explore how to get started in this introduction.
Find the Creative Cloud plan that’s right for you.
RM47.96/mo (termasuk SST)
Lightroom on desktop and mobile, Lightroom Classic, and Photoshop on desktop and iPad. Learn more
Photography (20GB)
Lightroom on desktop and mobile, Lightroom Classic, and Photoshop on desktop and iPad. Learn more
RM47.96/mo (termasuk SST)
RM110.16/mo (termasuk SST)
Get Photoshop on desktop and iPad as part of Creative Cloud. Learn more
Adobe Photoshop Single App
Get Photoshop on desktop and iPad as part of Creative Cloud. Learn more
RM110.16/mo (termasuk SST)
RM278.64/mo (termasuk SST)
Get Photoshop on desktop and iPad, plus the entire collection of creative apps. Learn more
All Apps
Get Photoshop on desktop and iPad, plus the entire collection of creative apps. Learn more
RM278.64/mo (termasuk SST)
RM95.98/mo. (termasuk SST)
Save over 60% on the entire collection of Creative Cloud apps. Learn more
Students and teachers
Save over 60% on the entire collection of Creative Cloud apps. Learn more
RM95.98/mo (termasuk SST)