Capture cinematic-style shots with anamorphic photography.
Learn how anamorphic lenses can help give you a widescreen cinematic look in your next photo project.
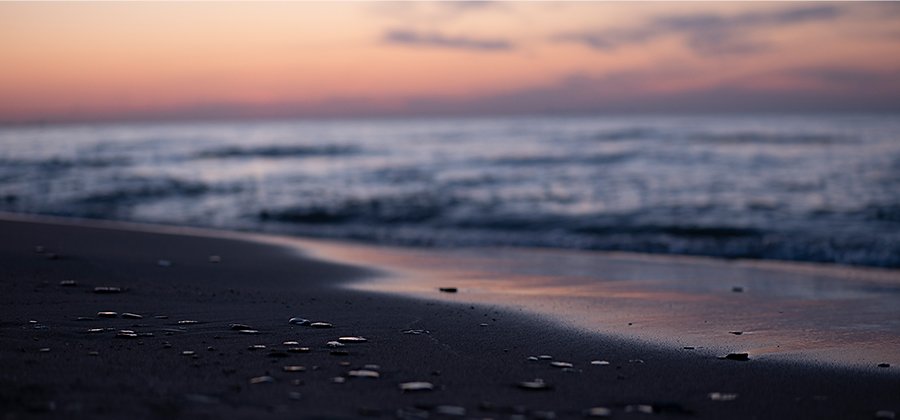
Image by Shane Dresch
Open wide to full-frame images.
Anamorphic lenses can make your photos feel larger than life, from stunning portraits to close-ups of plants to candid shots that amplify the charm of daily tasks.
Anamorphic lenses compress images horizontally to capture an artificially widened field of view (FOV) with a standard 4:3 size sensor. This process, called desqueezing, creates a wider aspect ratio in post-production without a wide-angle lens. Cinematographers initially used anamorphic lenses in the early days of filmmaking to show a vast scene with a shallow depth of field (DOF) to focus on subjects within their work — a cinematic feel with the intimacy of a portrait.
“When movies were shown on television, it was 4:3 letterbox,” videographer Margaret Kurniawan explains. “They wanted to look different, and that’s where anamorphic lenses came in.”
In those days, a technique called Cinemascope helped achieve the widescreen effect. As opposed to the more circular shape of regular lenses, oblong anamorphic lenses allowed early filmmakers to create the illusion of a more extensive field of view. They then squeezed the footage onto a narrow film strip, which was then stretched back out by the projector to create a widescreen image.
“It would take the 4:3 image and stretch it wider,” says photographer Shane Dresch. “It gave a new wider perspective.”

Snap wide-aspect shots of subjects and surroundings.
As anamorphic lenses became more widely adopted by the movie industry, they eventually crossed over into traditional film photography. And now you can use anamorphic lenses with a DSLR or mirrorless camera and even with a camera on an iPhone or other mobile device.
Due to their oval shape, anamorphic lenses capture more than circular or spherical lenses. The wider, more oblong shape naturally gives you more blurred bokeh around your subject. “When you do it in anamorphic, it’s oval bokeh,” Kurniawan says. “It gives the out-of-focus element this unique look.” This wide field of view (which directly correlates to the oval shape of the lens) helps you capture more of the space around your subject, so be selective about where and when you shoot anamorphic.
Certain types of photography — like a stunning portrait — work well in this format. You can use the shallow depth of field in the center of the frame to capture your subject, while getting a wide, dazzling view of their city or street to capture the character of the place they call home.
How anamorphic lenses can add drama to your shots.
If you want to pull off your best J. J. Abrams impression, shoot in anamorphic. Not only do you get a wide field of view that can feel like your shots belong on the big screen, but you can also capture a horizontal lens flare effect — a staple of Abrams’s work.
Lens flare occurs when light rays from bright sources reflect off the front of the camera lens. It can have two effects: Either the light becomes a haze that changes the contrast of your photo for a more washed-out look, or it’s seen as a starburst or line, the size and shape of which are determined by your camera’s aperture and lens.
Lens flares can add a sense of authenticity to photos by making the audience aware that what they are viewing was shot through a lens. The oblong shape of the lens can give your images a classic, cinematic look. “It works the edges a little bit. It gives a little distortion on the sides, which is a vintage-type look,” Kurniawan says.
Focus shifts (a focus error that can blur parts of images) also take on a flair for the dramatic with anamorphic photography. Due to the field of view being so much bigger than average, they become far more noticeable than usual, which can make for fabulous perspective photos.
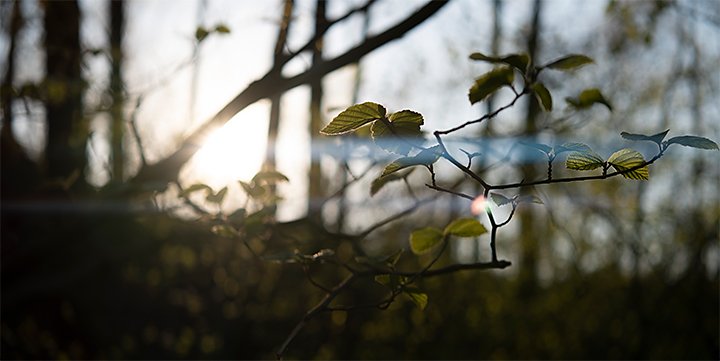
Image by Shane Dresch
Best practices for anamorphic photography.
When you start shooting anamorphic, you need to decide whether to add anamorphic lenses directly to your camera body or as an over-the-lens adapter to your Sony, Nikon, or Canon. For those who just want a little taste of anamorphic photography, renting equipment first is an excellent way to try this type of lens.
If you want to experience incredible, cinematic anamorphic photos without changing out the prime lens on your DSLR, adapters are the way to go. They offer an accessible way to start shooting anamorphic immediately.
Set your focus on your subject in-camera, and then attach your anamorphic lens and focus again. Stability is vital, so use a tripod to steady your shots. Now that your camera weighs more, it will be much harder to keep stable with just your hands.
Autofocus doesn’t work with anamorphic lenses, so patience and practice will be your best teachers when it comes to nailing manual focus. Learn how to manually adjust your ISO, aperture settings, focal length, and more through trial and error — these may be different every time, as using an anamorphic lens over a prime lens requires some work on the settings before each shot.
All anamorphic effects will be exaggerated when you desqueeze the image (a process done in editing), so be sure to consider the end result when you shoot.
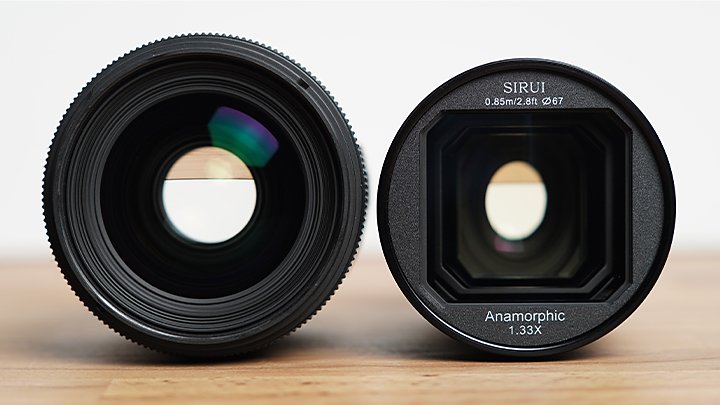
Image by Shane Dresch
Tips for shooting anamorphic.
Here are a few additional tricks to help you make high-quality wide shots.
Hone your skills: Anamorphic photography is easy to pick up and challenging to master — practice, practice, practice.
Learn to frame anamorphic shots: Balance the composition of your shot with a subject in the frame. Enlist a friend or family member as a guinea pig for your anamorphic experiments.
Adjust aspect ratio: Understanding aspect ratio is a good skill to help with anamorphic shots. This knowledge will be foundational for desqueezing your shots to a wider aspect ratio when editing.
Bring the look of cinematography to photography with Adobe Photoshop.
Once your shoot is over, adjust your images to a wider aspect ratio by desqueezing them in Photoshop.
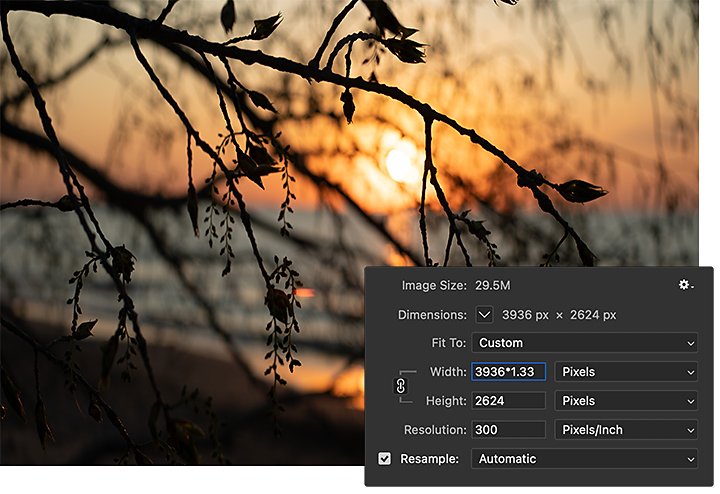
Image by Shane Dresch
1. Open your photo.
2. Click on the settings bar and select Image Size.
3. Change the aspect ratio with the Constrain Proportions tool.
4. Multiply the height or width of your photo by 1:33 (standard format), depending on whether the shot is horizontal or vertical.
5. Click OK and your image will be desqueezed.

Image by Shane Dresch
Once desqueezed, move your anamorphic shots to Adobe Photoshop Lightroom to elevate the Hollywood flair of your images with features like Noise Reduction and Dehaze. Since you can start edits on your desktop — and bring them with you via a mobile device with cloud-based storage — you can carry the cutting room with you wherever you go to fine-tune your epic shots.
Contributors
Do more with Adobe Photoshop Lightroom.
Edit photos easily with Lightroom presets, Super Resolution, easily share photos from any device, and access your projects anywhere with cloud photo storage management.
You might also be interested in…
Understanding shallow depth of field.
Explore how shallow depth of field can add dimension to your photographs.
Discover ways to select the ideal focal length for any and every photo.
The basics of photography composition.
Composition is all-important for photographers. Learn more with these tips from the pros.
Journey to a new world and make small subjects larger than life with macro photography tips.
Pelan Lightroom
Edit, atur, simpan dan kongsi foto di mana-mana sahaja.
7 hari percuma, kemudian (termasuk SST).
Fotografi
Dapatkan Lightroom, Lightroom Classic, Photoshop dan 20 GB storan awan. 7 hari percuma, kemudian (termasuk SST).
Semua App
Dapatkan semua 20+ aplikasi desktop dan mudah alih.
7 hari percuma, kemudian (termasuk SST).


