Sharpen your photos and get correct exposures by using the histogram tool.
Learn to use the histograms on your camera and in your photo editing software to reduce noise and enhance details.
What is a histogram?
A histogram is a graph that measures the brightness of an image by representing the frequency of each tone as a value on a bar chart. The horizontal axis moves from pure black on the left side of the histogram, through shadows, midtones and highlights all the way to the brightest white on the right side. The vertical axis represents the frequency or intensity, of each tone, with peaks for high frequency and valleys for low. Most digital cameras have both a luminosity histogram (measuring total brightness) and a colour histogram (measuring the intensity of red, green and blue tones). Adobe Photoshop Lightroom shows both luminosity and colours on the same histogram.
How your camera’s histogram can help you.
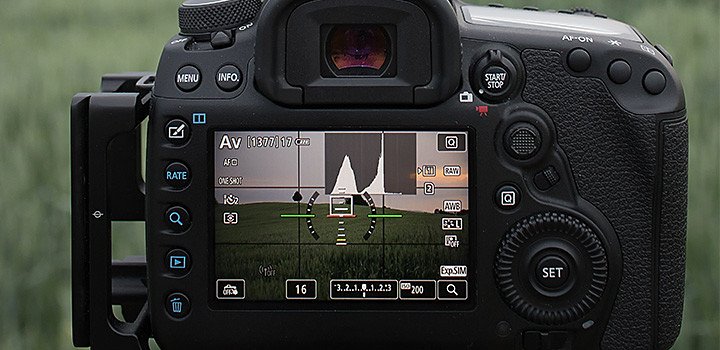
If you’re in the middle of a shoot, you can check the histogram on your camera’s LCD screen or in your viewfinder. Make adjustments if you’re surprised to find any of the following:
Left side run-off.
If you see high-frequency tones or peaks running off the left side of your histogram, that means your blacks are being clipped and your camera is not picking up all of the shadow detail that it might. This type of “low-key” image might be what you’re going for, but if it isn’t, you can let in more light by lowering the shutter speed, widening the aperture or raising the ISO (light sensitivity) of your camera. Each of these fixes can reduce the image quality, but you can experiment with slight adjustments to all three to get the combination of brightness and sharpness that you want.
Right side run-off.
If your image is “high-key,” you might expect peaks on the right side of the histogram. But if those peaks are cut off at the right edge, the image may be overexposed, meaning the highlight detail is washed out. In this case, take a shorter exposure, narrow your aperture or lower the ISO to reduce the light your camera is capturing.
A bunched-up histogram.
If all your tones are packed into one area of your histogram and there’s a lot of space on either side, the contrast may be too low. If you’re shooting in a controlled environment, you can add light to intensify highlights and deepen shadows. If the environment is out of your control, try reframing your photo to include contrasting elements or plan to adjust contrast in post-processing.
Shoot in a raw file format to maximise your editing options.
It’s important to remember that there is no single correct histogram shape. As subject and lighting conditions vary, so will the histogram that captures that information. If you shoot in an uncompressed, raw format, all of the information that your camera captures will be retained. Then you can decide in post-processing what to keep and what to discard. Experiment with the histogram to avoid losing shadow or highlight details.
How the histogram can help you in post-processing.
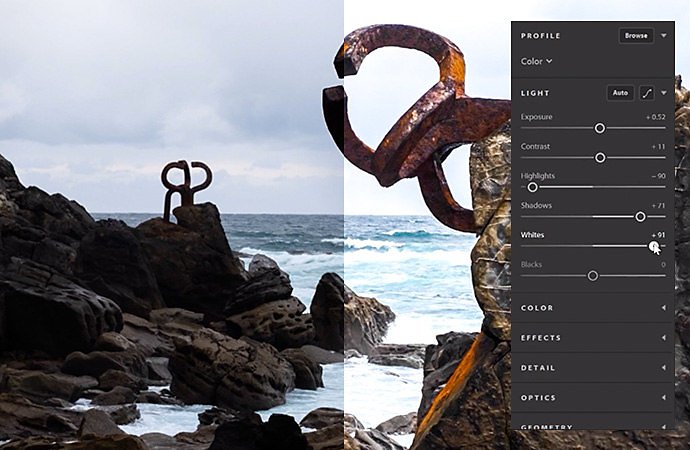
In Lightroom, you can find the histogram at the top of the right-hand panel. If your shadows are clipped, the grey triangle in the left corner of the histogram will turn white. Click the triangle or tap the J key to show shadow clipping and the clipped shadows will turn blue so you can see them in the photo.
If your highlights are clipped, the triangle in the top right corner of the histogram will turn white. Click the triangle or tap the J key to see the lost highlight detail, which will be coloured red. Depending on what you find, you can adjust exposure or contrast as needed. The histogram will change as you move the sliders. You can also click the histogram itself and move to the left or right and the sliders will move accordingly.
If your histogram frequencies are all bunched up toward the middle with empty space at the edges, your photo might be lacking in contrast. To fix this, deepen the midtones and increase the dynamic range of your image by moving the Contrast slider to the right. Slight adjustments to the Clarity and Sharpening sliders can also increase the dynamic range of your photo.
Learn how to adjust brightness in Lightroom CC.
Watch this video tutorial for both automatic and manual brightness adjustment.
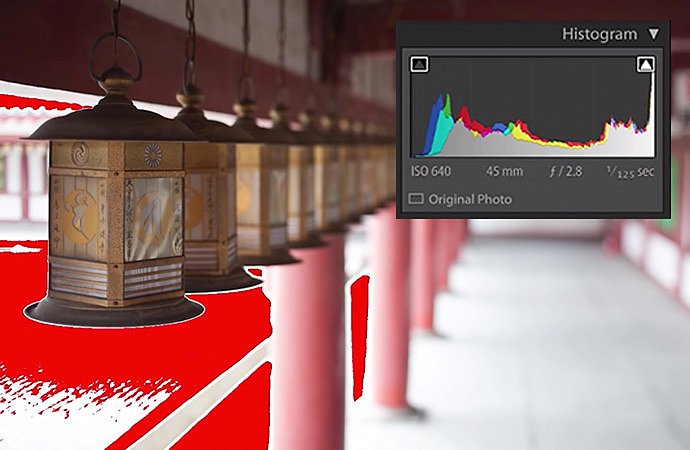
Experiment with Highlight and Shadow Clipping warnings in Lightroom.
Discover shortcuts and tips for maximising the dynamic range of your photos in this short video by Julieanne Kost, Adobe’s Principal Evangelist for Photoshop and Lightroom.
Always check the histogram before you print.
Your photo might look perfect on your screen, but when you print it, you find that you’ve clipped blacks and whites. Photographers can make great use of pure black, but blown-out highlights can be especially distracting, as the eye is drawn to places where no ink has been laid on the paper. “I tell my students, if they’re going to print, always look at the histogram first,” photographer and teacher Tina Tryforos says. “Then adjust the right and left sliders to ensure that you have a full tonal range in your print.”
When you print, if your photo’s colours look vastly different from what you expected, you might need to calibrate your monitor. Mac and Windows machines offer colour calibration tools, but truly accurate calibration requires a colorimeter. These devices measure your screen’s colours against industry colour standards and create a unique colour profile for your monitor.
With an accurate colour profile, as well as a balanced histogram, you can capture the full dynamic range of your photos. You’ll avoid any unpleasant surprises when you print and trust that you’ve maintained shadow and highlight detail when you share images online. And by making the histogram part of your process while shooting, you’ll have better images before you even begin editing.
Contributors
Do more with Adobe Photoshop Lightroom.
Edit photos easily with Lightroom presets, Super Resolution, easily share photos from any device and access your projects anywhere with cloud photo storage management.
You might also be interested in…
Building a great landscape photo.
Explore ways to artistically capture scenic views with tips on landscape photography.
Discover how adjusting shutter speed can help you capture clean shots or motion-filled moments.
Night Photography.
Low light doesn’t have to equal low quality with these tips for successful nighttime photos.
Creating great portrait photography.
Take a step closer to perfect portraits with tips and advice from professional photographers.


