Finding Character Inspiration in Everyday Objects

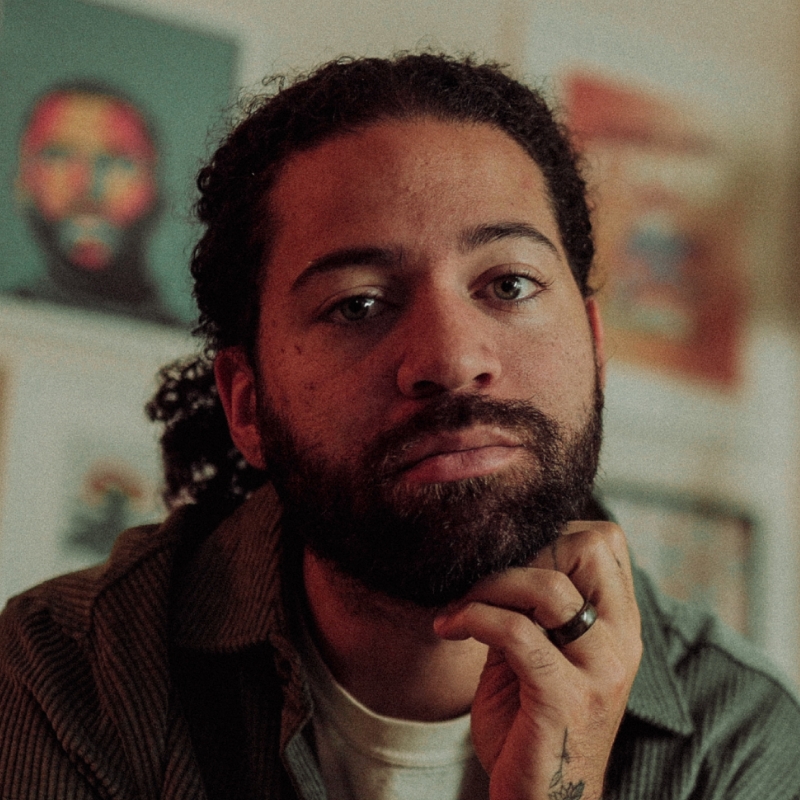
[music] [Cody A Banks] Yo! Thanks, everybody, for joining me today. My name is Cody A Banks. I'm an illustrator and content creator. I do tutorials for Adobe Illustrator and Adobe After Effects. My social media is full of process videos, and behind the scenes looks at how I create my art. Overall, I just enjoy sharing my process because I, personally, like to see how other people create their art. So, I try to give back as much as I can by showing my process, and giving tips and tricks along the way. So, today's lesson, I'm going to be going over how I find inspiration in everyday objects to create characters. I'll be showing how I implement the Pen tool, the Pencil tool, a little bit of the Pathfinder tool, to create abstract objects for your character. So, first things first, let's just go over a few basics of what I like to focus on when I'm creating a character, and then we'll move on from there. All right. So, here we have a few characters that I've created in the past. The three things that I like to focus on are facial expressions, hand expressions, and then the pose that the character is standing in, or walking in, or running in, whatever they're doing. And you can see how something as simple as just a small smile can change the entire facial expression. So, in this one, we have just a slight curve to the smile, and he's looking to the side, so, it gives him that mischievous look that he has. And then on this character, we have the straight line, and he has more of a serious look. And then, finally, on this fox character, we have pretty much the same as this one, but he's a little bit over to the side, so, it gives him kind of a more of a calm, relaxed look, more so than this guy. And them, obviously, we have open mouth, high eyebrows. It gives it more of an excited look. And then a simple smile again here, but we've got the eyebrows up. So, she's kind of just calm and relaxing. And then if we hop over here, this is a pretty neutral facial expression, where she's not necessarily smiling or frowning. She's just kind of chilling there, got the peace fingers up. And that's actually a perfect segue into my second point, which is hand expressions. So, you can see in a few of these characters, I have the peace sign going up. So, that's unintentionally become my signature hand pose that I tend to go to the most. But I know a lot of people struggle with drawing hands, so, I try to take my time, as much as I can. I get the basic shape of the hand in, and then I go in and edit it as much as I need to to make it look perfect.

The third point we have is the poses. The reason I put this pose in here was I thought this was a unique pose of her sitting here with her leg up, this arm at an angle too, and then we have the big arm here showing off the tattoos. This pose here is a bit of a unique one that I thought was cool, where he's not necessarily running or jogging, but it kind of looks like he's just floating in mid-air. And then we've got the classic walking pose, and we've got a classic running post. All of these factors can totally change the mood and feeling of the characters. So, I try to focus on those three points, facial expression, hand expression, and then the pose of the character are all super important when you're trying to make a character. All right. Cool. So, now that we have the basics covered, the next step is figuring out what the character is going to be. So, as a character designer, it can get a little bit old recreating human characters, or animal characters, all the time. So, what I tend to a lot nowadays, is finding an everyday object, and turning that object into a character. So, that can be something as simple as a pencil, something like a juice box, a piece of pizza, something that we're on all the time. Something, you may be on it right now, actually, your phone. Turn that phone into a character. Now, we can take this even a step further, and look for objects that have an actual face on them already, and turn that into a character. So, something like an outlet, even as a kid, I always looked at outlets, and it seemed like it was two faces on top of each other. So, what I like to do is take a short video of that object with the face on it, take a screenshot of it, and then turn that object into a character, using the face that is already on the object. So, here you're seeing an example of an outlet that I turned into two characters, looking like they're doing a little piggyback ride. Another example of this is a fire hydrant that I saw when I was out for a walk one day, and it looked like a robot to me. So, I took a little video of it, screenshotted it, and we turned into this little robot character with a wheel on the bottom. I love how he turned out. One other example of a face that I saw out in the wild is this power box that I came across. We come across these power boxes all the time, but you're probably not looking close enough to notice that this little latch right here looks exactly like a face. So, I screenshotted that, and we end up with this character, right here. So, once you start using this method for finding inspiration, you'll start finding these characters all the time in everyday life. I found this little pole in the ground the other day, with a flag tied around it, and, to me, it looked exactly like a headband hanging off the head of a character. So, that's the character that we're going to go with today. We're going to use this object, right here, and turn it into a character. So, let's get into it. All right. So, here we are in Illustrator. I just dragged this screenshot straight into the canvas. We have the pole, right here. I, typically, like to have my character facing to the right. So, I'm going to go ahead and just flip this around, and reflect it, so that the headband is coming off the left side instead of the right side. And we can just put this, and our background shape, which is this white, and our color pallette is right here. So, the first thing we need to do is make this rectangle. We're going to hit "M" on the keyboard, and just make a nice tall rectangle, like this, the basic shape of the pole.

And even though this is sort of like a gray color, we're going to make it blue. So, hit "I" on your keyboard, and that'll get to your Eyedropper tool. Then we can select this blue, and are automatically going to have all the stroke settings that are in your color palette, they'll automatically be applied to your new shape. So, we have our rectangle here.

Zoom in, and we're going to hit "P" on our keyboard for the Pen tool. And with your shape selected, add a point right in the middle.

And we can hit "A" on our keyboard for the Direct Select tool, or that's right up here, Select just that point, and we can bring it up with our arrow key, or you can even just drag it, if you need to, to give it that point, right there. Next, we can just draw with our Pen tool again. We don't need to fill on this one. So, we can get rid of the fill. And at the start point, right here, bring it down so it's not straight across, but it's down a little bit at an angle, and not quite to the middle, and then we'll bring it back over that way.

And then, what I'm going to do is start a point, right here, at the very top. Connect it to this point, and then straight down. So, hold "Shift".

And then zoom in here, nice and close. Select this line. I don't want it to go all the way up, but I wanted it to be directed straight at that top point. So, what I'm going to do is add a point, right here, and delete this point. So, now it's pointed at that top point, but it's not all the way connected. And then we can just drag this up a little bit, like that. And then we're going to use this reference as kind of just what it is, a reference. We're not going to exactly copy how this "headband" looks. So, we're going to draw it in ourselves...

just using the basic idea of that headband. So, let's add a line right here, straight down. And we're going to switch over to our Pencil tool. So, that's "N" on your keyboard. Now, we're going to just draw out the headband, like this.

Right to that side, straight up. So, hold "Shift" on your keyboard. And then the same idea over here.

Another bump like that, and then we're going to bring it back around and up, sort of like that. And zoom back out. We can give that the red color.

This can come down a little bit, because it's a little bit too high. And then we can go in an adjust this, if we need to, as well.

So, in order to adjust, we can sometimes just delete points entirely. So, with our Pen tool selected, hover over it, and you see that little line, right there? That'll delete the point, and then we can just adjust this one, and this one. Then I like to go in and add a small line, right here, and this makes it kind look like it's curving around the blue shape. So, we'll do that again over here with our Pen tool. Start right on that anchor, and it's just a tiny little line, right there.

That looks good, and we can add another detail line, right here, to make it look like this is continuing.

Kind of like that. And then, we'll do one more with our Pencil tool. Just add a simple line like that, kind of following the top curve. That looks good. Let's just move this one down, and we'll bring this one out a little bit.

Cool. So, now, let's add the back of the headband. So, we'll start with the Pen tool.

A slight curve, like this. Switch over to the Pencil tool.

Kind of like that.

And you can just go right on top of this, because what we're going to do is just send it behind, once the shape is finished. So, we can adjust this, if we need to, because it was a little bit too thick.

Adjust it like that.

All right. That looks good. Close that up. And we can, again, go in here, and add...

just a small line like that. It makes it look like it's fabric folding over itself, and gives it a little bit of depth. So, it's just a trick that I like to use when I'm drawing fabrics, or clothing, and stuff like that.

So, now this is all grouped together. We can just hit "Command+Shift" + "Left bracket", and that'll send it behind. And we're going to draw another one of these, pretty much the same idea, right on top of that. So, we'll go up.

Curve it around, like this.

Like that. That looks pretty good.

Add this line, right here.

Select that line and this shape. Command+G, group them together. And, again, we can send it behind with "Left Bracket" with "Command+Shift".

And that sent it behind.

So, now we can just move this around, adjust it as we need. I'm going to go in, and add a few shadows.

Just like this.

This can be solid black, or purple, in this instance.

Again, down here.

Cool. So, that's our headband. That looks pretty solid to me. We can move these. And that's pretty much the entire object that we have here for a reference. So, now, it's just a matter of going in and adding the facial features, the hands, the arms, the legs, and the feet. So, let's go ahead, and start with the face. We can do the eyes first. I'm going to just do a nice straight up circle, like this. It can be white. So, we can just select our background. I always have my background as the white in my color palette so that I can just Eyedropper tool the background, without moving over here. So, we've got a white circle.

I'm going to use the Pathfinder tool. So, let's hit "M" on our keyboard, and we'll select this rectangle.

Go right to this middle. With our smart guides, you can see that this is right in the middle. And we're going to make a rectangle over the circle.

Select both of those, and then go over here to your Pathfinder tool, and we're going to hit this one, right here, which is intersect. That's only going to keep the bottom half of the circle. So, now we have this shape, and I'm going to grab this point, right here, with our Direct Select tool, and drag it that way a little bit. And then now that we have this shape, I'm going to go ahead and add the pupils. So, another circle on top. And I'm going to do the same thing using the Pathfinder tool.

Create only the bottom half of the circle, and this can be black for the pupil.

Zoom in nice and close here. We're going to do another circle on top of the pupil.

And then this time, for the Pathfinder tool, we're going to do "Minus Front". That gets rid of that little chunk, right there, and it gives it kind of like a highlight.

And then we'll add another circle, right here, that can be white with no stroke.

And another one right here, a little bit bigger though.

So, that gives it kind of like a highlight feel, like you see the reflection in the eyeball. And we can group all these together. So, we can move them together, like that. Now, let's just drag this into place. It's fine if it hangs off the side a little bit, like this. I don't really mind that. It's a cartoon. It doesn't really matter. And we're going to take this whole group, right here, "Option" + drag it over this way, and now we have two eyes. Cool, I like that. Let's give him some eyebrows, really simple.

Draw it with our Pencil tool, like this. And we can make it black stroke, black fill.

And then we have quite a bit of space here. So, let's give him sort of like a high eyebrow.

Like that. This one can be a little bit bigger because it's got more space to work with.

That looks good.

Next, let's do his ears. So, again, we're going to a circle.

It'll be blue, just like the rest of his body.

So, "L" on your keyboard for the circle. Holding down "Shift+Option" on your keyboard, drag out a circle. We're going to rotate it 45 degrees this way. So, holding down "Shift", you can drag it by 45 degrees.

So, let's just do 45. So, then we have a point right here, and a point right here.

Hit "P" on your keyboard, with your circle selected, add a point right here, and you can delete that. So, now we have this open shape, and we can just drag it right over on top of the head, once we're ready. But first, we're going to add a little bit of detail to the ear, drag that line, right there. This has a fill on it.

So, it can cover up this shape, right here, that we're drawing.

Just hit "Command+Left Bracket" and it'll go behind this shape.

Like that. And then, we can make this a slightly darker blue.

And there's our ear. So, let's group that together, "Command+G". And we'll resize it, and just drag it over on top of the head, like that.

Now, I think I want to actually go in and move these a little bit.

All right. Cool. That looks good. Now, let's "Option" drag this ear over this way. Object > Transform > Reflect > Vertical.

And we can send this one to the back, "Command+Shift"+"Left Bracket".

Now, it's kind of just hiding behind the head, like that.

Cool. Now we have the eyes, eyebrows, and ears. The last facial feature that we need is the mouth. So, let's go in here, and we'll draw an all-black shape.

So, we'll just do it like this with our Pencil tool.

Not perfect, so what we can do is go in and adjust it, delete some points, curve this one out a little bit, if you have to, delete this one.

Just keep making adjustments until it looks how you want it to look. I want it to be a little bit more of a smile, so, let's bring this down, and keep adjusting.

I like to just get the basic shape in there first, and then go in and adjust things as I need.

All right. Cool. That's solid.

So, now that we have the basic shape of the mouth, let's go ahead and add the teeth. So, we're going to add some circular teeth like this and make those white.

And then we can just drag a few over this way.

I think there's going to be four teeth, total.

Like that. So, let's combine all of these together with our Pathfinder. Use this one right here, Unite.

And then select your mouth shape, "Command+C", "Command+Shift+V", to copy a new one on top. And then with that new shape, and your teeth selected, we can use our Intersect option again, and then just make that white.

There are definitely other ways you can do that. If you want to use the Draw Inside tool, that's cool, but we're going to bring that up a little bit later, and we can cover that. But, for now, I want to just bring these teeth down a little bit. So, let's select all the points...

and just drag them down a little bit so they're showing a bit more.

Like that. And then, double click, we can go into Isolation Mode, and we're just going to add a few lines to make it look like they're overlapping, like this...

on each bump.

Group them all together. That looks good. And then, the last thing we need to do is add a little tongue. So, we'll just draw a little shape, like this, going like that.

And, again, copy and paste the mouth shape on top. Intersect, and we'll make that one red.

Send it behind the teeth.

Cool. There's our mouth. Let's make sure that's all grouped together.

"Command+G". Cool. So, there's our face. The next thing we're going to do is the shorts. So, we're going to just curve out this bottom part, right here. So, with our Pen tool selected, "Option", and just drag that line down and it'll curve it. And for the shorts, we're going to just do a straight line, like this.

And, again, curve it, like that. We don't need Fill quite yet. We're going to add some effects to this. So, select that line, and go up to Effect, and go down to Distort & Transform, and Zig Zag.

Make it pretty subtle. So, the size can be like 2.

Ridges per segment, let's do 10, and make it smooth.

All right. So, that looks good. Go to Object > Expand Appearance, and now we have this curved line, like that.

"Option", drag this down so there's a second one, and we can make it a little bit bigger.

This one, we can shrink down, so it's the same width as the body.

And what we can now is go straight up, and then we're going to curve it out this way, like that, and connect it to the bottom curve line. The same thing on this side. Like that. And make that red. So, this is going to be the top of the shorts. The arms will be up here.

The legs will be down here. So, let's go ahead and add the legs now.

This will be part of the shorts, right here. Curve it out, like this.

Give it a little slit in the shorts.

Send that behind.

And then this will be the back leg.

You won't see this at all. All this part will be covered up, because we're going to, again, send it behind, like that. All right. Cool. And now, I want to give it a little bit of like a perspective, a look to the leg where it's kind of getting bigger as it gets down here. sort of like the foot is coming at you. So, we're going to start kind of skinny up here, and bring it down this way, where it's a bit thicker on the bottom. Send that behind. And that can be blue.

That's going to be our leg, and then we'll go ahead and add a sock. So, with our Pencil tool, we'll just draw it in. It's pretty simple, like this, a straight curve, like that.

And then kind of like a wavy line, and then straight down.

Straight up this way.

Give it some curves, like that. and this can be white.

Add some details in there, like this.

Don't need a fill on that.

This can have an extra little line, right there.

Let's group all these parts together for the sock. And we'll double-click on that, and we're going to go in and add some stripes, real quick, like that.

We can change this to red. So, select your stroke color over here, and then with your Eyedropper tool, hold down "Shift", and you'll only affect the stroke. So, that turns it red.

And now what I can do is take this shape, "Command+C", "Command+Shift+V", to paste a new one on top, and then get rid of the fill. So, now we have this stroke on top that's covering up...

that little red section, right there.

So, let's just "Option" drag another one of these stripes, like that, and we're good to go on the sock.

We can give him a little kneecap, right here.

Make that blue. And again...

over here.

And there's his knee.

All right. That looks good. Next, we're going to the back leg. So, using our Pen tool...

do a little V-shape, like this, like he's running.

Send that behind all the way. We can curve out this line. So, select just the point, and then select this little circle, right here. and you can curve it to make the knee.

We'll give him another sock on this side, just like we did over here. Pen tool, curve it like this, follow it this way, and then we'll switch over to the Pencil tool...

like that.

Let's make that white. And we can make it a little bit longer as well.

There's our sock. Add some stripes in there, again...

like this.

Group it all together, "Command+G". Cool. Now, we're just going to add the shoe. So, that's going to be a sort of solid red shape, like this. So, we can grab the red, and then we're just going to draw it in, like this, right on top, like this, but then we're going to send it behind everything. So, it looks like that.

Adjust that. And then what you do to make it not look so weird, "Option", drag another shape, like this, the same exact shape, and send that one behind...

and turn that white. Now it looks a little bit more like a shoe.

We can go in here and add a line to this. And let's group these two together, "Command+G". Double-click on that. And then we're going to draw in the shoelaces, real quick.

Like that "Option", drag.

"Option", drag.

All right. Cool. And let's actually just shrink the leg down a little bit. So, we'll select the sock and the leg, shrink it down just so it's a little bit skinnier, and then we can move this shoe back into place, like that. All right. Cool. So, now we've got to do this bottom shoe. We're going to start with the sole of the shoe. So, a straight line, like this and then let's drag out this second point, so it curves up like that.

Like this, it's going to be nice and big for the perspective effect.

Like that. Drag this a little bit.

We're going to add a second shape, like this, following the first one, except it's going to go a little bit further this time, and then straight down.

Like that.

And send that one behind. So, now we have these two shapes that we can group together, "Command+G". And then we can double-click on that to focus on only the shoe.

Make some adjustments to the shape. Curve these two out.

We'll add our next shape, which is going to be a nice round, almost circle, like this.

Like that. And we can make it red. Send it behind.

And then for our next shape, we're going to follow the direction of the leg and sock. So, we're going to bring it up this way, kind of curve it out. We can move this entire shoe once we're done with it. So, don't worry about if it's connected perfectly right now. But we can bring it back up this way, like this.

Send that behind.

And let's just move it into place, like this.

Shrink it down a little bit. It's a little bit too big, actually.

Next, we'll add the shoelaces. So, again, just go like this. Nice big shoelaces, like that.

"Option", drag. "Option", drag. We can move these up a little bit.

And send them behind this shape, right here. So, "Command+Left Bracket+Left Bracket" until you get behind it, but you still want to be in front of this shape.

Let's adjust this shape, right here, so it's up a up a little bit higher, and we want this point to be up, towards the top of the top shoelace. And then, we'll add the tongue, as the last piece.

So, let's kind of follow it, like this, bring it up this way.

I'm going to have it looping around the sock.

Like that. So, let's send it back a bunch of times. Curve this out.

And then we'll just give it a line, like this. Bring this over this way a little bit.

All right. Cool. That looks good to me.

We can add the ground.

So, just a straight line, like this. Bring it all the way.

Add a few points, and have a little break in the line, like that.

All right. So, there's our legs. We can add a few details to the shoes later.

But let's get the arms in there now, so it's more of a complete look to it. So, we're going to add this back arm first. Pen tool.

A slight curve on the anchor.

Make that guy blue, and a little bit bigger.

Then we can just draw in the hand. We'll have him have like a closed fist. So, we'll do like this.

Like that.

Send that behind.

Send that behind. And then we can group all these together, "Command+G" again. Go in there, double-click.

I'm just going to make a blue shape behind all of this to close this up with no stroke on it. Send it all the way behind and then, we'll add one little line, like this.

So, now it sort of looks like a closed fist. That's good for the hand. Let's go over to this arm and just add an extra line, like that. All right. Now, we can do the other arm on this side, so, the same idea, except we're going to do it this direction.

And send that all the way to the back.

This arm can also have this small line, right here.

That looks good. And then, we're going to do a pointing hand, sort of like this, like he's like, "Yep, I'm number one, I'm fast." "I'm a running pole with a headband, and short shorts".

So, let's go ahead and draw that in.

First off, with the thumb, like that. And then we'll do the pinky, over here.

This finger, right here, to kind of close it off.

Send that behind, and then the pointer finger...

right there.

So, let's group these together, "Command+G".

Add this blue shape in the back. Get rid of the stroke.

And there's our hand.

The last thing I'm going to do is go in here, and add some tattoos to this arm. So, what we can do is double-click on this, since it's grouped. And then, with this shape selected, go right here to Draw Inside, click on that, and now we're in Draw Inside mode. So, anything at we draw, it's only going to show up on the inside of this arm. So, let's just get a nice blue, with no fill, that's slightly darker than the skin tone, kind of like that.

And we can just draw in some doodles that look like tattoos. So, here's a little elbow tatt. And then we can do like this, just some straight lines, maybe some zigzags.

Give it some straight lines as well.

Real quick. Nothing too complicated.

I think we'll give him like a flower, right here.

And then just fill it in, like that, so it looks like he has some tattoos.

Again, I'm just doing this real quick to show you the idea. but you can take your time a little bit more than I'm doing here. But, yeah, that's the tattoo for the arm. He's got a full sleeve. That looks pretty solid.

We can go in here and add some more details and stuff, like to the bottom of the shoe. Maybe give him some wristbands, But, for now, I think that looks pretty solid. So, we'll stick with that for now. So, thank you, guys, so much, for following along with me. We just took this random pole with a flag on it, and turned it into a cool blue character that's going for a run. So, you can find inspiration anywhere in the world. Just keep an eye out for it, and it'll become second nature to you guys. So, again, thank you, guys, for following along. Peace.

Online Session

Finding Character Inspiration in Everyday Objects - OS300

Sign in
ON DEMAND

Closed captions in English can be accessed in the video player.

Share this page

Speakers

Featured Products

Session Resources

No resources available for this session

About the Session

If you struggle to find inspiration for your character designs, this is the perfect exercise to get your creative juices flowing. Follow along with illustrator Cody A Banks as he walks through the steps of creating a character in Illustrator while pulling inspiration from everyday objects.

Topics include:

  • How to implement the Pen and Pencil tools and Pathfinder effects to create abstract shapes
  • Adding personality to your characters
  • Using Draw Inside mode to add detailed tattoos to a character
  • Tips and keyboard shortcuts for fine-tuning body parts

Technical Level: Intermediate

Category: Inspiration

Track: Graphic Design and Illustration

Audience: Illustrator

This content is copyrighted by Adobe Inc. Any recording and posting of this content is strictly prohibited.


By accessing resources linked on this page ("Session Resources"), you agree that 1. Resources are Sample Files per our Terms of Use and 2. you will use Session Resources solely as directed by the applicable speaker.

Not sure which apps are best for you?

Take a minute. We’ll help you figure it out.