Mastering Masking: Enhancing Photos in Lightroom
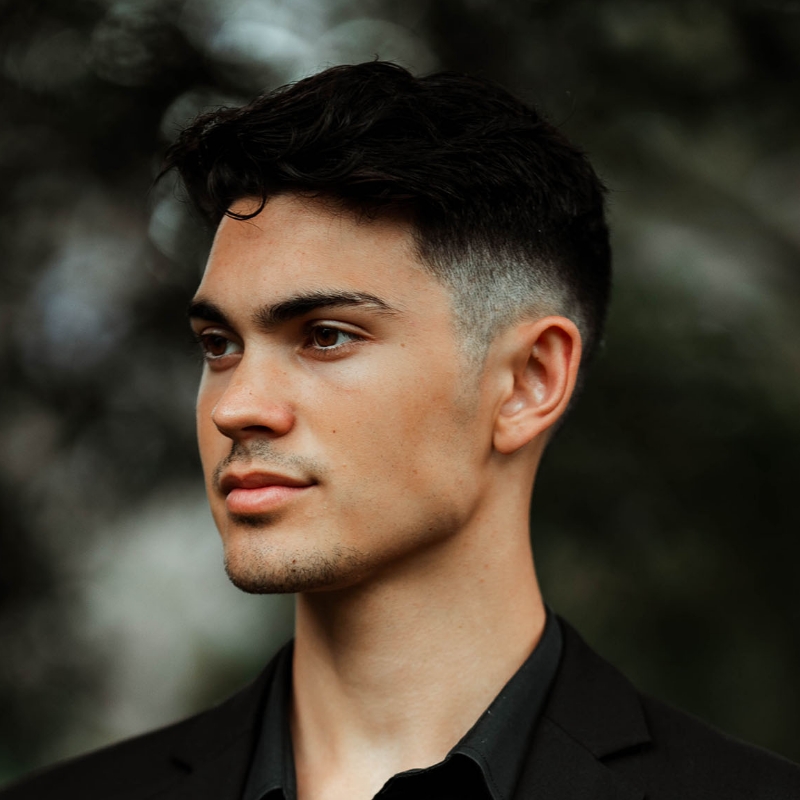
[Music] [Wil Calabio] Hi, and welcome to this Adobe MAX session. Thank you for joining me. My name is Wil Calabio, also known as itizwil on social media. And I'm a photographer and content creator based in Sydney, Australia. But I'm actually coming to you from Florence, Italy at the moment. But in this session, we'll be focusing on Adobe Lightroom, and in particular, the desktop version. And I'll be going through some primary features that I use in my editing, which is masking, and also, I'll be adding on some other features such as removal techniques and also some lens blur. But yeah, hopefully, you've already used Lightroom. I'm assuming if you're watching this, you have used Lightroom already or you know about it. And whether you're a beginner or you're already experienced in photo editing, this is just to help you level up your photo editing skills and in particular, masking if you haven't got too much into that. Because I highly recommend that and I also think you'll definitely be using it the further you go on with your photo editing skills. But yeah, so by the end of this session, hopefully, you'll be able to adapt these things into your own editing and into your own photography, but other than that, let's dive into it. Okay, so as we can see, I have Adobe Lightroom open here with some example photos. I've got a couple of photos here to show you, and I'll just show some before and afters to really show you how much masking can impact your photos. So we have this beautiful waterfall from Iceland, if I do before and after here by hitting the backslash key. We can see that there's pretty drastic change there. We've got some Tokyo photos, street photos of my friend, Willis, and then we've got some portraits. I see a lot of color changes and a lot of light changes in particular, which help draw the eye to the subject. But yeah, so why are masks important? I think masks are very important because you can basically adapt and change every single element of your photo to your liking. And there's a lot of flexibility with this because of Lightroom's features and because of how much you can change the color, or the sharpness, or just the general exposure, whether it be something simple like that. All these things come together and give the final result that you want. And just makes it a lot easier to change every single element in your photo if that's what you want to do. So an example of that could be this waterfall here. And in particular, masking will help you draw the viewer's eye to a subject or just to a focal point that you want them to look at. So I think definitely using masking to create a focal point is pretty much the number one thing that I use it for. And yeah, just make things stand out or have a balance in there. As you can see, I have seven masks on the side here. So there's definitely, in my opinion, you can never have too many masks when you're editing. They just have to be in balance with each other. But you'll see how subtle these masks are when I do go through them. So using a lot of them, but subtly, it will work very well for your images. So let's go for the first one. This one down the bottom here, which is what I like to do with a lot of the photos that include some ground, and this is basically just bringing the exposure down with the linear gradient. And actually, before I go ahead and do that, let's go to create a new mask, and I'll just show you the quick shortcuts that you can use to use when you are doing masks. So we have object, which is S, brush, which is B, linear gradient is L, radial gradient is R, and then you can see color range and luminance range, Shift+C and Shift+I. And then we actually have our AI masks at the top here, which are these three. Subject, sky, background, and then also this people one where it can even detect different people of images, which is amazing. So these AI features are powered through Adobe Firefly, and they are absolutely excellent. I use them in pretty much all my photos because it saves so much time, especially if you're batch editing photos. But yeah, so let's go ahead and just look at the mask for this particular photo. If I go down to the bottom here, like I said, bring the exposure down at the ground, just draws your eye straight to the person, straight to the waterfall, which is the two elements that I want to focus on in this image. So if I get rid of that, you can definitely see it's a lot brighter and it still works, but I think this accentuates makes it a bit more contrasty, and your eye definitely goes towards the middle of the image. One thing that mask definitely does is help-- Obviously, create focal points, but when creating a focal point, you want to think about bright parts of the image and contrasty parts of the image. And those are the two things that people will definitely look at pretty much straight away. So if you have a bright part of the image like this waterfall and the water, your eyes got to go straight to it. Whereas if you have a darker part like the grass have made it darker, your eye doesn't really go there straight away when you look at this image. It goes towards the main focal point. So one other thing I like to do with outdoor images is have a sunray or accentuate the sunlight in outdoor or nature photos. And I've definitely done this with the top right here. As you can see, I have a linear gradient, which I've dragged over the top right. And we can see I've brought up the exposure, and I've even brought the temperature to make it a bit warmer. And this is just to accentuate the sunlight, make it seem like it's a bit more summery, a bit more warm, and I think that does it pretty well here. Some other things, some obvious ones is this waterfall. So we've definitely made this a bit brighter. And as you can see, I've adjusted the exposure, it's +0.11 there, and they even put some more contrast in there. So that just further accentuates the waterfall, and we can even say, I've done that with little subject here we can see.

And basically just made that yellow jacket pop, made the hue a little bit more yellow. And yeah, it's pretty simple with that. So as you can see, seven masks, plenty of masks that I've used, but they all work in unison and they create this final image where I think it really works well when you have all these different masks that have combined together to create a unique image. All right, onto our next photo. We have a more of an urban photo. This one's taken in Tokyo of my good friend, Willis. And it's a bit more darker, a bit more moody. And something that I want to show you that I do through masking is using basically a vignette. So we're creating our own vignette, even though Lightroom does have its own vignette feature. This one just lets you play a little bit more with colors, and in my opinion, just a little bit more flexible when you're editing. So what we have here, as we can see at the very top, is our mask, and we have a radial gradient. And if you remember the shortcut for that, it's R. And we can also invert that. So let's just-- I'll just give you the example. If I press R and drag a gradient here, we can see that if I go to this little one here, we can go all the way down and go to invert gradient, and that's going to select everything outside the circle, which is what I've done already for this mask. So with that mask, what do you want to do? We've brought down the exposure, and because, like I said before, people like to look at the bright parts of the image or the more contrasty parts of the image, if we bring the exposure down of the outside or the surrounding area of the subject, it's going to draw the viewer's eye directly to the middle and look at that subject. So as you can see, I've got this exposure down. I've got a bit more contrast in there. But the main thing I've done is bring that exposure down for that mask. And I think that's definitely accentuated the subject, made them pop a little bit more, and I've even further done that through actually selecting the subject itself, which is really good because this is actually one of the AI features if you can remember. This is a-- If we go Create Mask, we have subject selection, and this is what I've done to select the subject of this image. And as you can see, it's created an outline of Willis and basically painted over him for us. So this saves a lot of time, especially if you're editing batch of photos and you want to select a subject. You can even sync this across a lot of photos, and if you have the same subject, it will select all of them in every photo. Yeah, so we've done that, and I think we've just gone ahead and just added some clarity to that just to make them pop a little bit more. I further accentuated the vignette here with the side of the walls, just darkening them a little bit more. And then one more thing that I've done is actually change the color of the backpack to match the ground writing here. And this is basically just to create more of a dual chrome effect, so there's two colors in the image, make it pop a little bit more. And because the backpack, if I turn this off, you'll see it's actually a dark orange color. So now it matches that, and how I did that was just bring up the exposure and change the hue so it was a bit more yellow instead of orange. But yeah, that's pretty much it. Pretty simple. There's not too many masks in this one, but as you can see, it really creates an effect where it's, yeah, as you can see the difference there. The subject is definitely popping more, and also the color as well. So let's move on to the next one. All right, we have our third photo here, and this one's a portrait for all you portrait lovers out there. This was shot in a studio with two different lights, as you can see. I wanted to have a warm light and a cool light, and mix those together to get a nice color contrast. However, if I show you the before and after, you'll be able to see how it actually didn't work in real life. But I knew that in Adobe Lightroom through masking, I could create this effect nonetheless. So let's go back to our masks, and we can see that we have two main masks down the bottom here, Mask 1 and 2, and these are basically just on either side of the model. So the right one where the cool light was coming from, I basically just brought down the temperature. If I scroll down here, you'll be able to see that. Temperature is all the way down to create that blue effect, and then on the left side, where the warm light's coming from, didn't have to change it too much, but you can see we've brought the temperature up just to give more of that warm yellow orangey color. But to create these masks, this is a combination of a linear gradient. And if you remember the shortcut, that's L. And then we also have Adobe's AI features mixed in with this, which is selecting the background. So I also selected the background, but minus that from this mask. So I'll give an example. Let's say we get rid of this one, delete that. How you'd go about doing that is going through your masks. So if you've made your linear gradient like I have here, let's just go to Subtract, and then we can click Background. And that's basically gotten rid of all of the background. So even though there's not too much going on in the background here, it's just cut out, Jae, the model, and her face, and her structure, and basically deleted everything in the background so that won't be affected. So it's only her that's being affected. So yeah, that's pretty much what I did for both those techniques. And as we can see, I even just did a background selection here to make it a lot darker. Once again, making the subject lighter, making people look at the subject, and make it pop more from the background. Some other things I like to do with portraits. This is what I love to do especially with brushes. So if we go to Create Mask, we have our brush here. Let it be. Make sure you remember that for your shortcuts. It's create my own brushes. So I have some for portraits. And this one in particular that you can see, I brushed over her face. This one is just to create some smooth skin. So you can go ahead and do this yourself. I'll show you down below here. We have the clarity and the texture brought down. This is basically just to give more flattering skin for a model if you're shooting them in a photo session. And yeah, it just makes the skin smoother and makes more of the other elements pop out more. So I haven't brushed over the eyes, or eyebrows, or even the nose and the lips, just over the general skin area. And then if we go to the opposite side of that, we have a brush as well, which goes over the eyes, the eyebrows, the lips, even the nose if you want to. And this just does the complete opposite of what we just did. So as we can see, we have contrast here, and we have some more clarity, and we have some more sharpness as well. So this is just going to accentuate those features of the face and make them pop out a bit more because in portraits, I've learned that you want to look at the eyes or specific features the lips, which, yeah, you want them to stand out and this is the way to do it. So one last mask here that I have is getting rid of the bright areas like I said before. Yes, expecting those results. So we have a linear gradient at the shoulder, and I'll show you why. If I take this off, we see the shoulder, it still might work, but I thought it was a bit too bright, so it was just a little bit distracting for the face, which I want to be the focal area of this photo. So just by darkening that, we can see that's already just gotten rid of basically staring there and staring more on the face of the photo. But yeah, so that's how I use marks in portraits and, yeah, using those in combination with people's faces and skin. So that's all. Let's go to the next photo. All right, so we have our fourth image here, and as you can see, we've got this nice McLaren on the road and a nice forest behind it. It's a bit of more of a moody, but nature image, and we can see that I've definitely used masks in this image. If we do a before and after, it's a lot darker. There's a bit more imbalance with the photo itself, with the exposure. It's a bit underexposed because of the car, how bright it is, and the lights. So I've definitely corrected that with exposure and through masking. So if we go to our Masking tab once again, we can see that something that I like to do a lot, as we did in the first photo with the Iceland photo, is bring the exposure down from the ground. And this is just to draw your eye towards the subject, which is the car in this instance. And yeah, basically, draw the viewer's eye to exactly what you want them to see. So we've brought the exposure down here, pretty simple, with a linear gradient, and if you know how to use a shortcut for that, it's L. And then we've accentuated that even more through the car itself. So once again, we've used Adobe's AI powered by Firefly to select an object. So this time, instead of doing a subject selection, even though we probably could do that, is go down to objects and basically just brushed over the car, it'll automatically do that. So I'll show you an example if I do that again. I have this brush tool. If we wanted to do is just brush around the outside of this car, and it should select it for us. There we go. Perfect. So we have the main car elements selected for us, and we can go ahead and change that as we place. So because I already have one, I'll delete that one, and we'll go back to this one. And as we can see, I brought the exposure a little bit down to balance out the exposure overall because it was a bit bright compared to the background in the before if we looked before, and we brought the temperature down a little bit to make it a bit cooler to match the environment. So what else have we done? We've also actually changed the window of the car or the front window of the car. And this is because I actually didn't have a polarizer at this point when I was shooting the car, and I knew that there was going to be a lot of reflections, especially because the sky was really bright, but we're in this forest where it was really dark. So to help me with not having a polarizer, I knew that through masking in Adobe Lightroom, I was able to bring the exposure down and make it look like I had a polarizer, which I think worked pretty well. So as you can see, I have the exposure down, the highlights down. If I bring this off, you'd be able to tell straight away that it looks so much different. There's a lot of reflections of the trees in the sky in the window of the car. So this basically just helps accentuate the shape of the car so you can actually see what's going on. And yeah, just makes it a lot more flattering, especially for the car itself. So that's enough about masking. If you're sick of me talking about masking, I'll dive into some removal techniques now, which is removal techniques. I'll say that again. And as we can see, if we click on this little eraser on the right-hand side, we have the four main features here, which is the Generative AI Remove or just Remove, and then we have the Heal brush, which is-- Or spot heal, which is very useful for portraits, which I'll show you in a second. We have Clone Stamp tool, which is useful for duplicating elements of your photo. And then we have the Red Eye Removal, or correct, which is for flash photos when you have that vampire look for some reason sometimes, but that will sort that out for you. So let's go to Generative AI, and we can use the brush tool that it helps us with. And I've actually used it already in this photo as you can see. And I'll show you the before and after because it's quite a difference.

So if I click on this, you can see there's always barriers behind the car, which definitely distract the eye. Sometimes you don't know actually things that are distracting or how distracting they are until you compare the before and after if you remove them. And as you can see, AI has done absolute perfection of a job with this. You can't even tell. So if I wanted to remove more things, I'll just give you a little demonstration on that. Let's just go ahead and let's say we want to remove these two little, black bars here. Let's just go down there, and I think that's just two little road things. And we can add more if you want to, if you want to add more to the brush, but that's pretty much it. Just brush over it. Click Apply. And as you can see, it'll generate. And this is using powered through Firefly or use AI to fill in that area and basically guess what you want to get rid of. And there you go. It's pretty much done a perfect job. So there's nothing there anymore. And if we-- Yep, get rid of our, highlight, we can see that the road just looks perfectly smooth now. So removal through AI is definitely super helpful, and it's a new feature, and it's super helpful, especially removing things in its name, which just helps make an image more flattering, especially for a car, or a portrait, or things for commercial use where you shoot in a public area and you need to get rid of things in the background that you can't really control in real life. So very useful, and I'll show you the Blemish tool option, which is-- Or the Heal tool option, which is what I use in portraits. As you can see, you can already see I've used it through here. So we have the Heal tool, and basically, all I use it for is just little spots, yeah, to make a model's face a little bit more flattering or smooth, and this will help you get the job done, especially for a client, or if you're doing for beauty products or something like that. This is super helpful to make the skin nice and smooth. So if we zoom in a little bit, we can see that we've used multiple of these. And, for example, just as a demonstration, I'll show you-- Let's say, we want to get rid of this little freckle here, even though I like to keep natural things in the photos, but let's say we want to remove this, all we have to do is click on it, and there we go. That's it. It will take another part of the image and in combination with a feather, as we can see on the top right here, it'll smooth it out and basically just take a different part of the skin, replace it with that part that you want to replace. So yeah, that's pretty simple and easy. Definitely useful for portraits if you want to get into skin retouching. This is definitely a great start. So yeah, anyways, let's go on to the next image. Okay, so we have our fifth photo here, and this one is in Iceland again. We have a subject in the middle and those beautiful glaciers behind him. So I'm actually going to be going through lens blur on this one, and it's a very useful feature, especially if you don't have a low aperture, wide open aperture lens, or a prime lens. So f/1.4s, f/1.2s, f/1.8s, and this is super useful as you can recreate it digitally in Lightroom. So let's go through and go to the normal editing tab or the sliders. And if you have it default like me, you scroll all the way down to the bottom and we have Lens Blur at the bottom here. So if we click Apply, it's going to calculate the distance. There we go. It's already done it. It will calculate the distance between the foreground, the background, and the middle ground of your photo, and determine basically what it wants to focus on. So it's pretty powerful as you can see. This is all AI done through computing, and somehow I can determine depth perception through a 2D photo. So as you can see, it's already blurred the foreground of this photo. If I change the blur amount, you'll be able to tell. So it's a lot more in focus now, but basically without the feature applied. And then if we bring it back to the middle here, you can see that's blurred a lot more. So this subject is already popping a lot because of the color contrast because of the exposure I've done already with masking. But this just makes it even more accentuated, especially if you have photos where your subject really isn't popping from the background, whether it'd be a person in front of a crowd, this will be super helpful for those. So I can bring it all the way back up. You can see it fully exaggerated, and, yeah, you can see it's basically blurring that foreground. You can't really see much in there, so it's basically leading the subjects or the viewer's eye directly to the subject where you want it to be. So super useful, especially if you're on a budget or you just don't want to invest in low aperture lenses, this is the way to go, I think. So just to recap this Adobe Max session based on Adobe Lightroom desktop version, we've gone through masking, which is evidently my favorite part of editing as you can see. It's great to just accentuate your subjects or just highlight certain elements of your photo to draw the viewer's eye into something that you want them to see. We've also used removal techniques, which is sort of serves the same purpose where we remove distractions from a photo or just flatter the subject a bit more by removing little blemishes and stuff like that. We've also used lens blur, which is amazing for those that are working on a budget or just don't have access to wide open aperture lenses, and that will help accentuate your subject behind a busy environment. But yeah, all these things in unison is, something that I love to use pretty much every single day when I'm editing photos. And hopefully, you can adapt these into your photo editing, and hopefully, you've learned something new and can use these in your editing workflow. But thank you for joining this session, and if you want to check out more editing techniques or just more tutorials, I have plenty on my YouTube channel, or on my Instagram, or TikTok where you can see, itizwil, probably in the title or the description. And thank you to Lightroom for giving us these features to use as photographers. It makes our lives so much more easy. So thank you and enjoy. [Music]

Online Session

Mastering Masking: Enhancing Photos in Lightroom - OS824

Sign in
ON DEMAND

Closed captions in English can be accessed in the video player.

Share this page

Speakers

Featured Products

Session Resources

No resources available for this session

About the Session

Most photographers use Photoshop Lightroom for photo editing, but are you harnessing its full potential? Join expert photographer and content creator Wil Calabio to explore the advanced capabilities of masking tools in Lightroom. Wil (aka @itizwil) will guide you through the essentials of using masks for precise edits — including specific area enhancement, exposure corrections, and detail refinements — equipping you with the skills to elevate your photo editing to the next level.

In this session, you’ll learn how to:

  • Master advanced masking tools for precise edits
  • Correct exposure in specific image areas
  • Enhance and refine photo details
  • Elevate your editing skills for professional results

Technical Level: General Audience, Beginner

Category: How To

Track: Photography, Social Media and Marketing

Audience: Photographer, Social Media Content Creator

This content is copyrighted by Adobe Inc. Any recording and posting of this content is strictly prohibited.


By accessing resources linked on this page ("Session Resources"), you agree that 1. Resources are Sample Files per our Terms of Use and 2. you will use Session Resources solely as directed by the applicable speaker.

Not sure which apps are best for you?

Take a minute. We’ll help you figure it out.