Making Animated Artwork with Firefly and Adobe Express
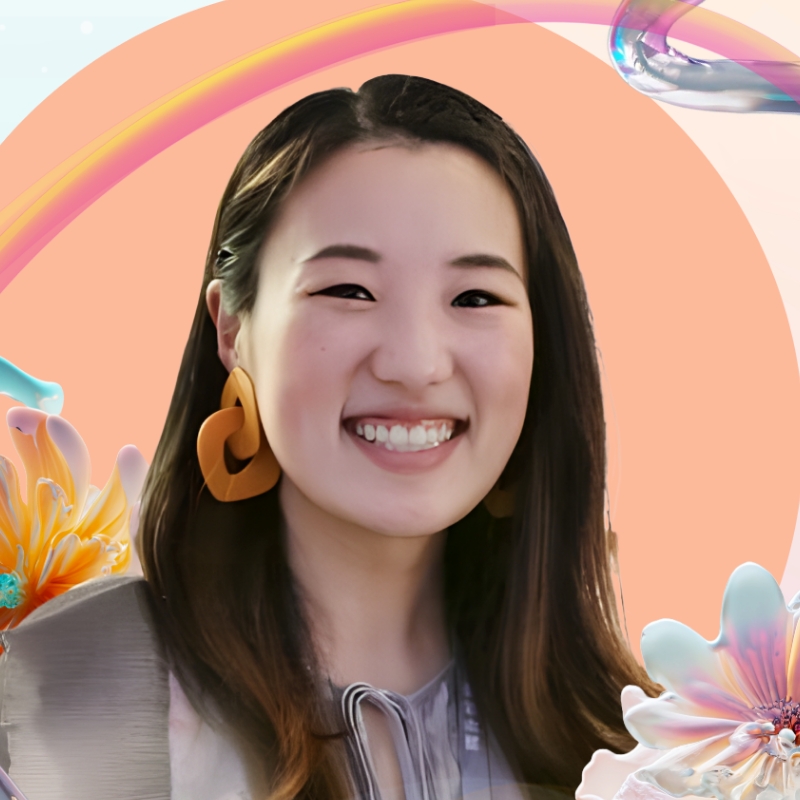
[music] [Joy Chiang] Hi, everyone. My name is Joy, and I'm going to be showing you how you can make animated artworks with Firefly and Adobe Express.

Here's what you'll be learning today. I'm going to do a quick introduction on who I am, the kind of artworks I like to create, before diving into how you can actually create images in Firefly, how you can add your personal touches using your existing artworks that you already create, to give you more of-- To give you more control on some of the outputs you'll be getting in Firefly. Lesson 3, will be preparing the images for animating, and then we'll be jumping into Adobe Express to be animating them.

So I started off as a physical painter, and my love is for fluid mediums like acrylics, Chinese, watercolor, Chinese inks, to use big brushstrokes, and my images have a lot of movement. And I feel like even when I'm creating AI images or any digital images, the style tend to follow with me. I love exploring with all different types of mediums, including ceramics, playing with Perspex. I painted physical statues, like you can see the two on the right. And while I was in lockdown, I think I created about a 100 single line drawings. So I'm constantly exploring, playing with different mediums, and really following what's driving my inspiration at the time. I then started learning how to do digital artworks. So the one on the left is a 3D motion graphic, and eventually, I got some of those animations and digital artworks into commercial spaces and different exhibitions. I then deep dived into AI when it first came out, and I've been playing with it as part of my workflow ever since. I started mixing the different mediums, all the different things I was inspired by, and really just helped me ideate before I make a physical painting or before I make any animations. And now I love just playing with it on the side to get my ideas flowing. But sometimes just as the image-- The image alone is almost enough, so I love to show you how I create them. Hopefully, we can start combining some of the AI images we make today and animate them into something that you'll see on the right hand side. So let's jump in to Firefly.

So I wanted to create maybe a landscape. That's something that's inspiring me at the moment. I just had a trip earlier this year with my family, and it was the first time we went back to China. So I think start with something you're inspired by because that will not only help you get your imagination going, but it might help you be more descriptive because you already know the kind of vision that you have. So one of my favorite places I visited with my husband before kids was actually in Guilin in China. And you might not know about this place, but it's actually where some of the mountainscapes inspired some of the Avatar scenes. So they've got really tall mountains, and it's just a beautiful landscape. So if we start with Guilin as a location, I think with generative AI, the more detailed you can be the better. But I always like to start with very short prompts just to see the type of images you would get to begin with. So if I do Guilin landscape, I just want to see the type of mountains it would give me as a base. That way, I know if I want to make taller mountains, shorter mountains, adding different types of prompts to it will help guide me. So just straight up, it's already looking very beautiful. And as you can see, I'm literally using two words. So if I start here...

I created these ones, and had a play. And as you can see, once I added cinematic, it's giving me a bit more depth in some of the colors. So the contrast is a bit more deeper compared to some of these, but, you know, these are turning out great. And I think when I first tried it, it didn't give me as much water, so I wanted to then add some water reflections. So it really depends on the type of outcome you want.

Because we are going to use the stock Firefly images as a base for our animation later on, I'm looking for something with very crisp edges between the water, between the mountain, and between the sky. That way I can isolate the different layers really easily straight in Adobe Express, and then we can start layering almost like a digital collage, but the ingredients are the ones you're creating in Firefly yourself. So when I create anything using AI, I feel like there's no need to hide that it's AI, and I almost want to celebrate it. So I want to create something that you can't really take a photo of in real life. So the more abstract I go, the more fun I think it makes it. So really make it your own. And I start by adding things that might not be possible to see in real life. So for example, in Guilin, I don't think it gets cold enough for it to snow. So if I start adding prompts like snowy landscape, I also kind of feel like the mountains are too blobby because that's what some of the mountains forms look like. But if I start adding other mountain forms, I know there's really beautiful mountains in another part of China called Huangshan.

So I'm going to type that in. And because Adobe works with a lot of different languages, I'm sure you'll pick up some of these general prompts. Even you can put in Everest or anything that gives it a better idea of what type of form. So if I just wrote mountains, it might just give you the stock standard triangle type of formation. Whereas I want this to be a bit more organic, a bit more randomized. So I'm giving it a bit more direction in terms of the type of mountains I want. I want to keep the reflections. I'm going to add reflections, and that way I just want to see what kind of mountains it will give me. So this is one that I prepared earlier. As you can see, it's looking really beautiful. These scenes are so stunning. And it's not something that you will see in real life because it's just not physically possible. But this is where that surrealism comes in. Really use your imagination to really think about what you can create from just anything that you can imagine.

So see, this one looks very different to that. And I think it's using similar-- I put in Himalaya for this one, and this one I didn't. But as you can see, this one's a bit more brighter. It's still really beautiful. We can work with this. From this step, I feel like it's still a bit too realistic for me. I want this to have a painterly feel, so I always like to add and incorporate something that I've created physically or I've created on with a different type of medium. That way we're starting to mix our ingredients of things that inspire us, things that will bring personality, things that will give your voice to these images so that people can distinguish the work that you create from everyone else using the exact same prompts. So I have a folder of physical artworks, that I think will look nice with a landscape color palette. So I'm going to choose something like this, for example.

So just to show you, I have a folder of some textures from my physical paintings. So these are very texture heavy. It's got very detailed, I don't know, paint blobs and streaks and strokes from my paintbrushes. So these things are really good to keep even if you take a close-up. Sometimes I take a crop of a specific section because I want more blues in a painting or more pinks in a painting. These are the things that I like to keep. That way if I might just take one section because I want it to have that more rainbow color spectrum. So anything you've created in the past that's inspiring to you at the moment, you can use as a style reference. Sorry. I put this in the wrong bit, so remove this. So I'm going to put this in style reference. I'm thinking something pink, something purple...

Just to see what we get.

So even this straight up is already really beautiful, and it's something we can already, use to animate really easily. But I just wanted to show you how easily you can change the style of it. So once I added this, it's almost looking too painterly. I think it's picking up so much of the detail from the reference photo that I used that if this is something that you like, which I actually love, I might use this straight away. But because it's got a lot of different textures, it's almost blurring out the mountainscape, which I don't mind. But I think for this purpose of animation, I want the edges to be a bit more clean. So it's a bit more-- So you understand that it's a landscape straight away. So what I can do is I turn down the strength of my physical painting. You can even or you can up-- I think the intensity doesn't change too much, so I'll just leave it as is just to see what it looks like.

This is one I did with a different texture. As you can see, it's looking more landscape-y, but it's still got some of the textures coming through. And with this one, I think because it was very frosty and...

Textured, it might not give you as clean of an edge, but we can try it and just see what it looks like. I also added galactic to my other image because, you know, when else is it going to be spacey? So I think when I put in the prompt galactic, it gives me some really beautiful skies, and sometimes it brings down the contrast a little bit because it's associated with nighttime photography. So let's just see if this turns out like anything nice. But this is one where I used a different texture...

this painting, which is kind of more blues and purples, but again it's very texture heavy which gives out very nice grainy looks. So this one you can see it's got the speckled stars in the background, and this is looking really beautiful. What I can do is...

I've actually sketched something really quickly on the table just then, which was-- I don't know, like a landscape layout. What you can do is you can crop this or you can even just draw with any type of lines and use this image as your structure reference. So if I put this into the composition reference-- And I just took a screenshot of the image. You can up the strength so it tries to mimic the exact locations. So if I want a mountainscape to have, I don't know how many bumps with some height on the right hand side and some lower mountains on the left, you can quickly trace it out. And this one's kinda-- Because I'm maxing out the reference, it's trying to copy exactly. So if I reduce the style intensity and reduce this, it might make it a bit more realistic.

I think, ultimately, it comes to trial and error. So every nice image that I create, I've probably prompted and refreshed and generated maybe at least 20, 30 times. So with my sketch, this one decided to put in the moon. Another one, it didn't. So if you put the strength up, the more similar it will be. And I don't need it to look exactly like my bad quick sketch. So I'm just going to use this as a rough layout because what I'm looking for is actually a really crisp horizon. That way I can put in water layers in the animations component to bring it to life. I quite like this one. It's quite pretty. So I'm finding it a bit too grainy, so I might change the reference image to another texture. Let's try the one that was in the other one just to see what it looks like. So this is the one I use the same structure reference, but I removed the style. And this is pretty close to the height of the mountains with the tree that I sketched, but it's adding the galactic component. It's adding the mountains that I've asked for with the snowy, and the reflection. So this is a really beautiful image that I would love to animate that you can use directly. So I usually download this because this might be the next structure reference that I use which will actually give Firefly more information to play with.

Oh, look at this.

This is really nice.

I'm really liking all of these images. It's quite hard to decide. So let's just pick one.

Let's go with something with some texture, some night sky, and it's got some great things in the foreground. Let's download this. And now let's move into Adobe Express. So first, I'm going to upload the images I just downloaded. I think it was this one.

And from here, it's actually really easy.

I'm not sure if I want to keep this rock. It feels a bit out of place. So I might just crop it out.

This is the setup bit where I'm just trying to get the composition of the image right.

You don't have to crop it too cleanly, but I just like this to fit straight into the template I'm using. That way when I'm duplicating layers, it's really easy to overlay them on the exact same spot. So now if I do this, I'm going to duplicate the layer.

Put this on top so it's exactly the same, and then I'm going to remove the background.

And from the different layers, you can see which bits have been removed. So you can see the tree was removed and this foreground was removed, which is exactly what I want.

And then I might move this to the side and duplicate this again.

This way, I'm going to put this back in the middle again.

Yep. See how it's just clicking. That way you know it's exactly right on top of it. Going to move this back and again.

Yeah. And this right on there. So I might move this to the background, so I'm not touching it and moving it by an accident. Next, I'm going to use the erase tool to just remove the background.

This is a bit tricky because sometimes you might not be able to see the areas that's removing.

But you can kind of see where it's removed the background. So if I get rid of this, you can see how nicely it's given me that crisp edge behind the mountain. And now I'm going to move this back. So we've got two layers. One-- Oh, sorry. We've got three layers. One with all of the assets, one with the mountains, and one for the foreground. This is going to give you the illusion of depth from the foreground to the background. And that way, you can start layering things in between the different images that we've got. So the different layers. It's not so magical right now, but we can quickly add some moving components. So here, you can find stock videos that Adobe has, which is super handy. There's a lot of free assets that you can use. You don't have to have the premium version. So if we start with water...

We can find-- We can try ocean, ripples, anything that kind of gives you the water movements. So once...

You've got this, I'd almost remove the top. So it's just one consistent color. And I'd find where the horizon is, which is actually behind this rock here, which works out perfectly because it'll give you that illusion that this is in the front.

And the magic bit is you can use the different blend modes. If I use multiply, it's keeping some of the shadows. If we play it, it's already got that movement.

I know this doesn't look realistic but it's still-- Let's try screen. Oh, this makes it look kind of icy.

Oh, I like this better, I think. It's a bit too fast for me. So if we slow it down, it kinda gives that more relaxing vibe.

I think this is the right medium. And because it's not giving us that super clean edge...

I'd almost go into here and remove these shadows because it's...

Not giving us a good enough-- I think that looks better.

So now if we play the water, it's looking like it's flowing out, which is probably the wrong direction. Let's see if we can-- If we're using other programs, you can reverse it so that the water is moving towards it. Let's see if we can flip it and see if that-- No. Then, the perspective's wrong.

It's alright. I think that looks fine for now.

So now we've got this in the foreground...

And we've got the mountain. Now let's find a background that will match here. I usually like to put in a cloud texture, but with this one because it's got the stars you can put, I don't know, fireworks, clouds, anything that will bring some movement to the scene. Let's try sky or night sky.

See if this comes up with anything.

Can you hover? This one almost looks like the image we picked. Depending on the length of the video, sometimes it takes a little while to load. So I will just leave it here, and it'll show up once it's all loaded. Sometimes if I'm putting in animals or birds or different smaller elements, it's also really simple to remove the background and place them around the scene to bring more variety into your scene, but it becomes quite content heavy and sometimes it takes a little while to load. So this one, for example, it's not loading. See if I can find another one while we're waiting. So this one looks like it's got clouds moving, and this one's got sparkly stars.

Let's see if this one works.

Oh, there we go.

Can have two side by side and see which one looks better.

So let's crop it to where we will need it.

So the bottom edge is going to be hidden behind the mountainscape. So if we put this behind the mountains, get rid of this, you can kinda see that it's fitting nicely.

You can stretch it out a bit more to get rid of the trees and this bit, but I just want to see how nicely it will blend once we put on screen. Just have a look. Looks like the sky is moving. So if we play everything together, like, doesn't that look so cool? I love seeing this come together. And I actually don't mind the texture of the tree here. So the only thing is from here, this is a seven or eight second video compared to the water. So what you can do is...

Show Layer Timing.

So with this one, we can trim it down to where this ends. So this is nine seconds. We can shorten the whole thing. So the whole animation is only nine seconds.

And that way, it won't just disappear halfway through. And nine seconds might be enough for what you need it for, or it might continue looping, and that's okay too. And the cool thing is from here, you can slowly add in text.

Let's see.

If we use-- I don't know, any type of messaging you want to-- Let's use my title.

You can put title here.

And because you've got the layers already, if you start moving things to the background...

It just looks really cool. This is how I made my cover file. So when you start layering text...

It just makes everything pop.

There we go. And right now, we haven't even animated anything. This is just layering the different video effects from stock templates that you can get directly in Adobe Express. So now if we want to add certain images, say, I want to add a, I don't know, a boat.

What's a nice boat? Well, if we're going surreal, we can put in anything random to bring it all together. Let's see if we can-- Or maybe an animal.

Fish? Actually, fish has a lot of movement, so it actually look like it's not supposed to be there. Let's try a boat again.

You can also use the same image, the background image as a style reference back in Adobe Firefly to create other assets so that they're all the same tone. So if I wanted to come back and say boat...

Might be too short, but at least it's got the same textures.

Oh, it's using a style reference not the composition reference. I should remove that.

Well, it's got some cool boats.

Let's download this one. Let's get rid of this.

We can do boat...

product photography. Ah, this is nice.

So I put product photography because that usually gives you a very clean, crisp background. Because with product photography, you've got the hero item and-- Yeah.

See, I like the ones before. But just to show you, I'm going to download this one.

Doesn't really matter. Any of them is okay. We come back in here, upload our image.

Where's the boat? So if we remove the background-- It's done such a crisp job.

Let me see if I can...

Make it really small so that gives...

The illusion of a really vast landscape.

Can...

put it here. And what you can do really quickly is...

Add animation. So you can use a looping animation, maybe have it bob up and down. Slow speed, slow intensity so it's not too fast and it matches the speed of the water.

That's pretty cool. I'd play around a bit more to get the right perspective so it doesn't look like it's view from the top. But just to give you an example, this is how quickly you can start layering different elements that animate differently to give you some really cool effects. So that's it.

I pretty much did the exact same thing with...

This image, and I added the sky texture. I added different animation elements. The flowers on the right are just image assets directly through Express, and again, I use the water texture in the same way. So final tips and tricks is to be open-minded. Try lots of different techniques. I always like to lay a different style. Sometimes it's picking fur as a material and mixing that with metals. Or if it's something else inspiring, it could be a different art movement that you love, or you start with something that's inspiring or something that's close to you that you already create, whether it's watercolor, physical paintings, use that as your starting base. Don't chase perfection because when you first start, everything you create will feel like it doesn't look very nice. But it's really the 10th or 20th, generation that you're like, "Oh, this is the bit I like." So start collecting the images that you like. Use them as your ingredients to pop into Adobe Firefly to continue experimenting with and start small. So again, this is something very similar. I used another water texture so the movements to the right to be more cohesive. The birds are also another video file. So you can really quickly do some really cool imagery with it or even just to build new compositions with to play with, new ideas that you want to have. So experiment with layering whether that's effects, colors, or movements. Sometimes it's good to be really vague when you use prompts. Don't be too literal because that will give you very literal outcome. Sometimes I put in lyrics that's inspiring me or songs that I'm currently listening to. Even poems that are inspiring you. Sometimes you want to type in a prompt that gives you a sense of feeling. Like, I like to use the words romantic because it softens the final look because a lot of the images it's trained on that would be associated with romantic would be very soft color palettes, maybe, pinks and purple hues that I'm drawn to. And I think the volume of works that you create and you start saving all the images that you like, that's when you're going to see more consistency with your style. And the styles really flow between any medium whether that's your physical artworks, your digital artworks, or your AI outputs. And I think that's really exciting. So good luck, and I would love to see some of your results if you want to share them with me. And my Instagram handle is joychiangart. So if you have any questions, feel free to contact me. Thank you.

[music]

Playlist

Social Media and Marketing

Online Session

Making Animated Artwork with Firefly and Adobe Express - OS823

Sign in
ON DEMAND

Closed captions in English can be accessed in the video player.

Share this page

Speakers

Featured Products

Session Resources

Sign in to download session resources

About the Session

Join multimedia artist Joy Chiang in this beginner-friendly session to bring your creative ideas to life quickly and easily. You’ll learn how to create stunning images with Firefly and transform them into dynamic motion graphics using Adobe Express.

Topics in this session include:

  • Creating stunning imagery using FIrefly
  • Animating your creations using Adobe Express
  • Leveraging AI tools to bring your ideas to life quickly

Technical Level: General Audience, Beginner

Category: How To

Track: Social Media and Marketing, Graphic Design and Illustration

Audience: Art/Creative Director, Graphic Designer, Photographer

This content is copyrighted by Adobe Inc. Any recording and posting of this content is strictly prohibited.


By accessing resources linked on this page ("Session Resources"), you agree that 1. Resources are Sample Files per our Terms of Use and 2. you will use Session Resources solely as directed by the applicable speaker.

Not sure which apps are best for you?

Take a minute. We’ll help you figure it out.