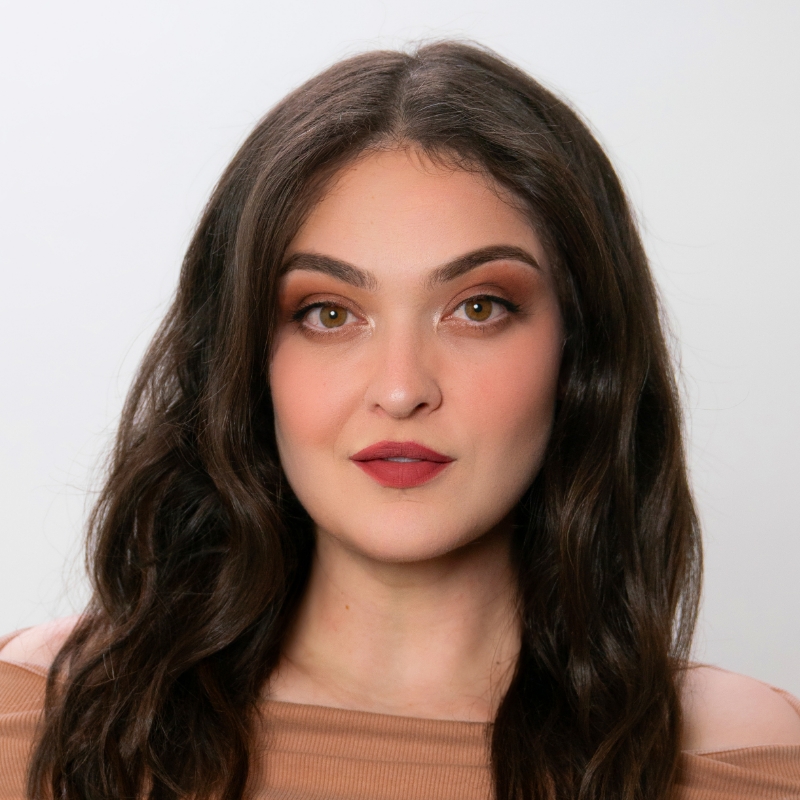
Editing Secrets: Advanced Premiere Pro Techniques You Need to Know

[Music] [Valentina Vee] I'm Valentina Vee. There we go. And you are in Editing Secrets: Advanced Premiere Pro Techniques You Need to Know. I'm not going to talk about myself at all because I have way too much to cover. But I do want to know a little bit about you guys or you people. And first of all, how many of you are full time editors? That's all you do. You sit down behind a computer? Awesome. How many of you are part time editors and you do a lot of other things as well? Cool. And then how many of you work for companies, meaning like you have a boss or somebody who tells you what to do, a client, something like that. Great. Me too. That has been my whole life. I've been freelance for over a decade. I only got a new job a couple of months ago. So a lot of the examples that I'm going to be showing you are examples that I have either directed or shot, but that I didn't edit because now I have people to do that for me, okay? So I didn't use any of the people's work. It's just I borrowed the footage so that I can show you by using the footage, if that makes sense. I just want to make it clear that I'm not borrowing anyone's work. Okay, so the first thing that I want to show you is how I've set up this session. Because you might not know that you can create a production, which is something that contains multiple Premiere Pro projects in it. So you can see here my production, which I'm calling Adobe MAX 2024, it contains this project, which is the name of this session, and I'm calling it the Working Project. So if I open that up, it only contains sequences and some bins. This is all I'm working off of hopefully for this entire presentation. Where did these sequences come from, you ask? These sequences came from the other projects that are open in the production. So I have this project here, which is a music video project. There it is, pulled up Exports Graphic in order please. Footage, Music, Sequences. I have this one pulled up, which is a lot of random examples. I have this one pulled up, which is a series of shorts that I'm doing with my friend Nat. So they're all open, but this is the one that I'm working off of, and I pulled sequences from all of those into one project inside this production. That way I can work across multiple projects at the same time, borrowing the media, and then if I want, I could just close them.

If they're really big and I don't want to keep them open so I can close, for example, Girls World, closed project. But still in my working project, I have the sequence from Girls World pulled up. So that's just a really easy and simple way that you can organize all of your projects. And in order to do this, it's really simple. You just go to File, New, Production, it'll ask you to name your production, find a place on your computer where to put it, and then you can right click within the production window. And you can either add a project to your production, so a project that already exists or create a new project in your production. So just in case you feel lost as to how I'm conducting this presentation, it's all being done through Premiere Productions. All right. Let's start with a few things that annoy me that you might want to adjust for your computer to turn off or on something like for example, this. So here I have a clip from an interview. It's all on one timeline, but as I look through it-- I hate it. Hate that sound. So instead I'm going to go to Settings, Audio and turn off Play Audio While Scrubbing.

Sweet silence.

Kind of like the feedback people gave me in the silent disco rooms.

Next, you know when you go to Edit Undo or you go Command+Z, Command+Z, Command+Z, and at some point you hit a wall and you're like, no, but I wanted more. But there aren't more. Well, if you go to your History here next to your latest action, there's this little circle, you can see it right there. If you right click and go to Settings, you can increase the amount of undos. So going from 20 to 200, ladies and gentlemen very easy. Definitely do that for your projects if you haven't yet. Next, what about when you've lost your project and you go back and you're like, it's okay, because I have it saved, Premier auto saves my versions except it didn't auto save your version from yesterday because it has made 20 more since then and it's deleted the old ones. Well, if you go into Settings and if you go into Auto Save, make sure you increase the maximum project version. Say you're working off of an external hard drive, so go from 20 to 200 and automatically save every 10 minutes instead of every 20 minutes. And you have plenty of room on your hard drive, right? It's a 4 terabyte. Just throw those babies in there. Who cares, 200 project versions. We love it, okay? Next, let's keep going. We have one more. Okay, here's a fun one. So let me find this in the project, and I'm going to just scooch this off for now so we could put it in again. Now let's go look at this information here by going into list view and right now list view here, it has my frame rate and my media start. So if I want to see more of the properties of this clip, I have to go all the way to the right to see what the size of the clip is. But what if this was a bin where all the clips were different sizes, and I want to see them right here? So first of all, let me just do the tilde, which is the little squiggly line on the top left to make it big, and then just drag the column over. So the first thing I see next to the video title is the video info, right? I can also drag the media duration over and then press tilde again to minimize it. So now I know that exact size, right? So let's say that my sequence settings is 1920x1080, right? And we all know this. If we drag something into our sequence like such, it's going to be zoomed in, right, because it's larger than the sequence.

Let's just do 10%.

Hold on.

Okay. There we go. So you can see it's larger than the sequence. So I try to scale it down. Oh, that's annoying. Scaling it down. Oh, my God, that's annoying. So then I go over here and I'm like, okay, I think it's 50. That's also annoying. Maybe you know how to do that. Maybe you know how to do right click and then set to frame size over here. Maybe you have a shortcut for it. Maybe you go Shift+Command+F set to frame size. Whatever way you set to frame size, why are you doing that at all? Why are you doing that when you could just default it? So you just go to Settings and leave timeline and make sure-- Wait where is it? Where is it? It is in-- Well, I have my notes wrong. Valentina, write your notes down correctly every single time. Okay. It's under Media in Preferences Default Media Scaling. And you want to set that to set to frame size. So now whenever you bring a 4K clip into a 1080 timeline, it's just always going to be properly scaled for you no matter when. So now let's just delete this. Press D to select everything under your playhead instead of having to just drag it in, and then instead of dragging it in, I'm just going to place the playhead and do a period. And now it's sized, right, and you can see it has set to the frame size. So those are a couple of things that you should just have already set up before you even start editing. Next, what I want to do is I'm going to go back to my production here and pull this up. So we have this project and it is a documentary project. Let's say that this is a segment of a documentary. In this segment, we have our host doing street interviews like here on the street, and then we have A Cam and B Cam. We want to see the whole thing. We just do the Backslash key, we see the whole thing. Then here are all of the interviews and I want to export this, but if I export it the way that it's set up right now, Command+M, right, and I export it, let's just say I want to do it as QuickTime. Awesome. And I'm just going to do Carnaby Street Interviews. What day is it? Wednesday. Export. Y'all, I've been doing way too many classes. I get lost. Okay, Exports, Save and Export. Sure. What's it going to do? Well, let's bring that export in and then we'll see.

I should have just done this on Media Encoder, but we can all wait 23 seconds, can't we? Here's a poll that I want everyone to let me know. How many of you were affected by Doctor Reverend T-Pain last night? I mean, I was. I was thinking about that man all night.

When he said that he needed to perform the full hour so he could get a Creative Cloud membership, I was like, that man.

Whoo! T-Pain. All right, here we go. Exported.

I could have used the one I had already exported, except I don't want to lose it. And I have learned the lesson the hard way. So, all right, here we go.

Reveal Sequence and Project. Oh, there it is. Okay, great. Let's just actually open up the project that I have for boomers.

There it is. There's my boomers project. Boomers is the name of the documentary. That's what it's called. All right. And here in Exports, I'm going to go ahead and drag in that export that we just made.

Which one was it? Wednesday.

See, this is how we plan things. Okay. Exports.

And this is also why I have two monitors at home. But there's the Wednesday export. Let's put it in its own sequence. And you can see all of the audio tracks, there were many of them, all got compressed into one. But what if I wanted to export those as splits? I wanted to create a split track QuickTime. I can do that. So first things first. You can see I've already done it, but I'll show you how to do it. So Shift Plus increases the size of each of these tracks, but also it gives you the ability to name them. And you can see I've named all of them A Cam Lavalier, A Cam Handheld, A Cam Scratch, B Cam Love, Music 1, Music 2, and Sound Effects. And the way I did that is just by right clicking and going to Rename. By default, they're all Audio 1, Audio 2, etcetera, right? So what I want to do is I want to make a sequence preset that has the tracks and the channels assigned, and then I want to make an export preset that has the tracks and channels assigned so that I can export that, and everything will be split up into splits. So the first thing I'll do Reveal Sequence and Project is I will duplicate the sequence. I don't do anything without duplicating it first, so I just hold down Command and drag down to duplicate it. Go to Carnaby Street Interviews and I'm going to say splits. There we go. Oh, my gosh. 02. Okay. Now I'm going to go to File, New Sequence and I'm going to select the normal default. We have the 1080 23.976. But here under tracks you can see this is the default track names. Instead I'm going to import the track names from the sequence that I was just working on. Load from sequence. Which one is it? Carnaby Street Interview Splits. That's what we just called it. Yes. So here they are. But not only that, right now my mix is stereo, but I want it to be multi-channel. Now think about it. So a two channel track means the left channel and the right channel. It's still one video layer, but it has a left channel and a right channel. Here I have one, two, three, four, five, six, seven video layers, right? So therefore I need to have double as many channels in order for each one of those to be a stereo pair to be left and right. Not only that, but I also want to create a channel that has the mix of everything in it to give people that option. But I don't care if both of the music tracks are mixed together into one channel. So I will choose 14 channels and I'll show you how I assign them. So the first assignment is going to be in mix channels 1 and 2, and also 13 and 14 because 13 and 14 is going to be my mix. So 13 and 14 I'm going to select for all of them. So 1 and 2 and 13 and 14. Next one is going to be 3 and 4, 13 and 14. Then next one is going to be 5 and 6, 13 and 14. Then the next one is going to be 7 and 8, 13 and 14. Then the next one is going to be 9 and 10, thank you, 13 and 14. That was the first music one, right? The second music one is also going to be 9 and 10, 13 and 14 because I'm going to mix that together.

And then the last one is going to be just sound effects in here. So now I have assigned them and I have named them. So I'm going to say Save-- Go back to music 1. Did I mess up? Oh, I didn't thank you. See you never get this kind of interaction in the silent disco rooms. People just let me mess up. And then later it's like, what did she do? Okay. And then save preset. So I'm going to name this Boomers Interviews Street Wednesday and press OK. So here it is. I'm going to make a new sequence. I'm going to call that 03 Carnaby Street Interviews Splits and also channels.

Okay. Then I'm going to open up the one that says splits. I'm going to select everything, Command+A copy, Command+C, copy down to here. There we go. And you can see the difference right away in how many tracks I have here versus here. I have just two channels here. I now have all of them, right? Cool. So now I want to export this as a split track. So I'm going to go to File-- Well, no, we're not going to do that because we're advanced Command+M. And then here under Audio, under More, now I have these and I need to make sure that they're here by default. You're actually not going to get these. You're going to get just the one. So you have to change everything to stereo and dedicate these and then keep adding them until you have enough of them built up. But I already did that because I don't want to waste the time. And you can now export them. So I'm going to say Carnaby Street Interviews Splits Wednesday.

Yeah. Great. And I'm going to send a media encoder because I'm going to be smart about this. And I'm going to continue working as I chat with you as this exports.

But you can pretty much assume what's going to happen, right? It's going to export a file that then when I bring it back into Premiere, it's going to have all of those layers out as layers instead of baked in together.

The point of doing that is if you're sending it out to someone who then needs more control with it and to export nondestructively. So if you want to have as much information as possible when you're handing it off to someone, for example, if you're handing something off to color, you want to hand it off in the highest quality possible. You want to do ProRes 4444, right? The same thing here. If you're handing it off to sound, you want to do it in the highest quality possible if you're handing it out to someone else. So you want to have those split tracks. Sometimes you might not. Maybe your particular way of working doesn't require this, and that's fine too. Listen, do what you want.

Okay. Ooh, hold on.

All right. Splits Wednesday. Oh, there they are. The splits.

They've split. I can solo them. [Woman] I'm starting my own solo music-- Right, and it's an export. Cool. Okay, moving on to the next thing. Let me go into my Prediction. There it is. Next thing, okay. So this is a two camera interview. So A Cam, B Cam. And we have this audio here. Now I could-- Oh, this is for a reality show that is already out on Nebula. It's really funny. It's called The Getaway. I shot it, I was the DP, and this is one of the confessionals. So this guy is basically talking about some other girl and what she did to him. Etcetera, etcetera. So I could just listen through to it and edit it this way. [Man] I didn't have to try that hard and challenge. Given that Georgia is honestly like the Swiss Army knife of being cheap. Okay. And then if I wanted to insert a cut here, right, I could do Command+K, except that only cuts the top clip because the top clip was selected, right? So I could do Shift+Command+K and insert a cut and that overrides any sort of selection. Or I can go to sequence and deselect Selection Follows Playhead so that it will never select the top clip when I'm moving so that Command+K does work, or my Q and W shortcuts work. So let me go to the next piece that I want to cut out.

Honestly, even if I try to sabotage it, Georgia wouldn't let me. It was just too obvious if I tried to sabotage it. But not only that. So I want to insert a cut here and also ripple everything forward. So I just press Q, we all know that. But I'm also very lazy and I don't want to hear him talk or listen to anything that he has to say. So instead, I'm just going to go to the Text tab. And when you go to the Text tab and you go to Transcript, there's usually a big old button here that says, do you want to transcribe these clips? I've already done it, so I can't do it again. But you can see the transcription is here. So if I wanted to not listen to him and just edit this, I could. So he says, and that was more important to me than getting money at that point. So I was like, really? So I want to cut out so I was like, really, I'm like, because that's just filler words, right? Delete. And it deleted from the sequence. So I'm going, oh, God, I look to my right and I see this and I think, you know what? I don't need that.

I cut it out so I can do the whole thing right from here. Really, really cool. And then if I wanted to send out this interview transcript, I can just click here. Go to Export, Export to CSV File. Put it where I need it to be. So this would be in the Getaway Documents, save and then I can pull it up.

Oh, my God, wrong-- What am I even-- It was T-Pain. Blame T-Pain, okay? There it is, right? And then whoever is your boss can read that.

All right, let me just make sure I have my notes here. So I just want to make sure I'm covering absolutely everything that I wanted to cover. [Man] When you do those cuts, the text cuts, do you Morph Cut in between those? The question is, do I Morph Cut in between those? And I'm going to be really real with everyone here. Morph Cut doesn't work as well as you think it does. Every time I-- Thank you, thank you, thank you. When I'm seeing stuff like Gen Expand I'm like, can you add that to Morph Cut, please? Can you just give a little bit of sweetness that AI sweetness to Morph Cut because Morph Cuts been effed up forever? But also I wouldn't do this with this because it's not on a tripod, it's on a-- We're handheld on all these interviews. So the background is not the same either. But good question on Morph Cut. Okay.

Okay. One thing here is selections. So usually I don't know why it's not here, but usually you have something that is linked. So you have linked selections, right? When you drag in the audio and video together, it's linked like this when you select it. And say you wanted to deselect it, you wanted to select just the audio, there's a couple of ways to do that. A lot of people do this by locking the track, and now it's like I have the audio. Why would you do that when you can just Command-- Sorry, Option click. You can just Option click to select the audio. Or you can break all of the links in the whole timeline by clicking this button, Link Selection. So now nothing is linked until it is again. You click the button and now it's linked again. So that's one thing I wanted to show you. Another thing I wanted to show you is, okay, let's just say that I have cut this up some more. There we go. And I undo Link Selection because I want to checkerboard.

Oh, my gosh.

I also just got a Mac, you guys. So I'm not used to these shortcuts. So don't blame me if I don't know exactly what button I'm pressing, okay? Because like, oh, my God, I was on a PC for years.

Let me just on-- It will get easier. At least I have AirDrop. By the way, speaking of AirDrop, if anybody wants to take a cute photo of me and then airdrop it to me later so I can send it to my parents, that would be awesome. I'm just saying. Anyway, I don't know why it's not working, so we're just going to do that and we're going to do disable enable by going to Shift+E. So there we go. All right. But y'all probably know that that's probably too easy. Next. This is cool. All right. Let's do this one. So we have, number one, you want to find music for your project. How do you do that? Well, you can go to anywhere, or you can just stay in Premiere here in the Essential Sound panel. You're probably used to the Edit tab. Well, there's also a Browse tab where you can browse music by whatever you want. So by moods and genres. So you can type in "I want dreamy and I want house." And these are the dreamy house tracks. And if you wanted to put it into something like for example, you wanted to put it in here, you're looking for music for your documentary, doo doo doo doo doo, and you don't have that music yet. As long as you click Timeline Sync and put your playhead where you want that music-- It's like auditioning the track where you want to audition the track. This is the volume rocker. You can audition track by track by track. So you can start with this one.

Is something soloed? Let's see. Let me actually go to-- Right there. - [Man] So you get a sense. - Okay, there we go.

To get a sense of how big an impact the boomers adolescents-- Don't like that. Go to the next one. To get sense of how big an impact the-- Don't like that. Go to the next one. To get a sense of how big an impact-- - Don't like that. - To get a sense of how big an impact.

To get a sense of how big an impact the boomers adolescents had on popular-- Happy tropical pop sounds good. And I can just drag that in easy, right? So that's what I've done here.

There it is. So that's what I've done here. Except I know the exact track I want and the exact track I want is called Fashion Summer Promo. So I'm just going to look that up, make sure that nothing here is selected so that I can actually find it. Fashion Summer Promo.

There it is. And I'm going to drag it in. Now a lot of people have needs to have a track that's shorter than 2 minutes and 14 seconds. Maybe you're making an Instagram reel or something and you need something shorter. So something that I'm sure a lot of us are used to is cutting down music yourself. So you put a cut here, you bring the bottom in, and then you try to find a logical match point to the beat, right? And you're looking at the tracks and you're like, okay, let's see, let's see. Let me zoom in. Let me see what's going on. Okay, I'm doing Option+Left. Command+Left I should say. But it doesn't quite line up. It lines up but not quite. See the bottom one jumped a little too far to the left. And if I go Command+Left to nudge it one frame to the right, it's a little too far to the right. Here it's a little too far to the left. It's not perfect. And I try to zoom in. It's the max that I can possibly zoom in. Did you know you could zoom in even further if you just click here where the numbers are, where the timeline is, right click and show audio time units, and that will allow you to zoom in within the frame itself to line it up even more perfectly than it was lined up before.

Yeah, for sure. One more time. So it's just up here where the numbers are. Right click, Show Audio Time Units and that'll help you go even farther than the frame accurate.

So then you can-- You're like, okay. Yeah. Now I've shortened the music, okay, let me do just Option+Up and then have a quick little fade here. Command+D with my default transition.

Go up to jump to that cut point. Oh, did I-- Oh, let me turn off audio time units. There we go. And then Shift+D there we go. There's my default transition. Great. Let me just drag it out a little bit. Let me listen to how that sounds.

Oh, my God, it's so loud. Okay, let me bracket down just to make it less loud. Bracket down. There we go. [Music] Fine. It sounds fine, but that took so long. That took so long. What if-- Yeah.

The bracket key will make something quieter or louder on your decibel scale, yeah? So I hate that. Don't want to do that. That's too much work. Too much work. So this is an Instagram reel, people. We're not Mozart. So instead I'm going to go over here to the tool hiding behind the Ripple Edit tool. It's the Remix tool. And now I'm just going to grab the end of it and move it to whatever duration I want.

And it's going to introduce those cuts automatically for me. And let's play through the cut and see how it did. Play through this one. [Music] That's one of the cuts. Let me bracket down. - [Music] - Perfect. So all of those little squiggles are where the cuts were. So let's just say I've already done that, right? Because I have. So here it is again. I've already done that. Not only have I done that, but I've put markers up at the top to the beats in the music, and that was easy enough. I was just pressing M as I was listening to it. We know this, listen to it. M, M, M to the beat of the music. They're all laid out. Now I want to do a little commercial for my local coffee shop and I have footage for that. But unfortunately that local coffee shop sent me all the footage as one big all glob together. So it looks something like this.

It looks something like-- Hold on.

This is when-- There it is.

My apologies. I've done this so many times that sometimes I have to redo it.

Okay.

Okay, let's just do that. Okay. So they sent everything to me as one file, as one clip, and I want to split it up. So instead of looking for the cuts that I need-- Okay, where is the cut? Is it-- Okay, right there. One, two, three. Make sure the audio time units are off. Yeah. One, two, three, four, five. Going left a bunch of times to find that perfect cut point. Oh, my gosh, where is that cut point? Oh, gosh. Okay, there it is to the left a bunch of times. To the right a bunch of times. Okay. Command+K. Great. Where's the next cut point? Right there. Okay. To the right a bunch of times. Okay, there's the cut point. Great. And now I'm pancaking. So I'm taking this one with the music. I'm pancaking it underneath, and then I'm bringing it in. Okay, that's too long. So then I turn snapping on by pressing S, I delete that. Oh, my God. Wow, that's a lot of work I don't need to do ever again. So I go over here instead of doing all this jazz-- None of that.

Hate that all my homies hate that. So instead what I'm-- Oh, and by the way, I extended it by pressing Shift+Q. So instead what I'm going to do is right click and go to Scene Edit Detection. And not only is it going to apply a cut point at each spot, but I can also create a bin of subclips that's going to put all of those cuts into a bin for me that I can then use later. So let's just say that I've already done this, because I have, and the bin looks somewhat like-- Let me do the full Monty, the full bin. Where is it? There it is. Okay. The bin looks something like this. And all the clips are all cut up. And now I can use them to my advantage. So let's just say that there's a couple of clips that I want to use for this little one-minute production, but I don't want the full clips because some of these clips they're long, they take a full two seconds. Valentina. Full seven seconds, right? I don't need a clip for seven seconds. So I need to set in and out points, right? And we all know this already I and O and period, right? Or locking this and period and whatever and then going to the next one going to the next clip I and O and period or just doing it from here without even going up here. So where's my I and O and period? Doing it from here. Where's the guy? Oh, he just does a little cheers. I and O and period. We can do that and then we can go and we can even use these and turn snapping on and snap it to each marker. Move it over. Yeah, sure, sure. We could do all that. We can even-- We have some gaps. We can even close all gaps like this.

Hold on. Does it work? I'll show it. I'll show you later how to close all gaps. I don't know why it's not working right now. We're not going to do any of that. Instead, what we're going to do is I already pre-selected some over here, and I also pre-selected the in and out points of them so that I know exactly what section of each I want, not up here but within the bin. So you can see right here there's that little in and out point. And what I want to do is select them in the order I want them in my edit. So I want to start with this wide, then go to the coffee, then go to the presented coffee. Then I want a little bit of ambiance, then the burger, then the biting of the burger, then a little bit more ambiance, maybe a little bit more, then the wide and then the medium, then this and this, and then the name of the restaurant. And then I just go down here to Automate to Sequence and I'm going to say Selection Order, so the order in which I selected it and place them at the unnumbered markers. I want to use the in and out range that I've set in each clip. And I want to ignore the audio because the clips they do come with audio, but I don't care because this is just going to be like a little music video type commercial. And I'm going to press Okay, there we go. So it has placed all of those-- Wow. You could say wow, you could say wow. Wow, wow. So it has placed all of these at the markers, and I just extend some of them because a couple of them were too short. But now. But now.

[Music] What did that take three seconds or what? Wow.

She's got me back there. That's back when I ate bread. That was a good time.

Okay, great. Wow. And then the client comes back and they're like-- Actually, I really don't like this section because she has her mouth or she has her hand up to her mouth, but in the next one, her hands are down. So can you do something about that? And I say, heck yeah, I can, I can-- One second. I can just slip it, so I can press the Y button and then I can choose a new beginning and end to this clip. So I'm going to end it where her hand is down at the computer. So on the bottom left here is the beginning of the clip. On the bottom right is the end of the clip. On the top left is the end of the previous clip, and on the top right is the beginning of the next clip. So it shows you where you're situated within this edit. And then you play that through and then your client comes back and they're like, "Actually I hate it." So because she's not doing anything active and you go, "Yeah, that's why I did the thing I did in the first place." - So did you have a question? - [Man] Yeah. I just wanted to ask how did you get to placing-- How did I get to placing the clips? So here in the bin at the bottom is Automate to Sequence. It's this little button that you might have never seen, but next to beside the search function. So it's right there. And then if you click it, you can do selection order. You can do the sort order. You can do it at numbered markers. Or you could do it sequentially. And then you can use the in and out range. Or you could put stills in there and say how many frames you want per still. So that's pretty cool. All right.

Is there a shortcut for it? You can certainly make a shortcut for almost anything.

Okay. So we did show audio time units. I'm just trying to make sure that we got everything. Okay. So let's say-- Let me go back to my little-- Also, when did this-- This started at 2:30. So I have like until 3:30. Great. All right. We're going to get through. We're going to get through it, you guys, I have so much to show you. Okay. Next. Here we go.

Okay. There we go. All right, so I have this sequence here. We're back at Carnaby Street with Tom, and I'm ready to send this to the client, right? So right click before I do it, right? Right click Reveal Sequence and Project then-- Hold on. Oh, my gosh. I Command dragged it to duplicate instead of right clicking and duplicating because that's for people who have time. Carnaby Street 06 for client or actually I'm going to say Client Notes because this is going to be the one where I put their notes or I address their notes. So that's ready to go. And I want to just upload it directly to the client. So I'm going to open up the review with Frame.io window and then simply just upload it into here Active Sequence Carnaby Street 06. And I'm going to say Wednesday and Upload. And that should just send it to Media Encoder and automatically just upload it to the back end. This is very helpful when you have a lot of different assets or projects and you not only do you not want to wait for the each and every single one of them to export out of Premiere, but now you can just be assured in the knowledge that it'll get to your client, and it'll just start uploading as soon as it's done exporting over here from Media Encoder. So it's still exporting, and eventually it will finish and eventually we will get notes. But let's just say that we have already gotten the notes.

So here are the notes. And you can see our client has left us some notes and we want to address them. So the first thing that we do right now if we just go to the note, our playhead doesn't jump over there. So we got to go back to the beginning and go over here to link playheads and now they're linked. So now when I go over to the note, our playhead should jump to that note. And you're thinking, "That's great. That seems fun, but can it be even more integrated?" It can. So if you go over here to Comments, click on that, then download the comments and import them, they will be imported as markers. So now you can address the comments directly on your timeline by just hovering over and you can see what the comment is. And the comment says cut out the word "ah." So that's what I'm going to do. I'm going to go over here and cut out the word "ah." [Man] Ah. Great. So I'm going to press Q to cut that out. But look what happened. None of the other markers rippled. So now everything is off. All of the comments in the markers are not where they were before. So if I want to address this comment which says, "Too bright," how about this one? "Too bright." How about this one? Cut into close up on Tom? I may not know what that is. Or this. What does that say? Audio Hit Fix. So to have the markers ripple, it's very easy. So I'm going to Command+Z to undo. Just go over here to markers and make sure you have Ripple Sequence Markers selected. So as long as Ripple Sequence Markers is selected, you can just take this-- Ah. And cut it out and watch all these markers over here. Watch all these green ones. They ripple. Yeah. So make sure Ripple Sequence Markers is always selected, ladies and gentlemen. Now next. Next, next, next. We did the ripple. We added the music already. Okay, how about something like this? A lot of people don't know. So this is a music video and you can see we have a ton of tracks. We have 42 different tracks and I have done some checkerboarding here. So some of these tracks are enabled. Some of them are disabled based on which take I want to use. And I've sent it to the client. The client has approved it and I'm going to send it to color. Let's just say, or I just want it to be a little bit more simple for me. So what I'm going to do is what am I going to do? I'm going to do this, this bullshit right here. Delete. Okay. Delete. Okey-dokey. I'm deleting. Yeah. No, no, I'm not going to do any of that. Why? Because I took my class. So I'm going to go to Sequence, Simplify Sequence.

And I'm going to make a simplified sequence. I'm going to close vertical gaps. And from the video tracks, I'm going to remove empty tracks, remove disabled or muted clips and tracks. And I'm going to click Simplify.

Bam. It's all down here now. All of my selects were down here. Wow. Okay, great. Great. Yeah. It's fun, it's fun. So it's the same thing. Except now it's been simplified.

Really handy also for if you or a computer just can't handle the heat, 42 tracks of 4K, that's a lot. So now you can work with it a little bit easier. Now you can be like, okay, well, oh, my God, that is-- Good morning. Yeah. Good afternoon. T-Pain. We're going to-- Shawty. Okay. We're going to watch it through. [Music] Okay, maybe I don't like this cut, right? Because she looks-- Let's see, she looks down at the end. So I want to adjust that. I can address it here by just pressing N and making that adjustment. It's called the Rolling Edit tool. I call it the Nudge tool, but whatever the Rolling Edit tool. So now she's connecting with the camera on both sides. And yeah, I can continue doing that for whatever. But the Nudge tool, very easy, very fun to work with. The Slip tool and the Nudge tool, I use them all the time inside the timeline. All right, okay. Moving on to Effects. So actually no, moving on to one more thing before we do that. So this is a series of shorts that I'm doing with my friend Nat. And you can see that she's very short and the guy that she's talking to is very tall. And when they are talking back and forth, I just want to make sure that the viewer's eye is guided to not make it confusing, right? Because it's like a one minute short and I don't want the eye jumping everywhere. And the best thing to do that with is just to have an eye line match. So the height of where their eyes are on the screen should match up across the whole thing. I wish that this was photoshopped so that I could put in some rulers and some guides for me. Well, it is Photoshop and you can do that. So here in the Button Editor, that is one of the things that you can add to your buttons. You can use show rulers or show guides. I have them both here. And the way that you add it is you just drag it in so I can just open up my guides and open up my rulers. And here I have a guide. But the way that you create it is just dragging it from the bottom. So I'll find what my ideal eye height is, which is maybe like here, that's my ideal eye height. So that all of the other clips, I can go ahead and change and manipulate to be that eye height.

Oh, hold on. I am selecting the adjustment layer.

There we go.

Am I still selecting the adjustment layer? Yes, I am. Okay, let's just lock it.

There we go.

Oh, my gosh. Hold on.

Let me just do it there.

All right. There we go. And for this one I actually am going to do what is it? A selection follows playhead. So just selects what's ever under my playhead.

So I can line up all of the eyelines. So the entire thing is smoother for the viewer. And of course, you can do this with anything, right? And any time you need a guide, you need to match cut a bunch of things, you need to have a phone in the middle of the frame, and the phone needs to be in the exact spot in the next section of the frame. Then make four guides, make one on the left and one on the right. And now all of a sudden, your phone is in there and everything's lined up perfectly, right? So that's really handy. Okay, moving on to the next, just a real quick note about footage that is raw. So if you're shooting raw, if you get raw footage like this, you can go ahead-- Let me turn off the guides here. You can go ahead and color it within Lumetri if you want. So right now if I go into Lumetri Color, there's some color correction on here. But let's say I wanted to really have a lot more dynamic range. So I wanted to bring up the shadows, but I'm losing. I mean, it's pretty well exposed. I don't shoot things that are badly exposed, okay? So but let's just pretend, right? Pretend that there's shadow and it's gross and pretend that I made some sort of mistake where I shot it at the wrong ISO or I shot it at the wrong white balance. I didn't, but pretend that I did, right? And it is a red clip. So when you go into the clip in the source monitor right here and you go into Effect Controls, you got to deselect that, make sure that the clip is selected. So let me just find it in the project, reveal and project. Oh, it has to open the project. Hold on. Because the project wasn't open because I'm in a production, right? So the actual project that the clip is in wasn't open and I was still accessing the clip. Mind blown. So here's the clip. And if I go into Effect Controls, these are the red raw settings that you can change after the fact. So if you messed up on your white balance, if you messed up on your ISO, you can go ahead and do it there instead. So let's just add some exposure.

There we go. Let's change the white balance. Let's do like 5600. There we go. Let's add some tint.

There we go. So it's your camera settings saved again, right? And this is why when it's something super important and you cannot shoot it a second time, like if you do weddings or something like that, you might consider getting a camera that shoots raw and not ProRes RAW, okay? I'm so sorry to a lot of these Sony mirrorless cameras that only shoot raw. If you like, connect an Atomos recorder and it's only ProRes because it doesn't give you all these options. It gives you one slider for just the intensity and that's it. But if you shoot red, if you shoot black magic, if you shoot almost any other raw, it gives you a lot more options. So that's something I wanted to show. And lastly, we're going to end on this because I think it's cool. So we have two clips on top of each other. We have this clip where you can see we pan the camera to the left so that the girl goes to the right, and then we have this clip of her eyes blinking. And what I want to do is I want to put one on top of the other in like a little box on the right side. So what I'm going to do is pull up the Effect Controls, right? I'm going to do crop and put that on. This is how you would do it if you were doing it wrong or doing it a different way, let's just say. You can even pull this in. You don't even have to go over here to the crop percentages. You can just-- Yeah. I'm cropping. I'm cropping. Why is it at 10%? Let's just do 25. Yeah, there we go. I'm cropping more or less. More or less a square. Cool. And then I'm going to reposition it over here. That's where it ends. And I want it to come off from-- Oh, she moved. Okay, let me move the crop. Great. Now I'm going to position her. Maybe a few seconds into it, I'm going to add the keyframe, but then-- Okay, so I want her to end up there, but I want her to start off like that. So I want her to pop on maybe a little bit faster than that.

Okay. So let's see something like great. And then the bottom one at the same time I want to keyframe the scale. So I want it to start there and end the position. And then I want to zoom in, move it over something like that. That's where I want it to end, right? Cool. Except she moves within the frame. So then what are you doing with that? Oh, okay, I guess this is what I have to do. I guess I have to keyframe everything. And then as she moves, I'm-- Oh, okay. As she moves, I'm going to have to change the crop. I'm going to have to change the crop to be like this, I guess, and then move her over like so, and sure, except it's not 100% accurate and it looks unprofessional, right? Look at the edge, right? It's moving because you just guesstimated estimated and you might be like, no, no, no, I'm smart. I'm actually going to calculate percentages. I'm going to be like, "Oh, it's 20 pixels off to the right." And then I'm going to move the position. No, no, don't be doing any of that. No, we're smarter now. We've taken this class. So instead of doing any of that, what we're going to do is we are going to use an adjustment layer with a transform control. So get rid of this. Get rid of this. Get rid of all this. Redo, undo, scale to frame size maybe a little bit in. Okay. So I'm going to put these on their own separate thing. And I'm going to add a adjustment layer. So reveal in project there's the project. I'm going to in Graphics Add an adjustment layer.

There it is. Put it on top. Great. And then on the adjustment layer I'm going to find the Transform Control, transform.

And I'm going to find the Crop Control, crop.

So now what these transform and crop controls, all I'm going to do is create-- It doesn't even matter where she is in the frame, I'm just going to make a crop for a square, square-ish smaller square.

There we go. Great. And then I'm going to find a keyframe where I want the position to end. Great. So no, not that one on the-- This one, not the Clips Transform Control, the Transform Control over here that I added. So I'm going to move. Hold on.

What is happening? Why is that? Hold on. What did I do? Oh, I have to crop it first and then transform it. There we go. So I'm going to move it off. The order matters, people, is what we've just learned.

There we go. Add a keyframe.

Add this keyframe. So now it has popped on, right? It's popped on, but it's an ugly motion. And, boy, I wish that Premiere had Motion Blur just like After Effects does. Well, if you use this, then it actually does. So it should be here under shutter angle. So if I add something like 180-- Hold on. Let me go to the front. Wow. Motion Blur. Cool. Except she's not in the middle. Okay, that's fine. I can now position her. Now I've created a border under which I can position her. Give her her own transform controls. Therefore, the border always remains the same, right? So I can do something like make sure that she is centered when she comes out. So use-- Now I'm selecting her at the bottom, right? So there we go. Position her there. Then as she moves, I'm moving the layer underneath of the adjustment layer. So there we go, right? So now what I can do is I can just nest this right click Nest. And I'm going to say Top Layer Crop Girl whatever and put it on top. And now double click.

What if the client goes, "Oh, I want to change the clip"? And you bring in a clip that's has different dimensions, a completely different clip from completely different something, right? Well, all you got to do is just put it underneath of something or put it on top of here, just swap it out, right? Because it becomes a precomp almost like in After Effects. So if I want to change it to this, for example, I bring that in and then I position it within the circle.

There we go. So then in my main comp, I've just very easily swapped out that footage without having to copy paste all of those keyframes, without having to copy paste properties, because I'm using the Transition Effect on the adjustment layer. And let me just double check my notes, but okay.

Okay. Say that you have-- Okay, one last thing before we go is say you have a ton of effects on something. So you have all of these properties that are keyframed, but then you also have some other stuff like video effects, I don't know, generate. Let's do warp wave warp, something like that. Great. And you have keyframed the wave type, and you have also somehow keyframed the wave with-- I'm not saying this looks good, everyone, I'm just making it up, okay? Okay, whatever. Let's just say you have a bunch of this stuff and you're lost in the source. There's just way too many effects, way too many keyframes. You don't know how to find the keyframe that you're looking for. Down here is a little Filter button that I don't know if you've ever seen, and you can just click on it and show only the keyframed properties so that you don't show everything.

Somebody said dang, which I'm guessing is a good thing. And then one more thing-- I think I completely skipped it. Yeah, here it is. Okay, so one more thing I want to show is this. So if I wanted to make a grid that looks like so on top of this clip at the bottom, so I wanted to clip at the bottom, but then I wanted four clips to come on top, right, one, two, three, four. And let's just copy that motion control over so that you see them. Okay. So I wanted to copy all of these.

One second. Let me check my notes. I want to make sure it's right. I want to make sure it's good. Okay.

First of all, there we go. Okay. So we wanted to put these in the corner. So I'm going to put this in the corner. But I'm estimating the corner. Okay, I think it's going to be 479. And I think this one's going to be what like man I wish I could snap to the Program Monitor the same way that I snap in my timeline what you can. So I'm going to just undo that and turn on Snap in Program Monitor, which is another hidden button here in the Button Editor. If I'm blowing your mind, nod. So you just turn that on and then bam! Should be snapping. It's snapping all over. Yeah. Very cool. Very cool. Nerds clapping for the snap. I love it, I love it, I love it. Okay, so let's say-- Yeah, let's say I've snapped, whatever. Here's my snap, I've snapped. And I have all of them coming in. I've added some keyframes. This is my last tip and it's the best one. It's the best one because I say so. So I've added the keyframes. So they come onto the project like this, right? Boring. I want them to be a little bit staggered so that they're not all doing it at the same time, right? So I'm going to-- Okay, this top one, I'm going to move the keyframes off a little bit so it comes a little bit early. And then this bottom one I'm going to keep the keyframes where they are. And then the next one I'm going to move them off a little bit just so that the keyframes are staggered, right? And I look back at it.

No, actually, I hate it. I don't want that. So I'm going to bring all the keyframes back to where they were, right? So I'm going over here. Oh, God. Where is that keyframe? It disappeared beyond the edges of the clip. What a nightmare. So now I'm going to have to do this awful thing where I extend it. There's the keyframe, I grab the keyframes, I move it over. No, folks, you do not have to do that. So I'm going to undo. Just go over here to the Hamburger Menu next to Effect Controls and deselect Pin to Clip. And now, ooh, you can see your keyframes past the edge of the clip.

So you can grab them and move them over. And with that, I end my session. Thank you so much.

[Music]

In-Person On-Demand Session

Editing Secrets: Advanced Premiere Pro Techniques You Need to Know - S6611

Sign in
ON DEMAND

Closed captions in English will be added in early November.

Share this page

Speakers

  • Valentina Vee

    Valentina Vee

    Director of Motion Pictures, Adobe Community Expert, Nebula Motion Pictures

Featured Products

Session Resources

No resources available for this session

About the Session

Adobe Premiere Pro has many details that you might have overlooked as an editor. In this jam-packed session, director Valentina Vee will speedrun as many hidden tips and tricks as possible in order to make you a faster and more productive editor. Get your notebook ready as this session will run at a feverish pace.

You’ll learn how to:

  • Master split-second timeline shortcuts for editing efficiency
  • Optimize project setups for turbocharged editing workflows
  • Seamlessly manipulate footage with cat-like reflexes
  • Maximize the impact of effects, graphics, and music with lightning-paced precision

Technical Level: Advanced

Category: How To

Track: Video, Audio, and Motion

Audience: Post-Production Professional

This content is copyrighted by Adobe Inc. Any recording and posting of this content is strictly prohibited.


By accessing resources linked on this page ("Session Resources"), you agree that 1. Resources are Sample Files per our Terms of Use and 2. you will use Session Resources solely as directed by the applicable speaker.

Not sure which apps are best for you?

Take a minute. We’ll help you figure it out.