Create travel videos that inspire wanderlust.
Learn how to plan and execute a video of your globetrotting expeditions. Get pro tips and advice to make stunning travel stories out of your adventures.
Immortalize your travels with a video.
Travel videos are a great way to document your trip, tell a specific story for a client, or just share the sights and sounds you experienced with the world. Whether you’re exploring the pyramids of Egypt, the skyscrapers of New York City, or the tropical waters of Thailand, learn how to make a video of your trip that you’ll want to watch over and over again.
Prepare for your trip.
When it comes to making travel videos, any time spent planning is time well spent. The preparation phase might not be as fun as filming or traveling, but it will help you make the most of your time, and it’ll give you the best chance to come away with the footage you need to make the best travel video you can.
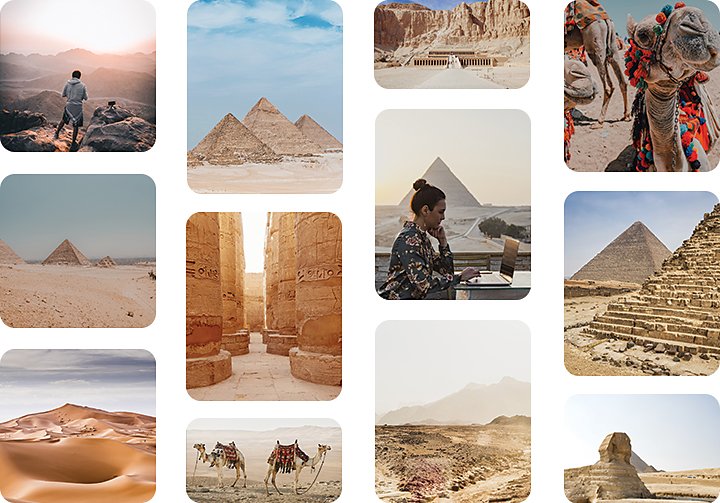
The first step is to research your travel destination and find inspiration. If you’re going on an expedition to Antarctica, this could mean finding out how to dress for the weather. If you’re going to Barcelona in Spain this might include looking up architectural points of interest. Logistics, location scouting, and getting familiar with the local culture will all help you plan your trip and your video.
“I find travel inspiration on social media,” says photographer and videographer Tiffany Nguyen. “So whether it’s Instagram, Pinterest, or a blog I saw, I usually have things bookmarked into a folder on my phone.” Next, Nguyen pins the different locations she wants to visit on Google Maps and color codes them in order of priority. “That way I can plan out a route, and I am not wasting my time jumping from point A to point B,” she says.
Map your story.
After you’ve done your scouting, start to visualize the narrative arc of your video. This process is also known as storyboarding. Your storyboard could be as simple as loose sketches, or it could describe the sequence of your video shot by shot. “Video is very time consuming and the window when you have good light is very small, so it’s important to have a good game plan,” says Nguyen.
One advantage of going through the storyboarding process is that you realize what shots you’ll need for your video. Now you can write a shot list to help you keep tabs on what footage you have and what you still need.
“If you have a strong storyboard and shot list, it’ll be a lot easier for you to put the timeline together and create the sequence for the video,” says Nguyen. “The most important part is being able to tell a story. You may have a bunch of epic clips, but if you don’t know how to tell a story and put it all together, it falls apart.”
If you’re working with a client, the pre-production process is almost identical, except that you’ll likely be given creative direction or a certain script to follow.
“It all starts with research. I have a client meeting, and then I sit down with my producer and we figure out how we’re going to execute this project. Then I write the script,” explains videographer Bevan Waite.
“The script dictates the next series of preparation documents, which would be the shot list, the call sheet, and any travel logistics that need to be organized. All of these organizational documents reference the script and ensure there’s an allotted time and location for every aspect of the script to be executed,” says Waite.
Find the focus of your film.
From the moment you start planning to the final edit you make, the most important thing to do is keep the big picture in mind; let it drive all your decisions as a filmmaker.
Another way to think about this is to ask yourself what your goal is, what the purpose of your video is. Are you making a travel guide for the Amalfi coast, a documentary of your road trip through Scotland, or a sponsored travel adventure through the Amazon rainforest? Or do you simply want to make an epic travel video as a keepsake of your trip?
Once you have your overarching purpose figured out, the rest of the planning, filming, and editing process will fall into place much more easily. Whether you’re a vlogger who wants to show their subscribers a day in Bali or a blogger who wants to add a video component to your post about the best way to see the Grand Canyon, there’s no limit to what you can do with the video format and a desire to explore.
“Some trips I totally fly by the seat of my pants. And that’s okay; sometimes you can schedule time to not know what the next thing is,” says Waite. “But it’s always a good idea to have that larger vision in the back of your mind, so you know what you’re trying to accomplish.”
Pack your camera bag.
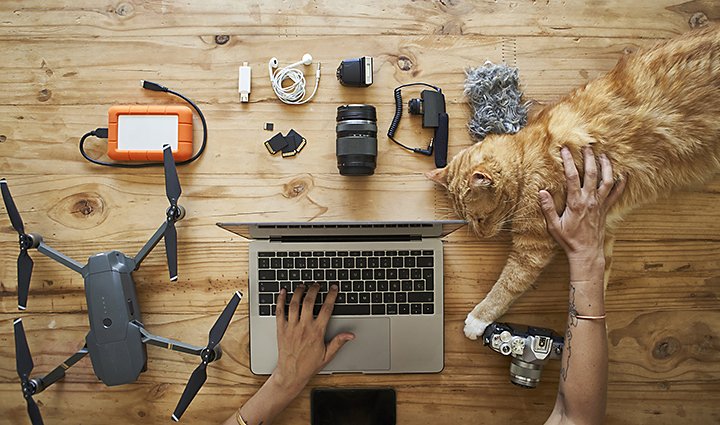
Now that you’ve got your vision, it’s time to pack your bags. The best strategy in the gear department is to keep your kit as minimal as possible. “Especially on travel shoots, where you’re going to four or five different locations a day, you want a really compact, organized camera bag. That’ll allow you to move more easily,” says Waite.
Mirrorless cameras are your best bet for cutting the bulk without sacrificing image quality, but you can use whatever camera you have that can film video. If you’re making a video for a client, it’s a good idea to bring two camera bodies so you have a backup in case one breaks, gets stolen, or gets lost.
“You don’t want to have a huge camera, because that draws attention to you and makes it hard to capture candid moments,” says Nguyen. GoPros and other action cameras are always a good idea to bring, since you can mount them anywhere and they take up virtually no space.
Finally, consider bringing a drone for those stunning aerial shots. “I love having aerial footage in the intro of my videos,” says Nguyen. “An aerial clip grabs your attention right away.” If you do decide to bring a drone, make sure you’re licensed and can legally fly in your chosen location.
“I almost always carry multiple lenses,” says Nguyen. “I have a wider lens, like a 16–35mm, and I also have a couple prime lenses.” While prime lenses are less versatile in focal length, they are more compact and their image quality is often superior to zoom lenses. To round out her kit, Nguyen brings a telephoto zoom lens, which allows you to capture subjects you can’t get close to. These lenses also create a beautiful compression effect for your scene.
But if you want to go minimal, a solid midrange zoom lens such as a 24–70mm can make a great all-in-one kit.
Stabilizers
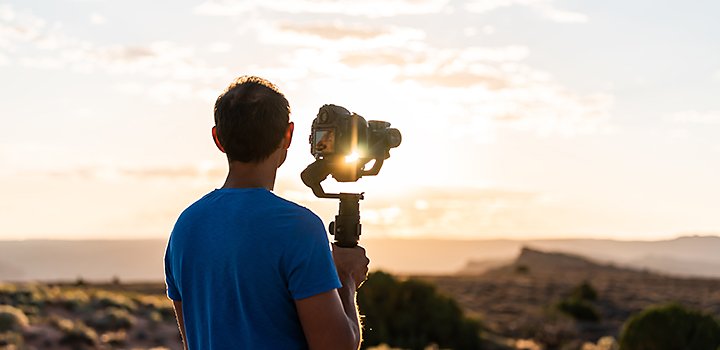
Nguyen also recommends using a gimbal or other stabilization system. “This is how you’re going to get those smooth cinematic shots,” she says. “When you capture videos with the gimbal you have more usable footage versus a handheld shot, since a lot of those shots can be really shaky and unusable.”
How much does gear matter?
Don’t let gear get in the way of what really matters: the journey itself. Most cameras with video capability can film exceptionally high-quality footage, even an iPhone. The difference is in the story you tell and how you choose to tell it. Your audience isn’t going to be dialed in to pixel differences, but they will care about craftsmanship and how well the story captures their attention.
Tips for filming your video.
Pay attention to light.
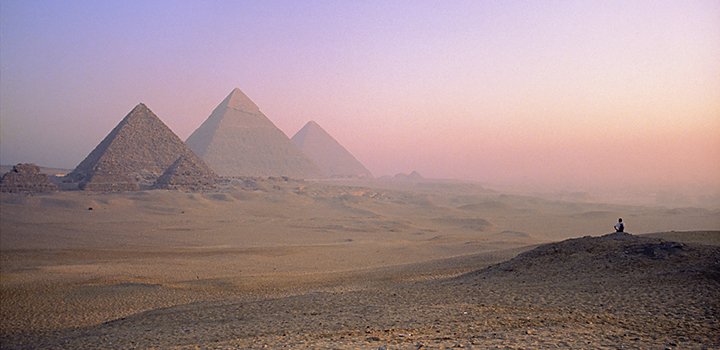
Light is one element you should always look out for, since the quality of your light will determine the look and feel of your video. Golden hour is a favorite time for most photographers and videographers, as the soft, warm, directional light close to sunset is flattering for subjects.
“If you have outdoor locations you want to visit, go there at the beginning or end of the day, and then go to your indoor locations in the middle of the day,” advises Waite. “That way you’re still getting a good quality of light inside the buildings, but you’re not getting that harsh daylight outside.”
Consider the variety of shot types you’re collecting as you travel. Just like a favorite food, it may be delicious, but if it was the only food you could eat you’d soon grow tired of it. In the same way, “if you just have static shots or all gimbal shots, the video won’t be as enticing to viewers,” says Nguyen. Wide shots, detail shots, candid moments, lively action shots contrasted with still tripod shots, and time lapses are all shot types you can use to keep your video interesting.
Embrace the unexpected.
When traveling, things are bound to go sideways or veer from your plan at one point or another. Try not to get discouraged when you can’t eliminate all unknowns during your trip. Part of the beauty of travel is your encounter with the unexpected. As long as your camera is ready to roll, you’ve got the opportunity to capture one-of-a-kind footage as the scene unfolds.
“Being able to think on your feet is a very essential skill to have as a filmmaker,” says Waite. “No matter how much prep you do before a shoot, you’re always kind of making it up as you go.”
Get consent from the people you film.
If you’re doing commercial work, you’ll want to make sure you’re squared away legally when it comes to showing people’s faces. The last thing you want is to run into any legal issues down the road, so make sure you get consent or a model release right after you’ve filmed them.
“That’s something you want to be upfront about,” says Nguyen. “Most of the time, if you let them know what you’re doing, I find that people are open to it and think it’s really cool.”
Edit with the story in mind.
The first thing you want to do after a day of filming is back up your footage onto a hard drive. If you can, have at least two backups of the footage, because you never know what could happen.
Once your footage is safely stored and organized, go through it and start to pick your favorite shots. Pull those clips into the video editor of your choice. Nguyen uses Adobe Premiere Pro.
Make your cuts cohesive.
Now that you’re ready to put it all together, pull out your storyboard again. This is going to be the difference between a clip montage and a story. While it may not be a feature-length documentary, every travel video has a story arc, even if it’s just a chronological retelling of your steps.
“It’s always good to have a bigger picture of what you’re doing in the editing room, rather than just putting a nice video clip next to another nice video clip,” says Waite. “Even if it isn’t clear to other people, as long as you know there’s an inherent structure to the way you’re doing things, I think that’s good enough.”
Waite likes to group similar shots together to create mini-scenes. “If the establishing shot is a drone shot of the ocean at sunrise, the next two to five shots should be of that same scene, shot in different ways,” Waite explains. No matter how you sequence your film, always do it with intention. Think about how your clips connect to each other and work together to move the viewer through the story.
That depends on what type of video you are making. “For regular Instagram posts, I find that 45 seconds is the sweet spot,” says Nguyen. “It’s really hard to create a video in just 30 seconds because usually I have so much footage. And I find that one minute is a bit too long, because usually the travel videos you see on Instagram are fast paced.”
Other platforms like a YouTube channel or IGTV are better suited for longer stories, but longer doesn’t necessarily mean better. As long as the story supports the length, you should be good. Just keep in mind that the longer your video gets, the more likely your audience will lose focus, so if you want a long video make sure you’ve got a compelling story to back it up.
Don’t forget sound.
Between voice-overs, interviews, and ambient music that complements your video, audio is one element that can really elevate your video. Collect sound bites from some of your filming locations to use alongside their respective video clips. Whether it's rainforest sounds in Brazil, water lapping at the beach in the Philippines, or even Los Angeles traffic, sound activates another sense and helps immerse the viewer into the scene.
When you work for a client, Waite’s advice is to “put your own creative spin on it as an editor. But go with the direction you’ve been supplied.” It can be tricky at first to strike this balance, but the chances are your client hired you because they like your unique style or personality, and it’s okay to let that show in your editing.
Begin your journey as a travel filmmaker.
There’s a lot to keep in mind as you start to make a travel film, but the most important thing to remember is to relax and enjoy the journey. Don’t worry about being technically perfect so much that you don’t immerse yourself in your location and culture. Your passion and perspective will be much more noticeable than which gear you used or how big your budget was.
“Be shameless and just go for it,” advises Waite. “It’s all about self-confidence. When it comes down to it, it’s really just organization, vision, execution, and editing. None of those steps is rocket science. People can make careers out of just one of those steps.”
From Turkey to Tuscany, Peru to Prague, or New Zealand to Norway, wherever you may find yourself, you’ve got all you need to get out and film your own epic travel video.
Contributors
Do more with Adobe Premiere Pro.
Make visually stunning videos virtually anywhere — for film, TV and web.
You might also be interested in…
Get B-roll footage that makes video editing easier and helps you to keep your audience engaged.
Introduction to video editing.
Learn the principles of video editing and practical tips for both big and small screens.
How to create a YouTube video.
Make better videos by learning best practices from professional videographers and content creators.
Get Adobe Premiere Pro
Create flawless productions with the industry-leading video editing software.
7 days free, then 25,55 €/mo.


