Try these tutorials with Lightroom
Enhance, organize, and share your photos.
When you add photos to Lightroom, they sync to the cloud so you can work with them across your devices.

You can select photos from a local or connected drive on your computer and add them to Lightroom. To import photos and sync them the cloud, make sure that Cloud is enabled at the top left of the Photos panel. Click the + Add Photos button in the upper left and browse the photos accessible from your computer. Select the images or folders you want to add, then click Review for Import. On the next screen, click to uncheck any photos you don’t want to include, then click Add Photos. Photos added from your desktop will automatically appear in Lightroom mobile app and Lightroom on the web.


If you want to add photos and keep them stored on a local hard drive, choose the Local option at the top of the Photos panel. This allows you to work with local images without importing them to the cloud. If syncing is useful for a particular project, you can create a group of the best images and selectively sync them to the Lightroom ecosystem. Some features, such as adaptive presets, may only be available once an image is synced to the cloud. Using the Local option is similar to using a standard file browser such as Adobe Bridge.

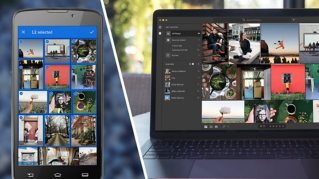
Tap the Device or Gallery tab in the lower left corner to view the images on your phone or tablet. You can choose from a specific album in the upper left (i.e., Recents, Favorites, etc). To select multiple photos to add to Lightroom, tap the More menu (three dots) in the upper right and choose Select. Tap individual thumbnails to select them, or swipe across images to select multiple photos at once. If a photo has already been imported to Lightroom, it will display an Lr badge on the thumbnail. Once you’ve made your selections, tap Import in the lower part of the screen. You can choose to Import into Lightroom or Import & add to Lightroom album.
Note: The Lightroom on mobile interface may vary slightly depending on the version of the Lightroom app you have and whether you are using it on iOS or Android.

Albums provide an easy way to keep your photos organized. You can create albums in Lightroom on your desktop, your mobile device, or in Lightroom on the web. In Lightroom on desktop, click the + icon in the Albums panel on the right and choose to create an album or a folder (folders provide another way to organize your albums). Once the album has been created you can drag and drop photos into the new album.

In Lightroom on mobile, tap on Lightroom at the bottom of the screen, then tap the album name at the top left of the screen, and choose Create new. Choose to create an album or a folder, enter a name, and click OK. Once the album has been created, select it and tap the More menu (three dots) next to the album name and choose Add photos. You can add photos that are already in Lightroom, or add photos from your device.

When you add photos and albums to Lightroom, they are automatically available on all of your devices. Lightroom sorts photos by the date on which they were taken. On your desktop, click By Date to view photos by year, month, or specific date. From your mobile device, tap All Photos and view your photos sorted by year.