Try these tutorials with Adobe Express
Create web pages, social media graphics, and videos.
Create branded content in a fraction of the time, and give every design a consistent look and feel with Adobe Express. Upload your brand assets to Adobe Express and easily access your fonts, colors, and logo to speed up content creation. Brand kits can be created from scratch or from an existing library.
These steps create a brand kit from an existing library you may have from Photoshop and Illustrator to make it simple to access your brand assets as you design.
From Home or the Editor, navigate to Your Stuff.
Click Libraries.
Right Click over a Library and select Use as brand.

Now that you’ve created a brand in Adobe Express, you’ll be able to apply your logo, fonts, colors, graphics, and templates within seconds. To apply your brand fonts or colors, click the font or color picker in the Editor for quick and easy access. Your logos, graphics, and templates can be found in Brands.
You can always access and edit your brand kit either in the Editor or at Home, by navigating to Brands.
From Home or the Editor, navigate to Brands.
Select Create brand.
Type in a brand name and click Create.
Now you can upload your logo, colors, fonts, graphics, and templates. To learn how to set up and use these elements, see below:
Logo
Upload your logo or simply drag and drop into the space provided. Adobe Express supports JPEG, SVG, PSD, AI, and more.
To edit, rename, duplicate, move, copy, or delete your logo, click the three dots in the top corner of any tile.
If you already have a logo and want to add another one, click the Upload logos button.
Colors
Add your brand colors using the color picker or click Custom to type in custom hex or RBG codes.
To edit, rename, duplicate, move, copy, or delete your colors, click the three dots in the top corner of any tile.
If you already have colors and would like to add more, click the Add color swatch.
If you would like to add additional color palettes, click Add Color palette.
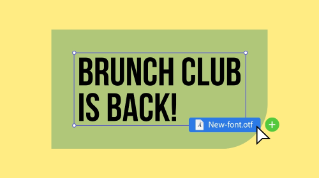
Fonts
Choose your fonts from the dropdown font picker or click Upload to add custom fonts. We support OTF and TTF files.
To edit, rename, duplicate, move, copy, or delete your fonts, click the three dots in the top corner of any tile.
You can also click the three dots to add header and body tags to your fonts.
If you already have fonts and would like to add more click the Add fonts button.
Templates
Click Add templates button.
Select the file you’d like to save as a brand template.
Name your template.
You can save your template to any brand or library using the dropdown menu.
To finish, click Save template.
Assets
Upload your assets or simply drag and drop into the space provided. We support JPEG, SVG, PSD, AI, and more.
To replace, rename, duplicate, move, copy or delete the asset, click the three dots in the top corner of any tile.
If you already have assets and would like to add more click the Upload assets button.