PHOTOGRAPHY
How to compress your photos.
You’ll find it much easier to use, share and store compressed images.

PHOTOGRAPHY
You’ll find it much easier to use, share and store compressed images.
JUMP TO SECTION
How to compress photos in Adobe Photoshop Lightroom
How to compress image files in Adobe Photoshop
Image compression is a way to reduce file size to make images best suited to their intended use. The golden rule of file compression is: don’t compress photos or images any more than you need to. But how much is that?
Image compression is a method of reducing the size of an image file by means of a specific algorithm. Different image file types such as JPG, TIF and PNG use different algorithms to change how image data is stored and to produce smaller-sized files (measured in bytes). When compressed the right way for the intended use, the new files can maintain acceptable image quality at reduced (or even greatly reduced) sizes.
File compression is your friend — especially if you tend to run out of storage space on your phone or hard drive or post lots of pictures online. There are plenty of ways you can make your images smaller without affecting the quality too much. It all starts with the golden rule of file compression: don’t compress photos or images more than you need to.
By following the steps below, you can find the right balance between file size and image quality. Then, dig a little deeper into photo compression so you’ll always know how to save the best quality image file for the occasion.

You can use any software that converts image file types as your own personal image compressor. In Lightroom, you can compress your original photos by turning them into a JPG or a TIF file. JPGs tend to work best for sharing and storing images, because they maintain reasonable image quality at a relatively small size.
1. Open your photo in Lightroom.
2. Go to File > Export.
3. In the Export menu, choose JPG as your file type.
4. Change the dimensions and quality to reduce the size of your file. You can preview your file size in the lower left-hand portion of the Lightroom window.
5. Click the blue Export Photo button and choose where you want to save your compressed file.

Edit, organise, store and share photos from anywhere.
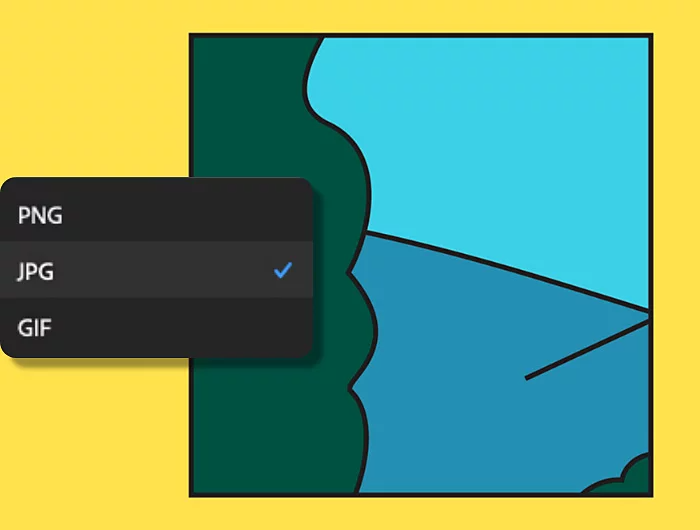
Compression works similarly in both Photoshop and Lightroom, but in Photoshop, you have the added option of exporting your file as a GIF. For most sharing and storage purposes, though, you’ll get better results using the JPG image file format.
1. Open your image in Photoshop.
2. Go to File > Export As...
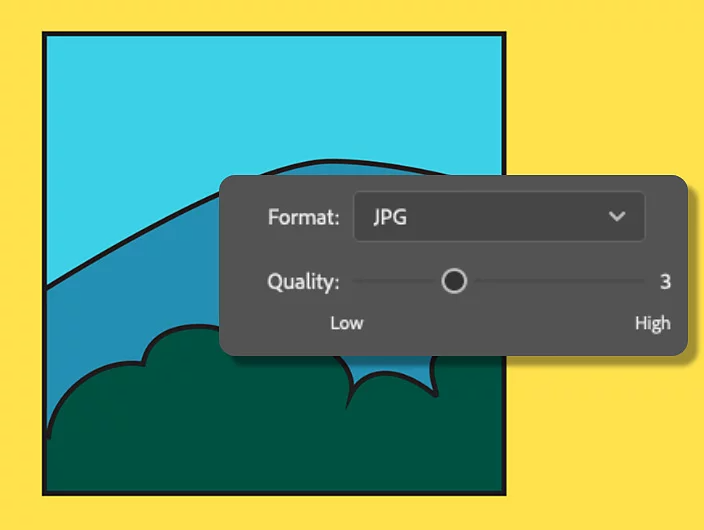
3. In the Export As… menu, choose JPG as your file type.
4. Move the Quality slider to the left to reduce file size and quality. You can preview your file size in the left-hand portion of the Export As… window.
5. Click the blue Export Photo button and choose where you want to save your compressed file.

Create gorgeous images, rich graphics and incredible art.
If you’re working in Lightroom and Photoshop, the fastest way to compress image size is to convert to another file type. This is especially true if you’re working with raw photos (that is, the uncompressed version of your photo from a digital camera).
Converting your image file to another format will compress the image data in each of your pictures so you can post, publish, share or save them. However, not all file types are created equal.
A tried-and-true option, JPGs are a popular file type because they can maintain relatively good image quality at a small size. And even at that size, JPGs can still capture up to 16.8 million colours, making them especially useful for photographs in all their multicolored glory. The format is compatible across a large swath of software and devices. Plus, it's one of the standard image file types for the web, where bandwidth is at a premium and speedy load times are a must.
JPG is a lossy file format, which means that you’ll lose some image quality when you convert. But, more often than not, the changes to your image won’t even be visible to the average viewer.

The terms lossy and lossless describe how much information files maintain after compression.
Lossy files “lose” some amount of data — for example, the actual number of colours or pixels in a photo. In most instances, your image will only lose redundant or barely perceptible visual information. An average viewer isn’t likely to be able to tell the difference between an original photo and one that’s gone through lossy compression. But, if you want to print the highest-quality version of your photo, you’ll want to keep all of its pristine visual detail intact — and that’s where lossless compression can help.
If you’ve ever used a ZIP file, you’re already experienced in lossless compression. With this form of compression, you get slightly reduced file sizes without losing any precious data. Lossless compression is great when every detail of your image counts, like when you’re photo editing or printing a family portrait.
Compression and resizing are similar concepts — both can make your file sizes smaller. However, there are critical differences between the two techniques that you should know if you want to set up your image files for success.
As you learnt above, image compression reduces the amount of visual information in a file. Think of it like a fluffy down blanket — you can reduce its size by packing it into a box. Or, if you need to make the blanket even smaller, you could remove some of the feathers before packing it up. In both cases, you still have the same basic blanket, but one will be slightly fluffier than the other.
With image resizing, think of it as tailoring your blanket from a king size to a twin size. The aspect ratio — that is, the dimensions of length and width — will be different than before. This comes in handy when you need to store your down blanket away for the summer, but you might regret it when winter comes round.
So, when you need to decide between compressing an image and resizing it, think ahead to what you may need that image for in the future — and always keep a copy of your original picture, just in case.

There are many ways to show off your photos and images online, whether you’re creating a website, emailing a friend, posting to social media or saving to the cloud. Here are some tips to help you to discover the best compression style for your sharing needs:
Animated GIFs are a great way to tell a story quickly. It’s easy to make your own and share them in emails, messaging apps or even on your website.
While it isn’t always the best solution for reducing an image’s file size, cropping can be helpful if you only need to share a small portion of your image. This is particularly true for social media posts, where image composition really matters.
If you’re ready to share your Photoshop work with the world, first convert your PSD (Photoshop Document) to JPG, one of the most universally compatible file types that also works well on the web.
Based on your location, we think you may prefer the United States website, where you'll get regional content, offerings, and pricing.