사진
Adobe Photoshop으로 이중톤 효과 만들기
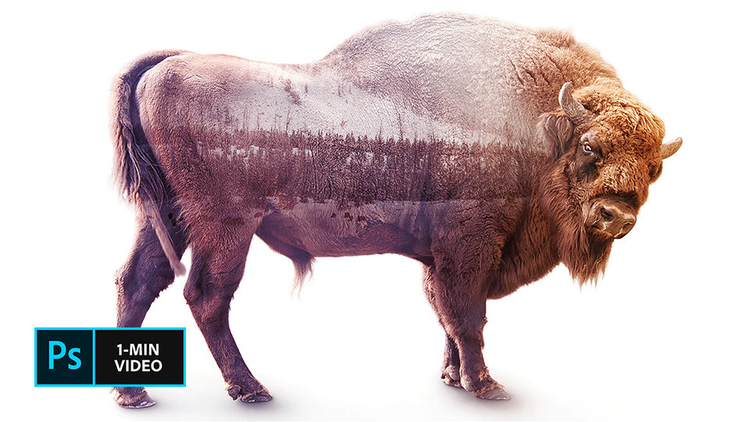
이중 노출은 하나의 이미지에 두 개의 노출을 결합하여 흥미로운 사진을 만드는 기법입니다. 따라 하기 쉬운 이 튜토리얼에서는 그래픽 아티스트 Erica Larson이 Adobe Photoshop에서 두 장의 사진을 합성하여 이중 노출 효과를 만드는 방법을 소개합니다.
사진
이중 노출은 하나의 이미지에 두 개의 노출을 결합하여 흥미로운 사진을 만드는 기법입니다. 따라 하기 쉬운 이 튜토리얼에서는 그래픽 아티스트 Erica Larson이 Adobe Photoshop에서 두 장의 사진을 합성하여 이중 노출 효과를 만드는 방법을 소개합니다.
이 기법은 밝은 영역과 어두운 영역이 뚜렷한 고대비 이미지에 효과적입니다. 샘플 이미지를 활용하거나 개인적으로 소장한 파일을 이용해도 됩니다.
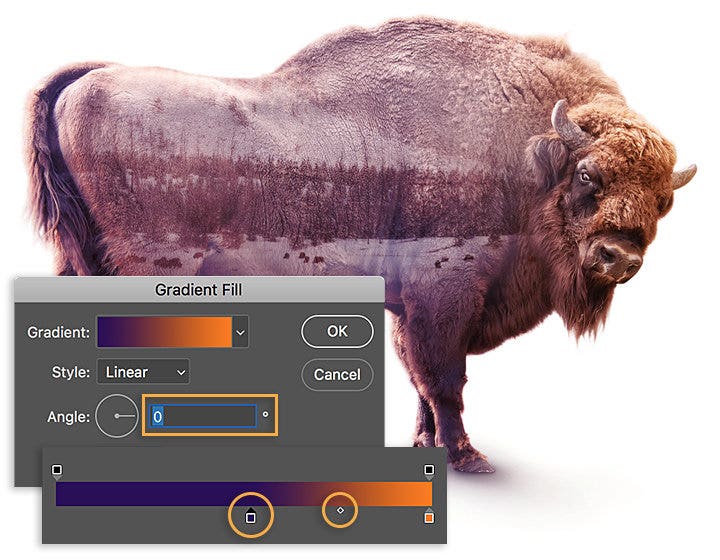
두 가지 이미지를 열고, 한 이미지를 다른 이미지 위로 드래그합니다. Larson은 설경을 들소 이미지 위로 드래그했습니다. 레이어 패널에서 혼합 모드를 스크린으로 설정하고 불투명도 설정을 낮춥니다.
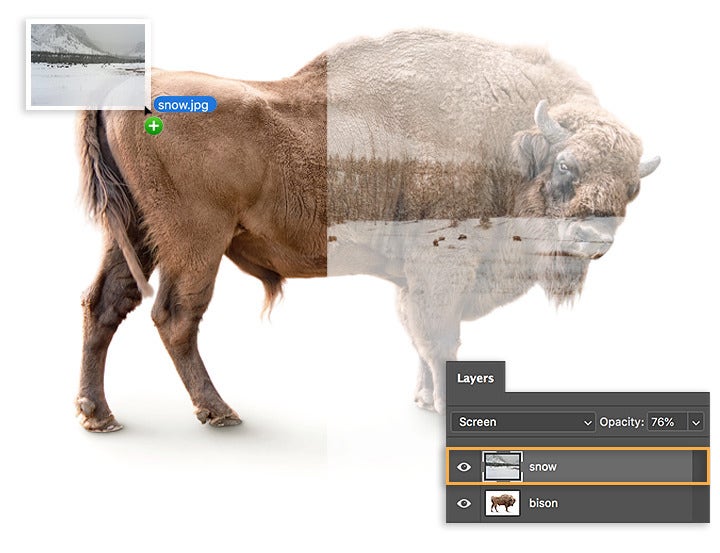
들소의 머리와 다른 영역을 살리기 위해 설경 레이어에 마스크를 추가합니다. 그런 다음, 디테일을 살리고 싶은 곳을 자유롭게 칠합니다.

극적인 연출을 가미하기 위해 보라, 주황 사전 설정을 사용해 그레이디언트 칠 레이어를 추가한 다음, 혼합 모드를 오버레이로 설정하고 불투명도를 60%로 낮춥니다.
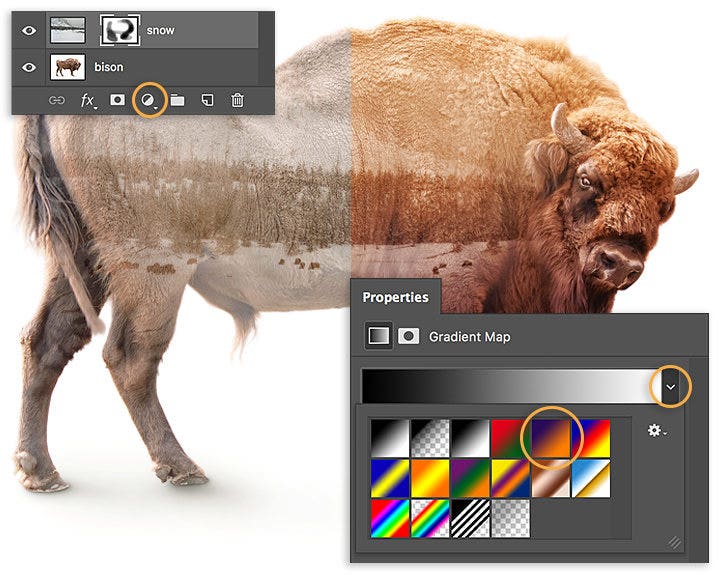
그레이디언트 칠 각도를 0도로 조정합니다. 그레이디언트를 클릭하여 그레이디언트 편집기를 열고, 원하는 효과를 얻을 때까지 보라색 정지점과 색상 중간점을 이동합니다.
이중 노출 효과는 추상적이고 초현실적인 이미지를 만들 때 많이 쓰이는 기법입니다. Photoshop에서 간단히 만들 수 있는 만큼 다양한 사진을 합성하여 참신한 작품을 제작해 보세요.

참고: 이 튜토리얼에 포함된 프로젝트 파일은 실습 용도로만 사용하시기 바랍니다.