Prova questi tutorial con Photoshop
Modifica foto per creare nuove immagini e grafici.
Bring out detail in parts of a photo that are too dark or too light with a quick Shadows/Highlights adjustment in Adobe Photoshop.
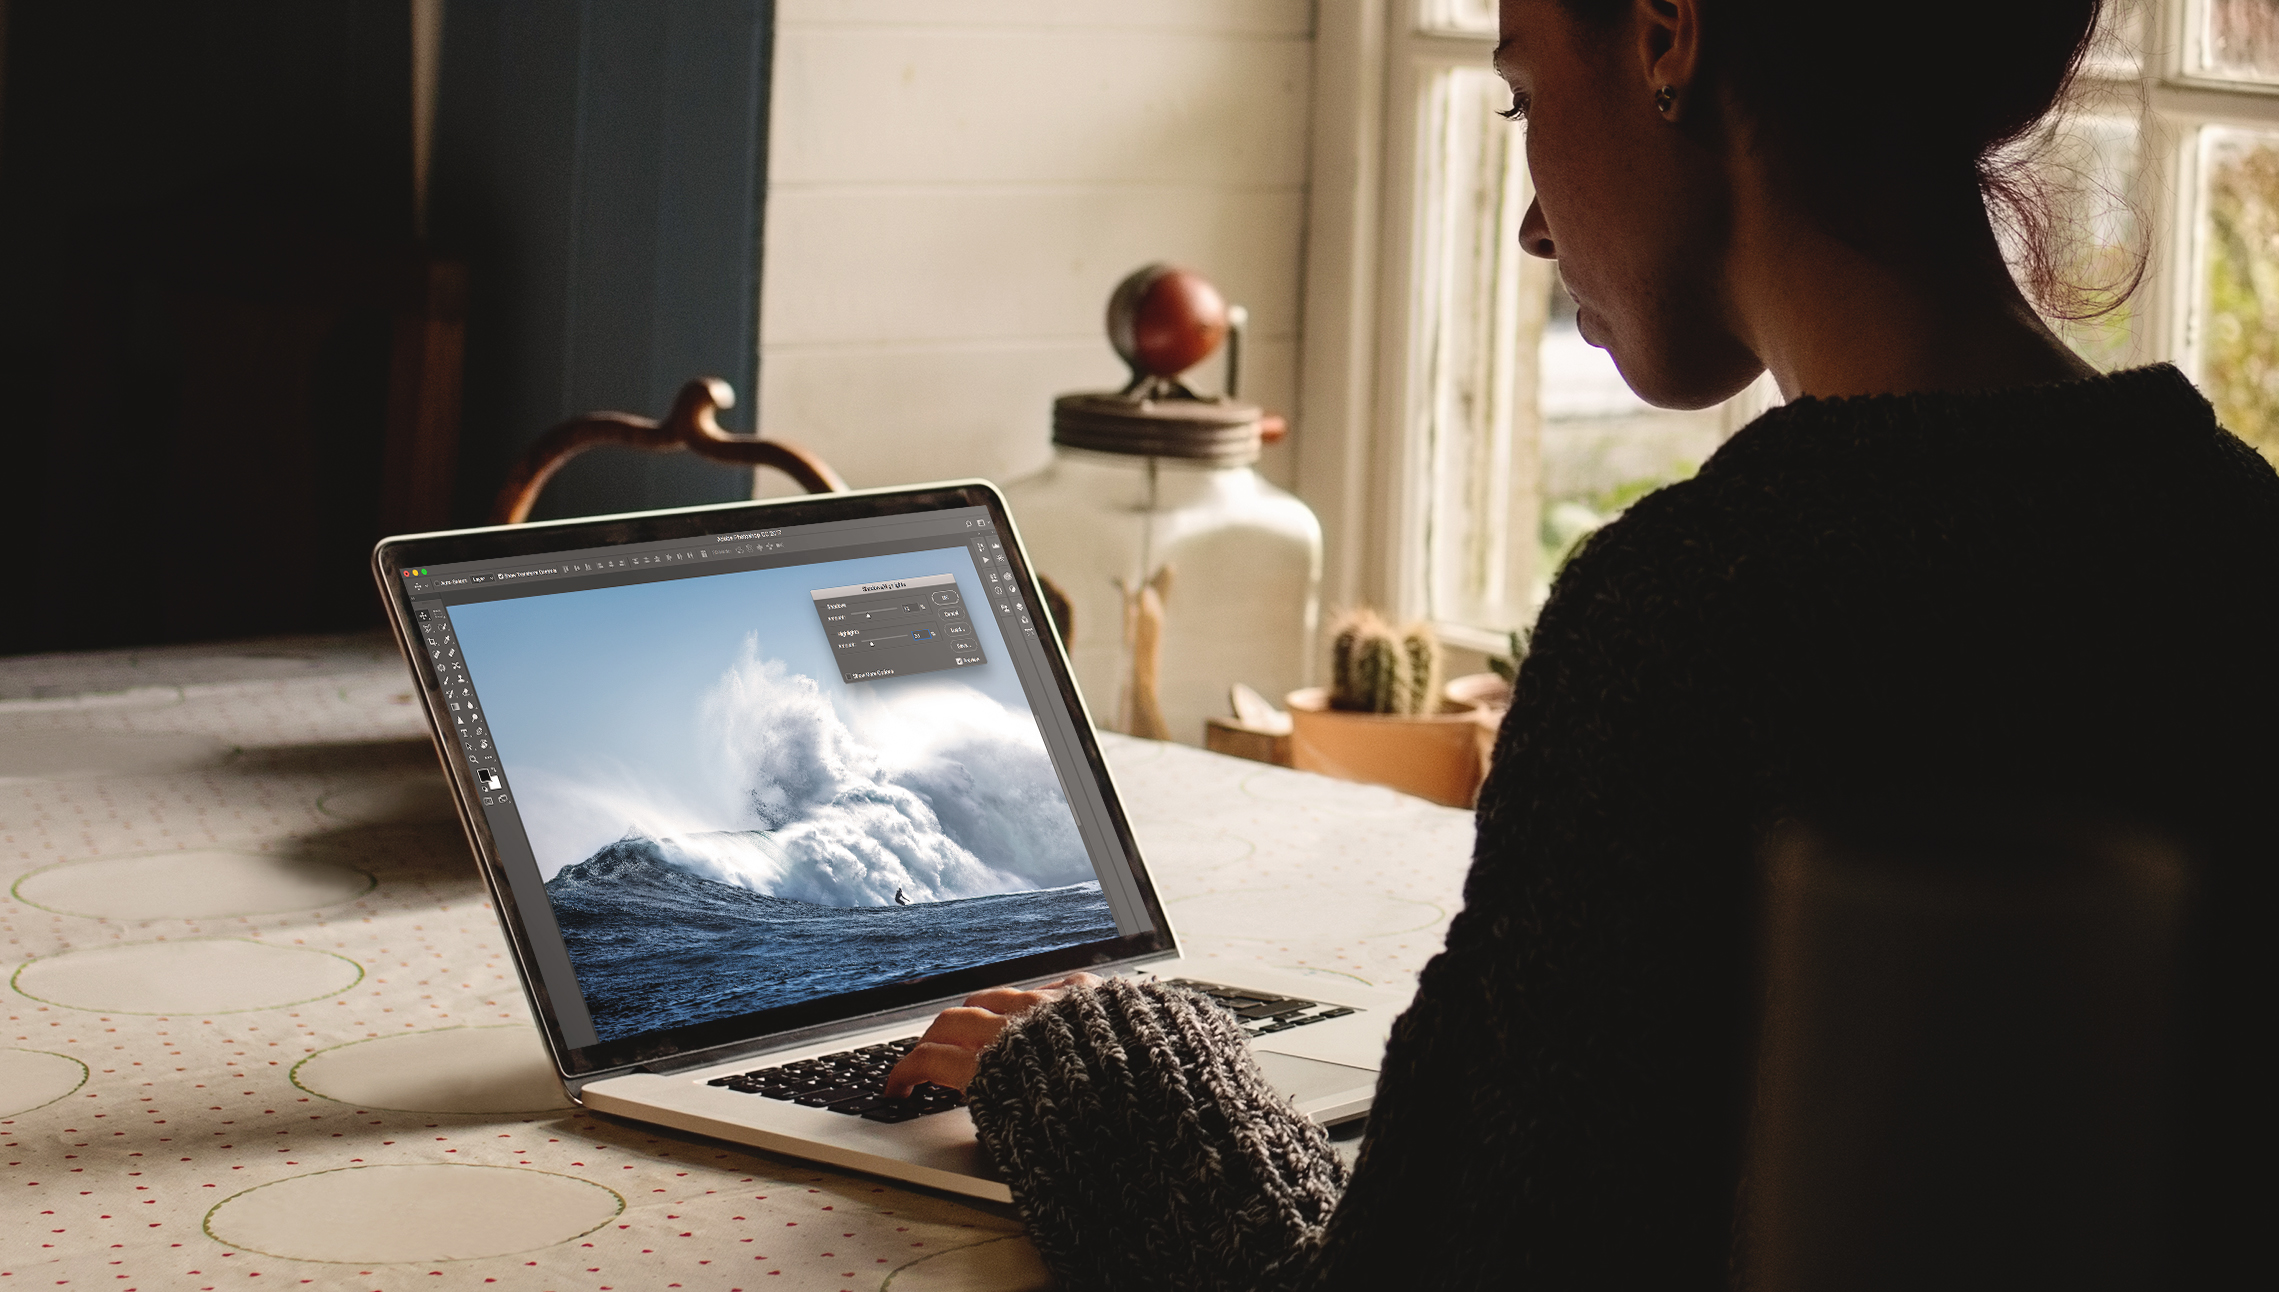
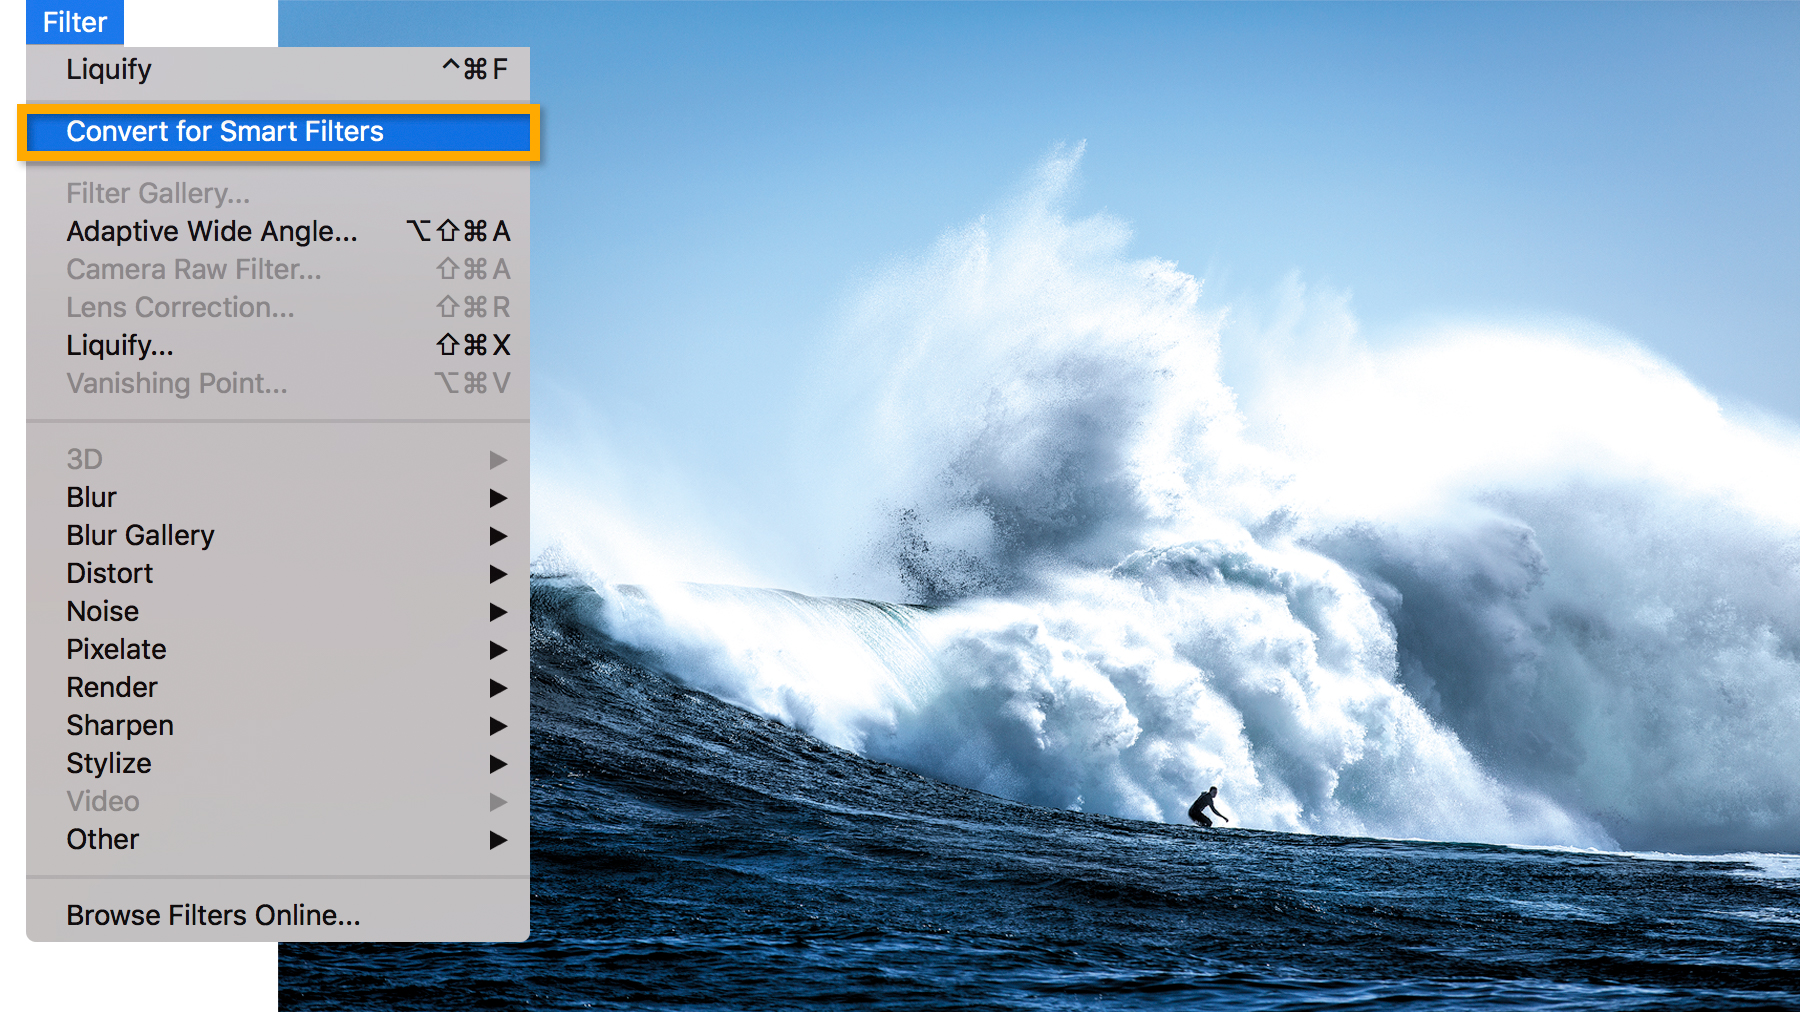
Open a photo and select the photo layer. Choose Filter > Convert for Smart Filters, and then click OK. This preserves the original image and gives you the option to make future changes to the Shadows/Highlights adjustment you’ll apply in the next step.
Tip: You could apply a Shadows/Highlights adjustment directly to a photo, but converting for Smart Filters before applying this adjustment gives you the flexibility to re-edit your adjustment or even delete it altogether.
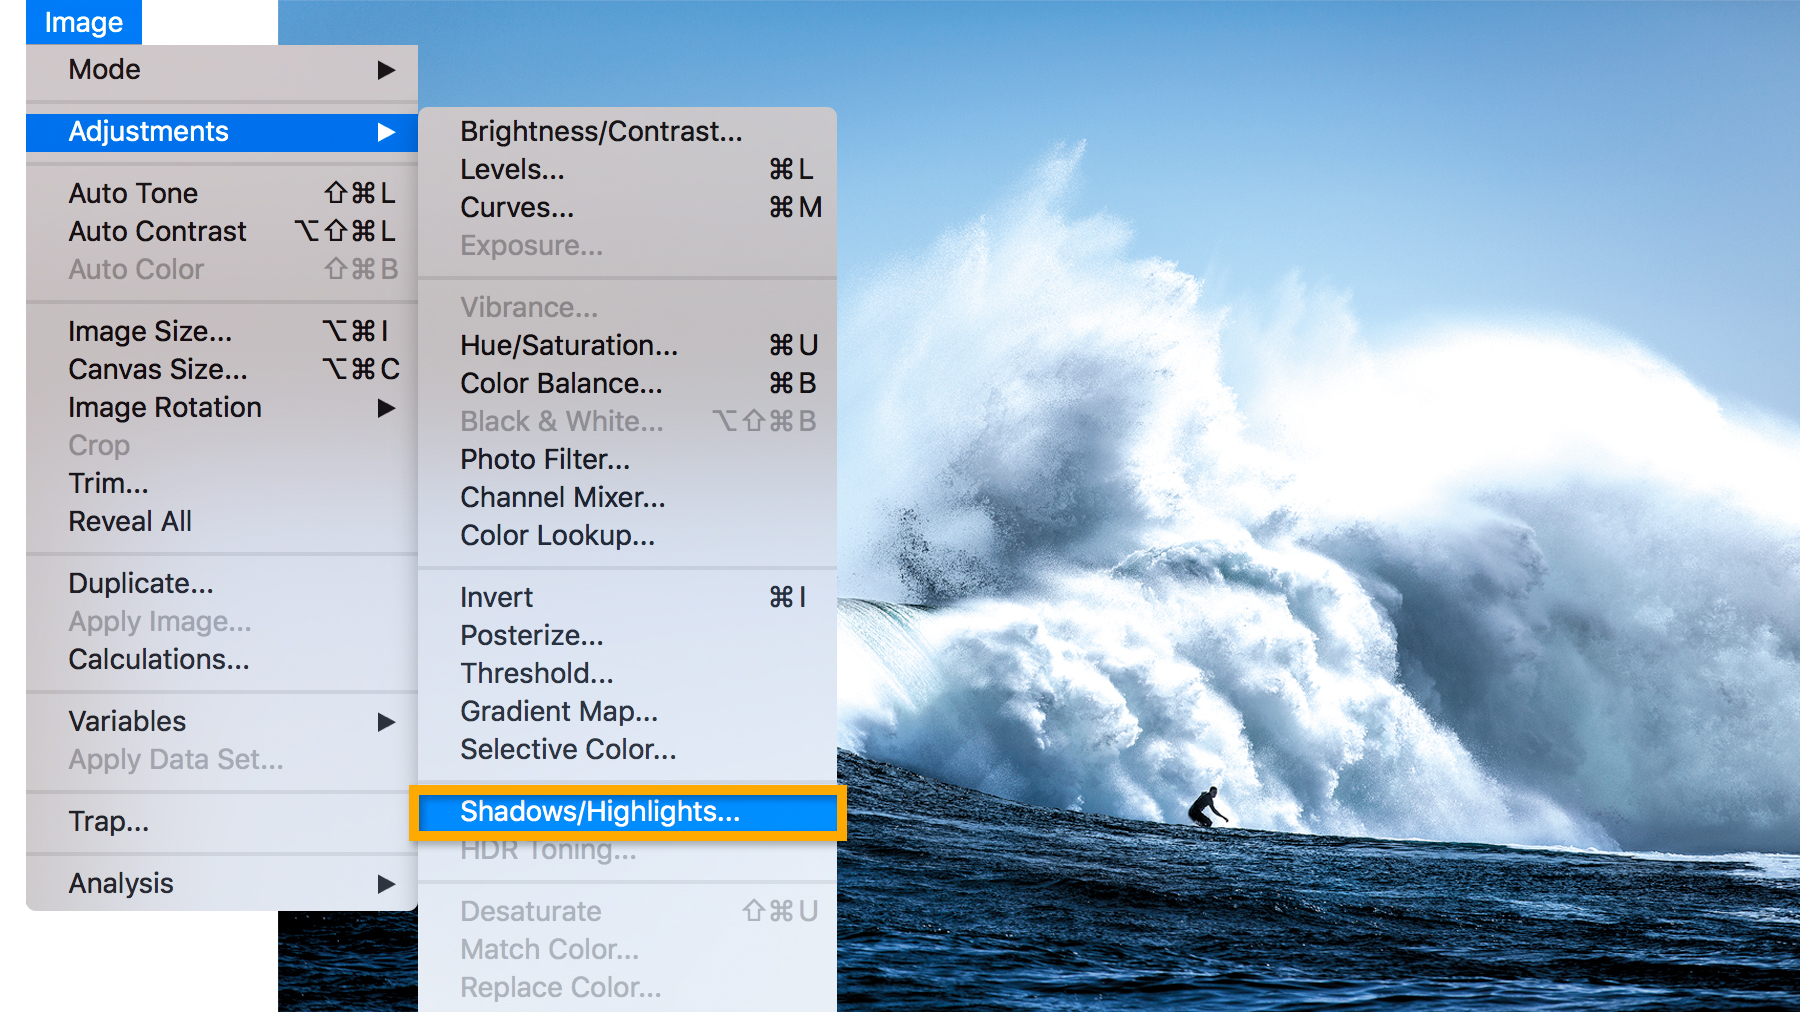
Apply a Shadows/Highlights adjustment layer to adjust over- or underexposed areas of an image. Choose Image > Adjustments > Shadows/Highlights to open the settings.
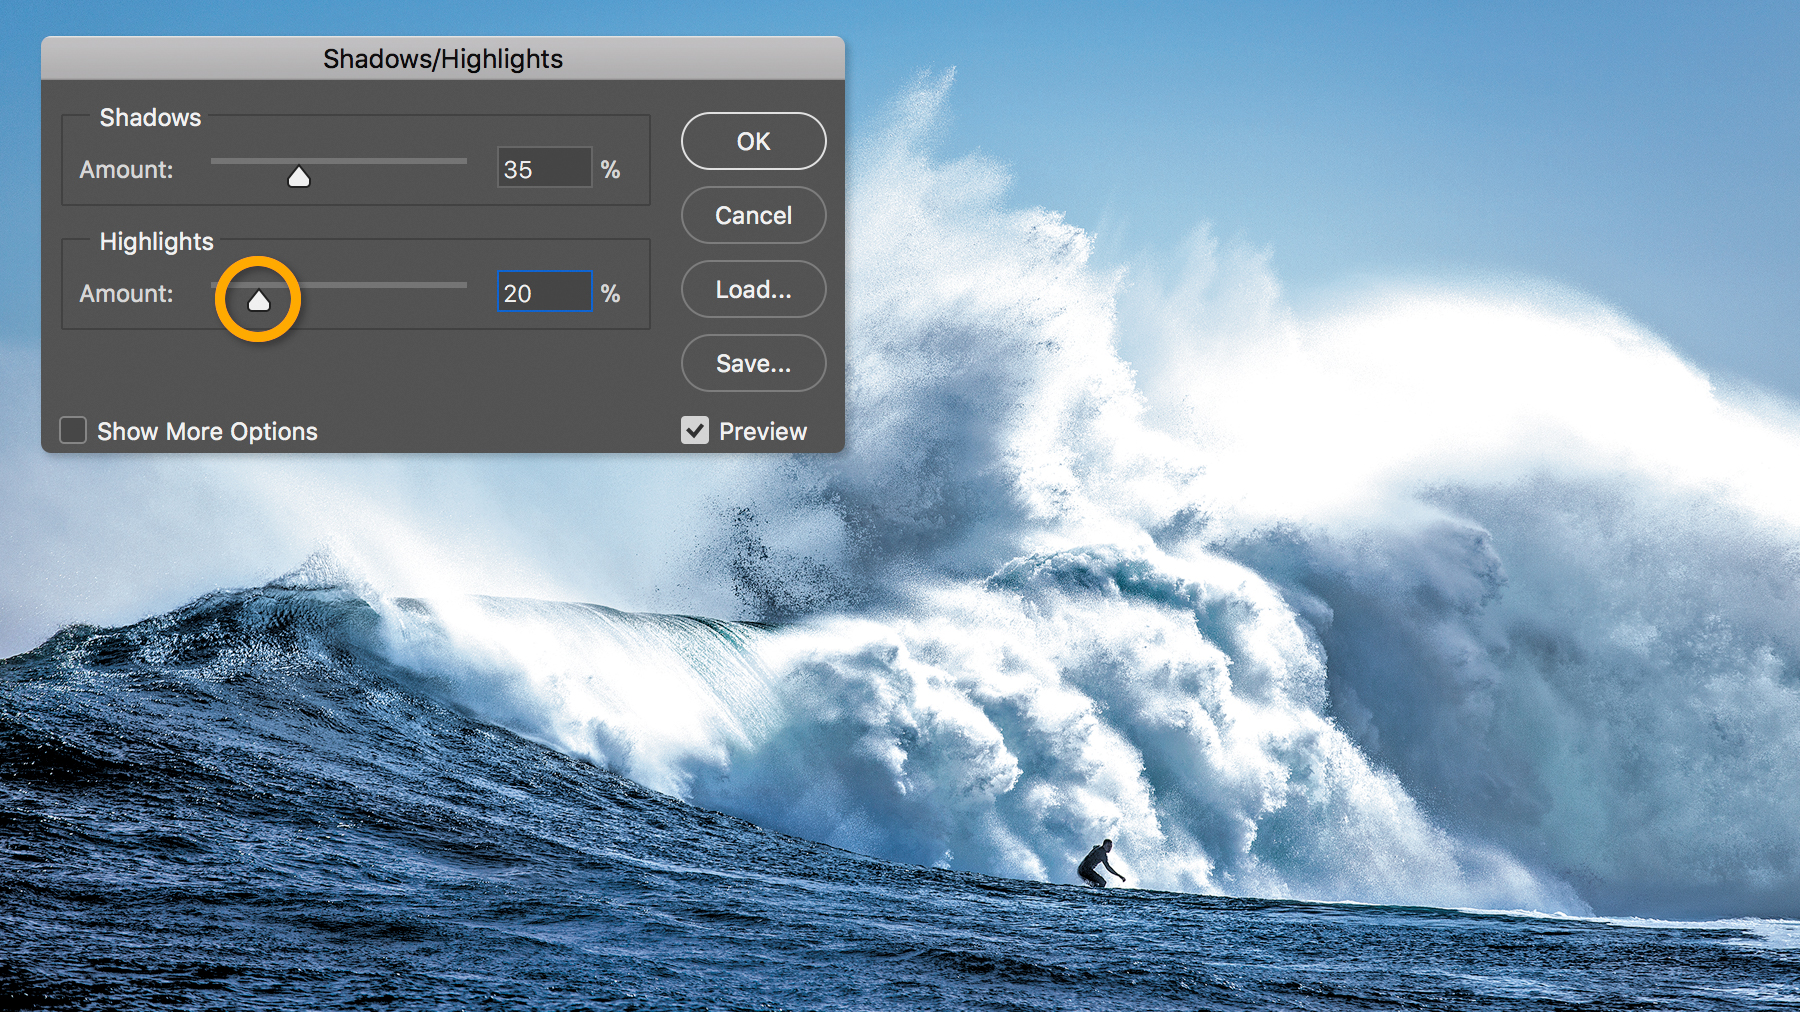
Drag the Shadows slider to brighten areas hidden by dark shadows.
Tip: Toggle the Preview checkbox to compare a before and after view as you work with these settings.


Drag the Highlights slider up to bring back the details of an area that’s too bright. Click OK to apply the settings.
Tip: Select Show More Options to see additional settings to fine-tune the adjustment.

Tip: Save your image as a PSD or TIFF file so you can adjust the Shadows/Highlights settings later. These file formats also allow you to save a copy in a different format, such as JPEG or PNG.
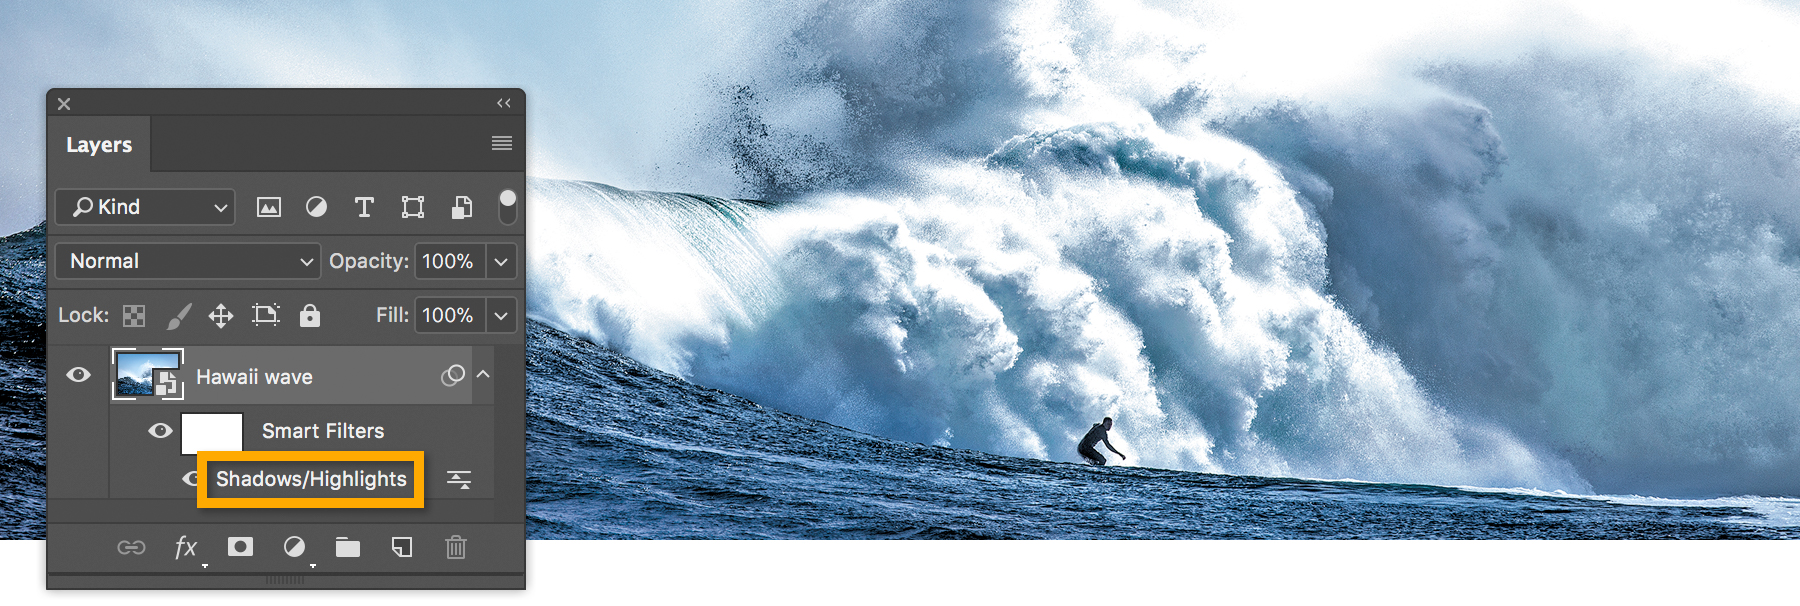
To adjust the Shadows/Highlights settings, double-click Shadows/Highlights under Smart Filters in the Layers panel.
Experiment with shadows and highlights settings to see the effect they have on your own photos.