How to draw braids, step by step.
Braids are one of the most elegant and well-known hairstyles. Learn how to sketch realistic, flowing locks in this drawing tutorial.
Breaking down braid drawing.
Hair drawings can be striking and beautiful when done well; they can also be a tricky task for artists of any experience level. For straight or curly hair and hair of different lengths, textures, and volumes, there are a lot of elements at play if you want to draw hair and braids well. In this step-by-step tutorial, you’ll discover expert tips to help you draw perfect plaits more easily in fashion drawings, portraits, or comic book art.
Easy steps for drawing braids.
Simplify your braid into basic shapes to streamline the process of drawing hair. While there are infinite ways to make this process your own, you can use these four steps as a framework to help you nail a great braid drawing, from outline to finishing details.
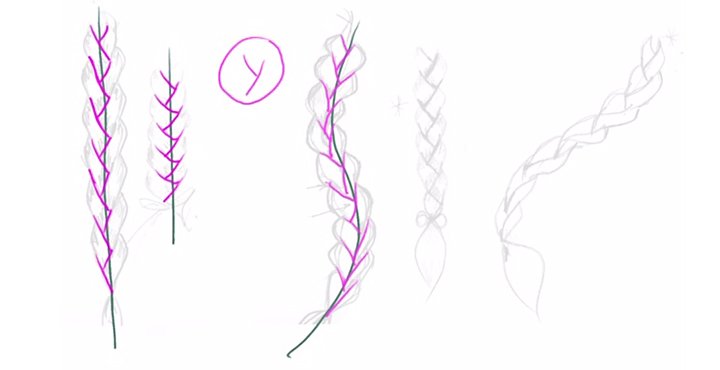
Image by Josefina Fernandez
Establish your line of action.
This is the basic line that shows the motion and shape of the braid. “Even if the braid is static and falls straight down the back, you still need a line of action,” says chibi artist Shiela Larson. For example, where the braid hits the shoulders, there will be a slight curve. “It’s important to not just have the braid go straight down. You want to give it some life.” To start out, it can also be helpful to draw a simple head shape to work around.
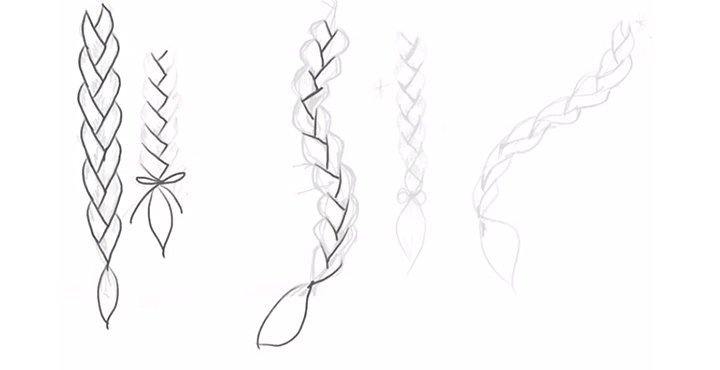
Image by Josefina Fernandez
Start with a basic shape.
Braids are a pattern, so the next step is to find a basic repeating shape that will loosely represent your braid. Draw that shape over your line of action. Fashion illustrator Josefina Fernandez uses a repeating Y shape for her braids. With the Y method, you connect the ends of the Ys using a rounded, inverted C shape to achieve a natural flow. Larson opts for a zigzag shape as her centerline, and connects each point with the same curved C shape all the way through.
No matter what shape best suits your art, one universal tip for braided hair is to always work with curved lines and stay away from straight ones. “It’s important to avoid making your lines extremely pointed and sharp. Unless it’s a really tight braid, it’ll always have a rounded quality,” says Larson.
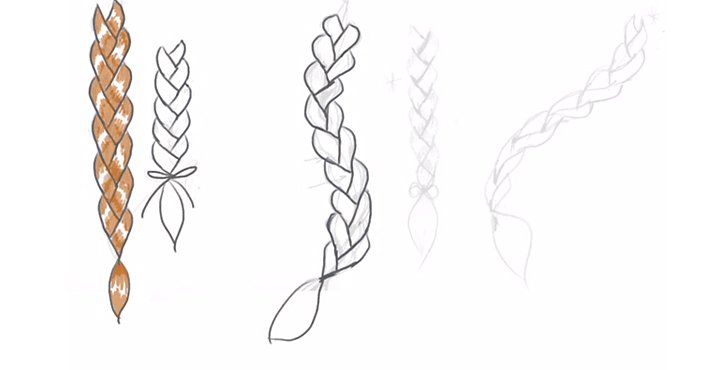
Image by Josefina Fernandez
Draw in details.
Once you have the shape of your braid outlined, you can refine your drawing and fill in the details, such as individual hair strands and highlights. “The way you create the lines should be the actual direction of the hair. It should look like brushing or combing the hair,” says Fernandez. “Curl your strands of hair into each other,” advises Larson. “It shows the flow of where that strand goes. It’s all about layering.”
And don’t forget to draw the end of the braid. “The hair will be pinched where the hair tie is, and then it poofs out at the end,” says Larson.
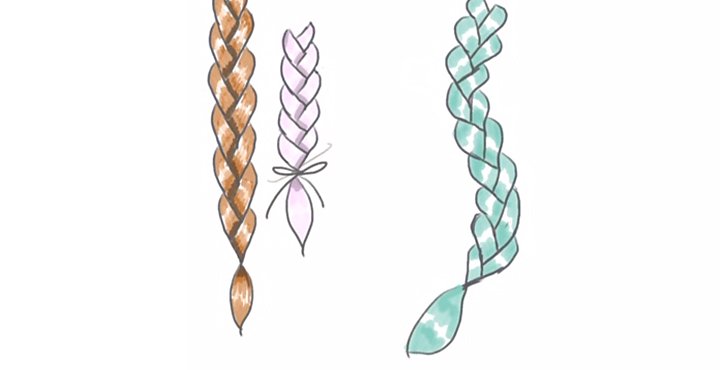
Image by Josefina Fernandez
Shade your braid for dimension.
The most important element for lifelike hair is the shading. Different color or tonal values in the braid will keep your drawing from looking flat and give it that sense of dimension. “You need at least three tones to make it look realistic,” says Fernandez. A good rule of thumb is to think of these shades as your roots, base color, and highlights. To render your highlights, where the light hits the hair, you’ll want to leave those areas mostly unshaded. But don’t leave them completely white. Instead, “blend out the highlights. It ties everything together and makes it look like there’s actually hair in the highlight,” says Fernandez.
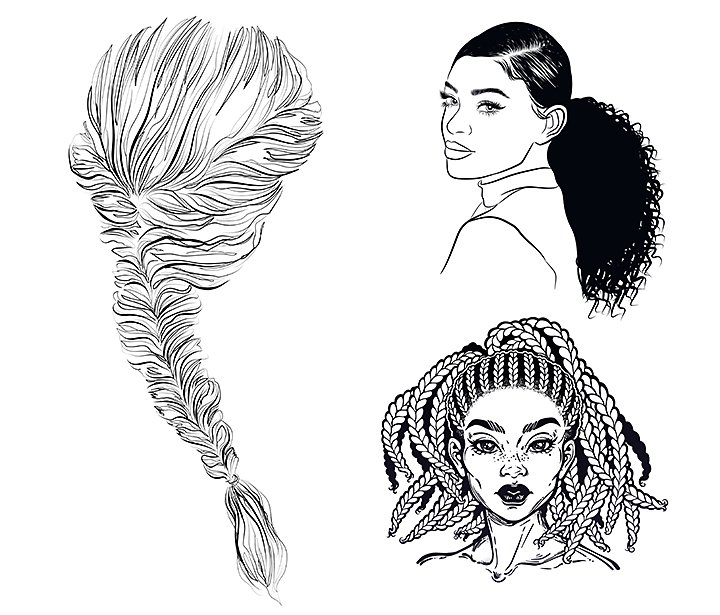
Types of hair.
Keep in mind that no two heads of hair are the same, so not all hair can or should be drawn the same way. You’ll want to switch up your technique based on how hair texture, volume, color, and style vary between people. For example, a Black person’s braids, whether they’re styled in cornrows, box braids, or a simple three-strand plait, may require a different treatment than a white person’s braids, due to differences in texture or styling.
To convey thicker or more voluminous locks, focus on creating generous contours that convey fullness and volume. Unless the hair is naturally straight and smooth or has styling product in it, there will be hairs that curl out and away from the central line of the braid. Don’t forget to include these organic variations; details are what make your hair truly lifelike.
To differentiate coarser hair from smoother, try switching your brush, pencil, or line weight. One approach is to give more definition and sharpness to individual strands for coarser hair. And for finer consistencies, give your lines a more uniform flow, rather than accentuating individual strands. You can find tutorials online that will walk you through drawing many different textures of hair and braids.
More tips for easy drawing.
If you’re working with digital drawing tools, use separate layers for each step or color. That way, you can easily toggle between elements and make edits without worrying about tearing up your drawing paper with an eraser. Just scale back the opacity, draw over your preliminary lines on a new layer, and keep what you like.
Once you’ve got the basic steps ingrained, you can adapt them to experiment with other types of braids, such as a fishtail, French braid, or plaits. Don’t be discouraged if your braids aren’t perfect on your first go. Keep refining your shapes and shading, and you’ll discover they come out more natural with each try.
Contributors
Shiela Larson, Josefina Fernandez
You might also be interested in…
Take your skills to the next level with drawing exercises and advice from professional illustrators.
Get tips on how to draw this challenging bit of human anatomy.
