How to draw a bunny.
Whether you want to draw a bouncing cartoon bunny or a photorealistic hare, learn how to create a rabbit illustration with this step-by-step tutorial.
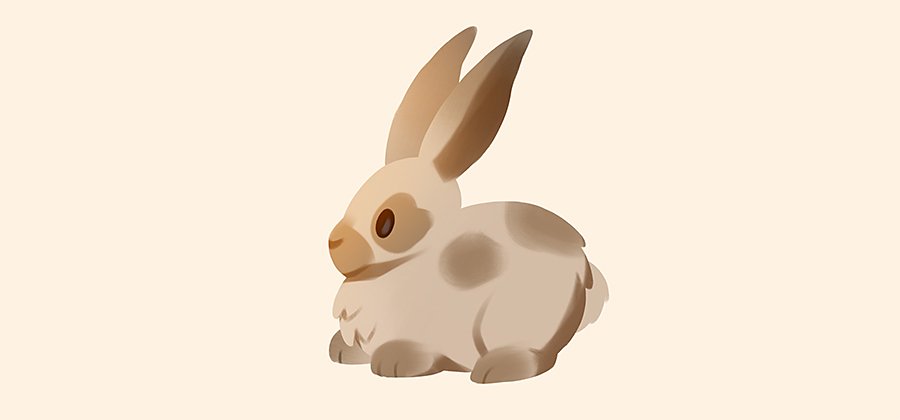
Image by Alex Braun
Draw with a calculated approach.
Drawing a cute bunny is a great way to practice foundational shapes, and rabbits have the added benefit of being a relatively simple animal to draw. You can create an easy bunny from a few simple shapes or a more realistic one by adding more details.
Find a reference bunny.
Quality reference is the best way to draw something you’ve never drawn before. A reference image gives you a clearly defined set of parameters that will create boundaries for your drawing. And references can also inspire new drawing ideas when the creative well is running dry. Head to Adobe Stock to find hundreds of reference images to choose from. In addition to having a massive supply of images ready for use, Adobe Stock also makes importing images into Adobe Fresco easy. Simply click the heart icon. Try searching for “bunny drawing” or “Easter bunny” to see what different types of images come up.
Sketch your bunny step by step.
Fresco makes sketching easy with a powerful suite of drawing tools, but you might be working on paper with the plan to import into a digital space later. Either way, start with the basic shapes of the rabbit and go from there.
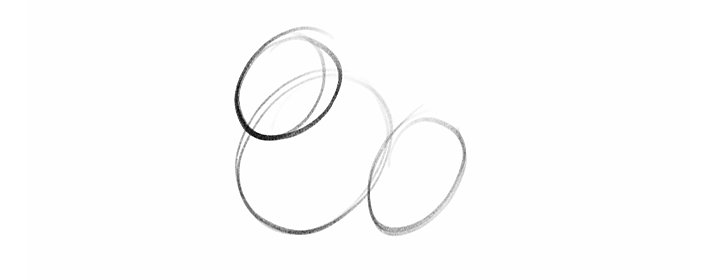
Image by Alex Braun
Lay down the basic proportions.
Especially if you’re going for a more realistic bunny, rather than a cartoon one: “The easiest way to approach it is to break the animal down into simple shapes. The best way to do that is to look up a ton of photo references and then think, What shapes do I see in this animal?” says illustrator Chioma Iloegbunam.
To start, draw two small circles that are slightly wider than they are tall. The first will be the head of your bunny; the second will be the body. Both shapes should be relatively close to one another.
Depending on the perspective of your reference photo, you might need to make the body shape longer than you would for a cartoon bunny. The goal is to sketch the circles, squares, and ovals that you see in your reference, so you can then start working on the pose and perspective of your drawing.
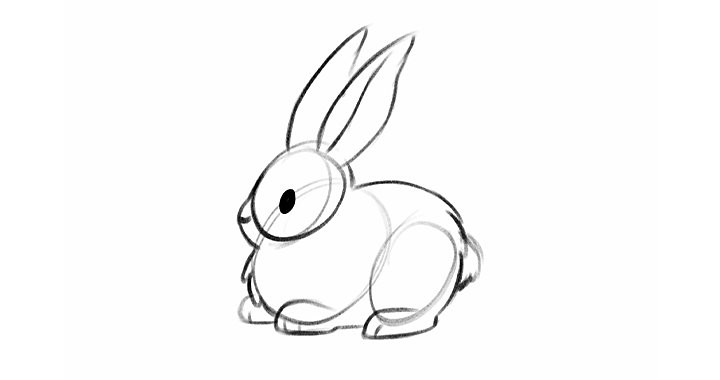
Image by Alex Braun
Give your rabbit a pose and perspective.
After you’ve drawn the basic proportions, you can begin to create the pose, perspective, and posture of your rabbit. This doesn’t have to be highly detailed yet, but as you sketch in the legs, think of them as the anchor point that defines the perspective your sketch will have. If they’re bunched up and around the body, your bunny will look like it is sitting. If you elongate them and give them a different shape, you can create a bunny in motion. This process is an opportunity to practice curved lines.
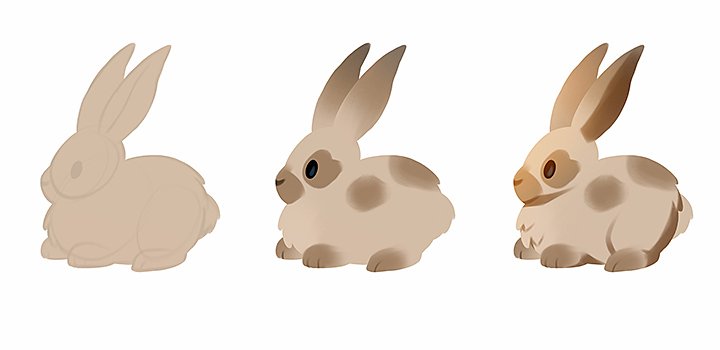
Image by Alex Braun
Details, details, details.
The key to detail work, like that in a bunny face, lies in close observation of your reference. It may seem complex, but artist Alex Braun describes his process of doing detailed work on a rabbit quite simply. “Their nose consists of this line on their snout that moves around the head. There are also these dark brown lines that separate the toes. Finally, there’s a big dark oval for the eye.”
The point isn’t just to imitate the style of another artist or to exactly copy your reference. Instead, when doing detail work, really get into the nits and imperfections of the rabbit that you’re drawing to bring it to life. Digital tools can help here, and Fresco is perfect for exactly this type of work.
Start the details with layers.
It’s easy to create new layers in Fresco. They serve as the individual canvases on which you will create the details of your bunny. Press the “+” button to create a layer. This new layer will appear at the top of all the others. You can adjust its position as needed. Create layers for shadows, colors, and linework. You can always add more as you explore what works best.
Play with refinement and opacity.
Bunnies are fluffy and have plenty of texture in their fur, so experiment with opacity settings and different brushes to capture those. As you work with the details of the bunny, try using pixel brushes to enhance your linework. A charcoal texture can add a degree of fluffiness to the bunny. You can also change the color on pencil brushes to give the impression of colored pencils, if that’s more your style. The eraser tool can help you refine your drawing as well.
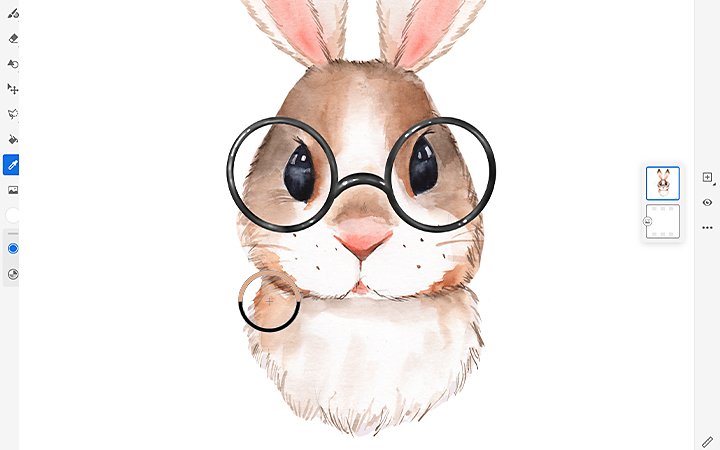
Add texture and color.
Textures and colors are the final strokes needed to complete your bunny. Fresco has tools for capturing many different colors in a single brush stroke. If you’d like to capture a few different colors of brown for the fur, tap on the Eyedropper tool in the toolbar, and then choose the multicolor swatch icon. You’ll be able to capture several colors (possibly from your reference photo) and use them to paint an array of hues on your bunny.
The final steps are all about adding in the quirks that will leave you satisfied with your work. Fine-tune the textures, details, and colors to finish your rabbit. And, if you’d like to try your hand at drawing other objects and animals, you can find a wealth of step-by-step animal drawing tutorials just a hop, skip, and a jump away.
Contributors
You might also be interested in…
Take your skills to the next level with drawing exercises and advice from professional illustrators.
