video
Channel the 180-degree rule for compelling cinematography.
Use the 180-degree rule to help your audience track dialogue in a film. Learn how you can apply this rule to your shoots.

Rules and regulations.
When you watch a scene of dialogue in a film, the flow of the camera between characters as they speak makes the conversation seem real, immediate, and logical. When viewed abstractly, it’s strange that distinct cuts between two actors can feel seamless. What makes this cinematography magic work?
Film school students know the answer — the 180-degree rule, also known as the 180 rule. This cinematographic guideline helps filmmakers create dialogue scenes during principal photography that feel consistent, keeping the viewer focused amid the action. But like many rules, there are times when it can be bent or broken.
An imaginary line for dialogue.
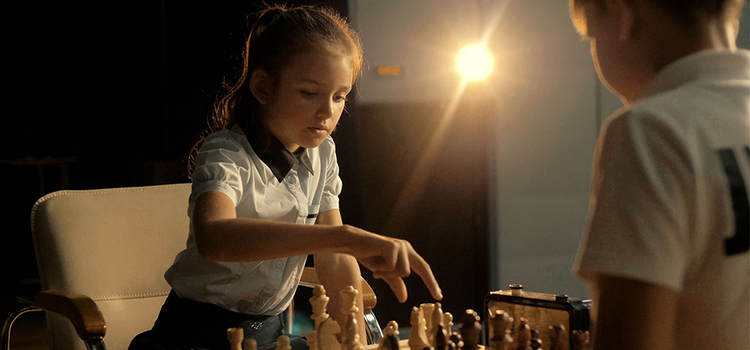
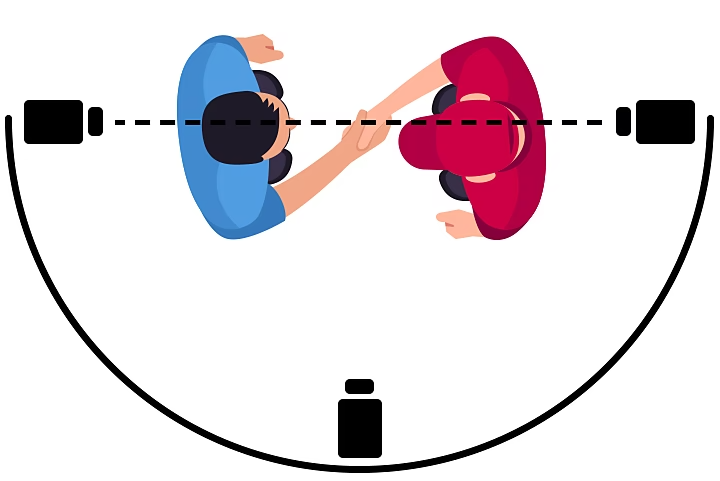
Imagine a scene of two actors talking, face-to-face or in close-up. Now, jump to a bird’s-eye view above their heads and envision a straight line drawn from the crown of one actor’s head to the other’s. This is the 180 line that should govern your camera movement for the scene.

When you position the camera for a dialogue scene, the key is to keep the camera on one side of the imaginary axis along this straight line for the duration of the scene. Why? For many films, the goal is to keep the viewer focused on the action of the scene, keeping them keyed into what is happening with the actors. Obeying the 180 rule maintains continuity — along with following a solid shooting script — so the viewer is not distracted by inconsistencies in spatial relationships.
A cutaway across the line when filming a scene breaks continuity, potentially disorienting or confusing the viewer. But sometimes that confusion is helpful.
How do you visualize this? The answer is simple, says director Whit Ingram: “Watch movies, observe the 180 rule, and then go out and practice.”
When to hold the line and when to break it.
Making the decision to maintain the 180 line is a critical one, and whatever you choose to do, be intentional.
Hold the line.
Preserving the 180 line is critical when you want the focus to be on actors or movement within a scene. When you reverse cut from one over-the-shoulder shot to the other, keep the camera on one side of the line to maintain continuity and keep things consistent for the audience.
Break the line.
One of the most important aspects of acknowledging a convention is knowing when to break it. Many filmmakers make an intentional choice to break continuity and disorient the audience. By jumping across the line, you can cause a shift in perspectives.
But before you think about crossing the line, ask yourself why. There are many reasons to do this — a jarring battle scene, a power change in a conversation, or presenting an alternative perspective.
For a lesson in disoriented continuity, look no further than Stanley Kubrick’s The Shining. Multiple scenes in the film break the 180 line to get the viewer inside Jack Nicholson’s character’s own mental disorientation. There are cuts from the right side to the left, so characters in conversation switch sides of the screen. The effect, like Kubrick’s many jump cuts, is unsettling — precisely the right choice for a horror film.
Technical details and stylistic choices.
The beauty of the 180 rule is that there’s no special filmmaking equipment required to practice it. You can maintain the same degree of continuity with an iPhone camera or a three-camera setup — a multi-camera setup used to simultaneously film a scene from different angles. The main thing to keep in mind is the structure and flow of your scene.


“Start with just a tripod,” says cinematographer Joshua Martin. When new filmmakers are trying to learn the ropes of shooting, often they get bogged down by complicated equipment. Instead, keep your setup small. “As you learn what your scenes need, you’ll learn about and add more specific equipment to get the desired effect,” says Martin.
Something that will help you plan and film scenes is having a sense of when and where scenes will end. A shot list can help with this, especially when you’re in a dialogue-heavy section of your script.
Make sure that you give yourself enough room to make good camera placements, especially if the goal is a wide shot. “When you’re scouting locations, be aware of where you can actually put the camera and how far you can go outside 180 degrees,” says Ingram. Many great scenes have been undone by a lack of room to shoot.
Controlling the scene.
Continuity isn’t just the cinematographer’s job. The editor also has to work to make sure that intentions with the 180 rule remain consistent.
Organization is key.
Whether you’re cutting together a short film or a two-and-a-half-hour epic, an editor needs to keep footage organized, so no gems get left on the cutting room floor. Organize footage in Adobe Premiere Pro in whatever way makes the most sense for your workflow. From the Assembly workspace, you can create a folder structure and use labels to bring order to the chaos.
If you’re organizing a dialogue scene with the classic 180 line structure, here’s a suggestion for how you might create a folder hierarchy:
- Top-level folder with scene title
- Subfolder with Actor A’s footage
- Subfolder with Actor B’s footage
Within each subfolder, you can create more subfolders for different points in the scene, and you can use a labeling system to organize takes. The key is to create a system that’s repeatable and memorable, should you need to return for a re-edit.

Search Bins save time.
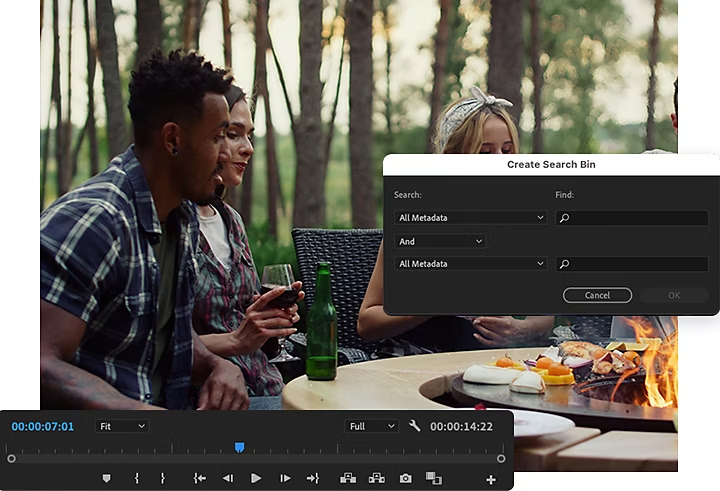
Another useful feature for editors working in continuity is Search Bins. When you create a Search Bin, Premiere Pro asks you for metadata information, which is essentially labels for your clips. With that metadata, Premiere Pro will automatically populate the bin with the results of a metadata search for clips that have the search terms.
When you first watch all the footage for your film, the Metadata tab is a powerful assistant. Fill in details there, so when you create Search Bins to assemble your edits, all your footage will be at your beck and call. You can write single keywords in the Description field separated by commas, serving as important keywords that can then later be pulled with a Search Bin.
At the end of the day, camera placement and clever editing are everything for maintaining continuity. “Where you place your subject, where you place your lighting, and how you control movement decides the scene,” says Martin. So gather up your gear and start experimenting. You’ll have a handle on film logic in no time.
