An introduction to the video timeline.
The backbone of digital video editing is the video timeline. Learn the basics of how a timeline functions and how to use it in Adobe Premiere Pro.

Image by Joshua Martin
What is a video timeline?
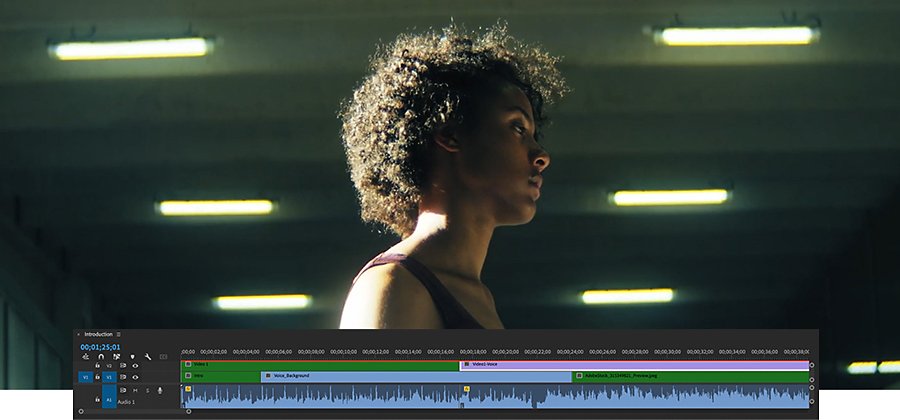
The timeline is the area of a video editing application where you arrange your video clips and map out all the edits you’d like to apply. From start to finish, you’ll see all your video clips, audio clips, effects, and transitions laid out in chronological order as you work. You’ll be able to reorder, trim, and enhance your clips — all the basics of video editing. You can also play your project at any point in the timeline to see how your edits will look.
Edits on the timeline do not alter your source files and are just previews of how edits will appear. You can undo anything you’re not happy with. Trim down a clip, and then extend it back out to full length again without consequence. Once you’re happy with your edits and are ready to export your video, Premiere Pro will encode a whole new video file incorporating all the edits you added to the timeline.
“If you’re a video editor, the video timeline is your canvas for making your art,” says cinematographer Joshua Martin. “You’re taking the footage that you shot and crafting it to make something very compelling, whatever that might be — a YouTube video, a film, a trailer, a commercial. On the timeline, you’re in full control of the story.”
Videos by Joshua Martin
Get your edits under control.
Professional timeline editing can be just as useful for social media videos and video marketing as it is for feature films. It’s true that some social media platforms like Instagram and TikTok offer in-app editing. However, the functions of these in-app editors are limited, whereas the timeline editing tools in Premiere Pro give you incredible control so you can make exact edits to your video frames.
“In social media apps, the cutting and timing is really difficult to get right, because it’s just a little slider tool,” says Martin. “Some people’s fingers are quite wide, so it’s hard to get very precise. If you want to be as precise as you can be, do it in a timeline versus on your phone.”
Access the intuitive timeline in Premiere Pro.
Easily add media of all types onto the timeline in Premiere Pro to get started on a video project. You can upload video clips, animations, audio clips, still images, and graphics. Plus, integration with Adobe Stock means premium stock video footage and title and transition templates are just a few clicks away. Simply search your Libraries panel and license assets right within the app.

Other applications that use timelines.
All video production programs use a version of a video timeline. In fact, applications not created for video editing use timelines for certain functions as well. The audio editing timeline in Adobe Audition provides an extended audio clip canvas similar to what’s in Premiere Pro, but with even more advanced audio tools.
You can use Adobe After Effects to create timeline animations for motion graphics or video effects. You can even edit individual image sequence files in Adobe Photoshop using its timeline mode. Create new frame animations this way or apply image transformations to video frames. The opportunities in timeline editing are endless.
The basic functions of the Premiere Pro timeline.
The timeline in Premiere Pro allows for unlimited visual and audio tracks. Use them to add layers of video files, image files, and audio files that appear in your project simultaneously. In this way, you’ll be able to organize sound effects that play during music and dialogue — or layer graphics, photos, or videos that play on top of one another.
The playhead and playback window.
A blue line with a clickable marker at the top runs through your timeline. This is your playhead. Click and drag it to travel to different frames in your project. To watch a preview of your project, look to the playback window above your timeline and hit Play. You can also adjust your images in the playback window. Change the dimensions of clips or images and drag them to various points in the window to affect how they appear in your video.
The eight primary timeline tools.
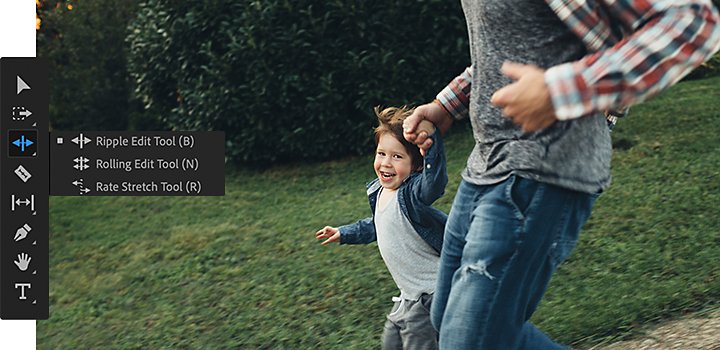
To the left of your timeline is a set of eight tools represented by icons. Use these to perform the following basic functions:
- Selection tool:
Select clips on your timeline or in the playback window to make adjustments. Right-click or control-click to cut, copy, or delete clips. Hover your mouse at the edges of clips to adjust their length.
- Track Select Forward tool:
Use this tool to select all clips going forward from where you click on your timeline. Or click and hold the tool to change it to the Track Select Backwards tool, which selects all clips going back.
- Ripple Edit tool:
Close gaps caused by your edits by clicking on one side or the other of an open space.

- Razor tool:
This tool cuts clips into shorter pieces wherever you click.
- Slip tool:
Trim the end point of one clip and the start point of the next one, leaving the total duration of the two clips the same.
- Pen tool:
Use this to draw free-form shapes on your project in the playback area. Or click and hold on the Pen tool to reveal the Rectangle tool and Ellipse tool. Then apply special edits or graphics inside your new shape.
- Hand tool:
Use this tool to navigate through your timeline sequence without making selections.
- Type tool:
Quickly add text over the top of your footage by selecting this tool and clicking inside the playback window.
Add transitions and audio clips.
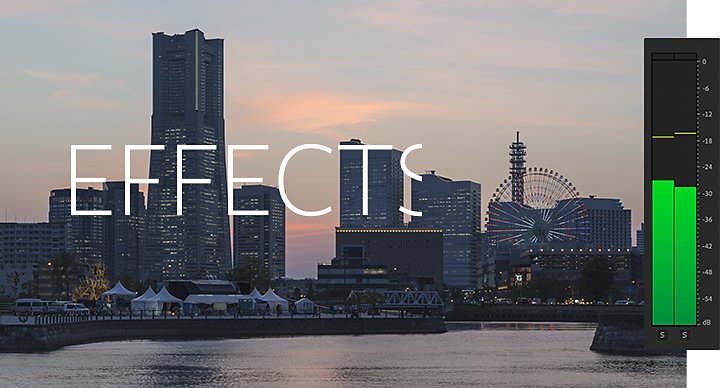
Add artful effects that carry one scene into the next by placing transitions at the start and end of clips. Go to Effects › Video Transitions and drag them right onto your timeline over the top of your clips. Add and adjust audio clips that play during your scenes by adding them to your timeline, just as you do with video and images. You can even record new audio clips right within Premiere Pro. In the Audio panel, click the microphone icon to record voiceover tracks.
Workflow tips for timeline editing.
To avoid lost footage and streamline your workflow, stick to a routine when you edit your video content. Before you start, back up all your footage to an external hard drive. Then upload or ingest your footage into a new project in Premiere Pro. This will be the bucket from where you’ll pull your clips onto the editing timeline. Go through and delete any unwanted clips from your project library.
From there, drop a few clips onto the timeline and make your first cuts. Bring in the music or sound effects you’ll be using to help shape your sequence. It helps to color-code your sound clips — one color can be used for sound effects, another for music, another for dialogue, and so on. Once you have your rough cut down, you can add transitions, begin color grading, and add text or graphics.
Take breaks.
“I’ll do one rough pass — cut it all the way through, even if it’s not perfect, and then I’ll take a break,” says Martin. “I won’t touch it, I’ll walk away, do something else, cut the grass, go cook. And then I’ll come back with fresh eyes and do another cut. Then I’ll watch it one more time to see how it feels. I’ll also ask my wife or other people to watch it.”
Always rewatch.
Watch your project all the way through one final time before you export it. “Go back through your timeline and make sure everything’s where it needs to be,” says Martin. Make sure all your titles are in the right place and that you didn’t miss any color grading. “It can be tedious with longer videos, but it’s going to save you a lot of headaches in the end.”
Tutorials and templates for timeline editing.
Follow along in this video as a professional editor walks you through the fundamentals of editing on the Premiere Pro timeline. Then jump into Premiere Pro and see what you can do. The most effective way to learn to edit on a timeline is to start doing it. “Just start messing with it. Get some clips from your phone, drop them in, cut them up, and add some stock footage,” says Martin.
Then try to shoot some new footage to see how you can shape a story from start to finish. The best videographers plan ahead for how they’ll edit future projects, even while they shoot. “If you’re editing your own videos, as you’re shooting, you have to think about the edit too. That’s the necessary evil of it,” says Martin. “We try to think ahead.”
If you’ve created a project that works and you’d like to replicate its structure with new footage, you can create video templates to come back to customize later — save everything from titles and graphics to entire timeline templates that preserve your sequence for use in your next project. Practice and preparation will make each new project on your timeline easier and easier.
Contributor
Joshua Martin
Do more with Adobe Premiere Pro.
Make visually stunning videos virtually anywhere — for film, TV, and web.
You might also be interested in…
Take your music video from concept to post-production with these tips from veteran filmmakers.
How to make a lower third graphic for your video.
Learn how to display titles, captions, banners, and more in your video with lower thirds.
Learn how to create a shot list that guides the crew through all of the day’s camera setups.
Understanding camera shots in film
Explore the most common camera shots, and learn when and how to use them to greatest effect.
Get Adobe Premiere Pro
Create flawless productions with the industry-leading video editing software.
7 days free, then Rp344.322/mo Termasuk PPN.


