Photography (20GB)
Rp149.628/mo
Lightroom on desktop and mobile, Lightroom Classic, and Photoshop on desktop and iPad. Learn more
Discover how to use tilt-shift lenses to achieve unique depth-of-field effects and get total perspective control in your shots. Plus, hear from experts on how to hone your tilt-shift photography technique.

Whether you want to create a miniature model effect, straighten lines on tall buildings, or experiment with selective lens blur on portraits, tilt-shift effects open up a world of creative opportunities for photographers. Photographers use tilt-shift lenses to achieve depth-of-field and perspective effects in-camera that you can otherwise only approximate with digital tools. If you want to create high-quality, unique images, a tilt-shift lens might be just the tool for you.


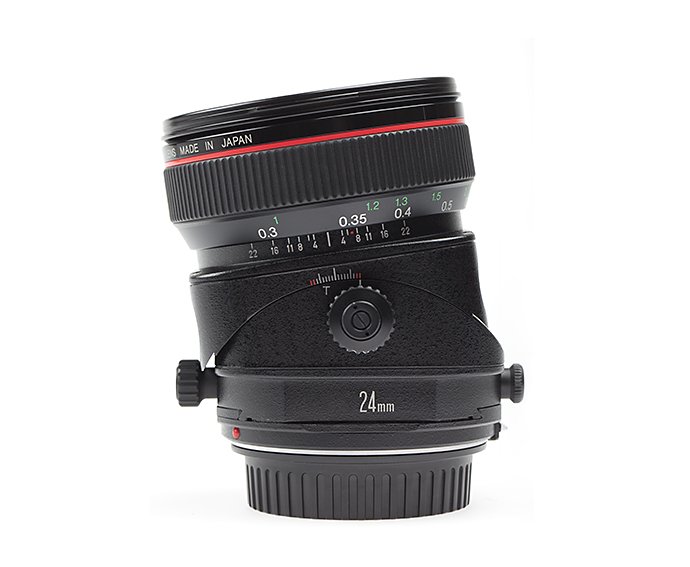
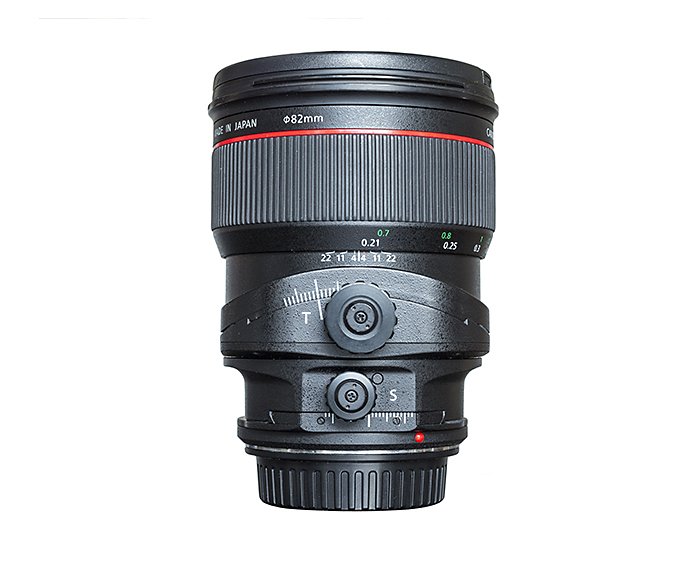
Tilt-shift lenses have two sets of knobs: one that controls the tilt function and one that controls the shift function.
The Tilt knob changes the plane of focus by tilting the lens in relation to the sensor. This means your focal plane, which determines the area in focus, isn’t parallel to the camera’s sensor but rather is angled in a certain direction.
Once you’ve tilted your focal plane, you can use selective focus to either broaden or narrow your depth of field. You can create a very shallow depth of field with lots of lens blur or you can bring everything into tack-sharp focus. You can also make two points at different distances from your camera in focus.
The ability to manipulate focus with the Tilt function is due to something called the Scheimpflug principle. One way to see this in action is with miniature faking photos, where you can make real-life scenes look like a miniature scale model by blurring most of the image and shooting with a very shallow depth of field.
The tilt effect alters the focal plane of the image, but the shift effect alters an image’s perspective. With the Shift knob, you can move the lens up and down or side to side on the body of the camera. As the lens moves, the image plane moves too, so that the sensor records different areas of the total image. You can think of it capturing a panorama without the need to physically move the camera. To use the Shift knob, point the camera lens where you want the image to begin, and twist the knob to shift the lens in whichever direction gets you your desired composition.
“With any lens, a circle of light hits your rectangular image sensor,” explains photographer Nick Ulivieri. “But with a tilt-shift lens, the image circle is a lot bigger than a normal lens. So when you shift, you’re moving the image circle around your sensor. Think of it this way; what you see through the viewfinder is only a fraction of what the lens sees; it's as if you were cropped into a photo in Lightroom. Shifting the lens, then, is like dragging the crop box across the image to find the ideal composition.”
This panoramic-type function enables you to capture completely straight lines no matter where you’re positioned in relation to an object. One of the most common examples of this is in architectural photography, where tall buildings will appear to fall backwards the higher they go. With the Shift function, you can get perfectly parallel lines all the way up.
One way to use your tilt-shift lens is to make a panorama by taking one picture, shifting the knob upward, taking another photo, and stitching them together in editing apps like Adobe Photoshop. “Stitching images is a huge part of my workflow,” says architecture photographer Andrew Pielage. “I overlap about 30% of every image to ensure I get a proper stitch.”
You can also correct perspective in the Transform panel in Adobe Photoshop Lightroom. These tools work by stretching or compressing areas of your image, which will crop your image to some extent. This works for many images, but if your image has a lot of distortion, the crop could lower your image quality or alter your composition. Post-processing tools are good solutions for many scenarios, but for professional photographers or enthusiasts who need perfect results on location, a tilt-shift lens is the best way to get the shot in-camera.


Images by Nick Ulivieri
Architecture photography
“If you don’t have a tilt-shift lens to shoot cityscapes or architecture, to get perfectly rectilinear shots you’d need to position your lens parallel to the ground and perpendicular to your subject,” explains Ulivieri. But most of the time, you won’t be parallel to the building; you’ll be on the sidewalk looking up at it, and you’ll mostly likely need a wide-angle lens to fit the whole building in the frame.
This will capture the entire building, but vertical lines will appear to converge inwards to a point rather than stand up straight. The Shift knob fixes this issue so that you can capture buildings the way they were designed to be viewed, without distortion.
The same principles that apply to architecture photography also apply to landscape photography. A forest of trees or a mountainscape are both examples of scenes where you can avoid receding lines with the shift effect.
The tilt effect could also be used to make landscapes tack sharp, no matter how near or far elements are. Say you have wildflowers in the foreground and a mountain in the distance. “If you’re close to the flowers, there’s no aperture you can shoot at with a normal lens where your flowers and the mountain are going to be tack sharp,” says Ulivieri. “But if you tilt the lens, you can lean the focal plane back so it intersects with both the flowers and the mountain.”

Miniature effect
You can use the Tilt knob to make scenes look like a miniature model, as the shallow depth of field and blurring throughout the image emulates the look of macro photography.

Portraits
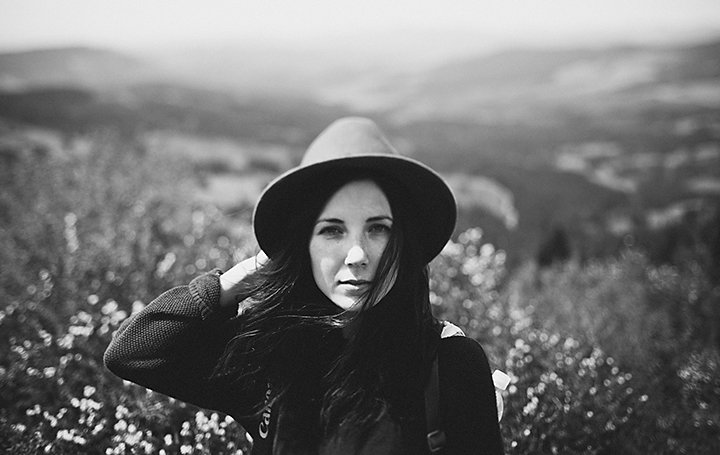
The selective focus opportunities that the Tilt function provides make for interesting storytelling techniques, especially for wedding photography or couples shoots. You can tilt the plane of focus to keep only a few elements in focus while the surroundings fall away into a soft bokeh, or blur, which complements your subjects and directs the viewer’s eye to what matters.
“In product photography, if you can’t get the product in focus with a small aperture alone, you can tilt the plane of focus so you can keep things both near and far looking sharp,” says Ulivieri. Alternatively, you can blur everything but your subject, a technique often used in food photography.

Invest in a good tripod.
Because there are more moving parts to operate, a sturdy tripod is your number one must-have for getting good tilt-shift photos. As you shift the lens up, you’ll need to keep the camera very steady so you can capture a continuous frame, which is a hard feat to accomplish when shooting handheld.
“Tilt-shift lenses are very sharp and really well designed, but that’s also why they’re so expensive,” says Pielage. Because tilt-shift lenses are a larger investment, renting or borrowing a lens before you buy is a great way to get a feel for it and see what you like.
“I’d recommend renting a couple and playing with them before you make a purchase, because they’re expensive,” says Ulivieri. “But the end result is certainly worth the investment.”


Images by Nick Ulivieri
Slow down and experiment.
Tilt-shift lenses come with a slightly steeper learning curve than traditional DSLR lenses, so don’t expect to have your technique mastered right out of the box. “The first time I used my tilt-shift lens I was frustrated for the first month or two,” says Piealge. “It took a lot of experimenting to learn how it worked. You really need to get it in your hands, shoot with it, and make a lot of mistakes. That’s the best way to learn.”
As you explore the lens, don’t combine the tilt and shift functions right off the bat. Instead, experiment with them one at a time to get familiar with how they work independently. Because tilt-shift lenses are all manual focus, you’ll need to spend more time dialing in your composition and setting up your shot. “I think the biggest challenge is slowing down your process and making sure your focus is locked in,” says Ulivieri. “You have to be really deliberate about what you’re trying to achieve.”
No matter what kind of photos you want to take or how experienced you are, tilt-shift lenses offer something new for every photographer. “There are so many different ways to use tilt-shift photography. I think people are still figuring out different ways to get creative with these lenses,” says Piealge.
Now that you know the ins and outs of tilt-shift lenses, get ready to enjoy the process and discover all the different kinds of creative photos you can make with this powerful tool.
Create beautiful images with Photoshop brushes, Content-Aware Fill, Photo effects, Neural Filter, Sky replacement, and the many tools photographers rely on.
Explore the Photoshop family of apps.
Cara menambahkan latar belakang bokeh ke foto Anda.
Pelajari lebih lanjut mengenai efek blur yang indah dan dapat memberikan penampilan yang memukau pada foto Anda.
Discover ways to select the ideal focal length for any and every photo.
Bring creative storytelling into your photography with forced perspective.
Convey a specific point of view by changing the proportions of your image.
Getting started in real estate photography.
Begin your journey into real estate photography with these tips and insights from working pros.
Find the Creative Cloud plan that’s right for you.
Rp149.628/mo
Lightroom on desktop and mobile, Lightroom Classic, and Photoshop on desktop and iPad. Learn more
Photography (20GB)
Lightroom on desktop and mobile, Lightroom Classic, and Photoshop on desktop and iPad. Learn more
Rp149.628/mo
Rp344.322/mo
Get Photoshop on desktop and iPad as part of Creative Cloud. Learn more
Adobe Photoshop Single App
Get Photoshop on desktop and iPad as part of Creative Cloud. Learn more
Rp344.322/mo
Rp868.686/mo
Get Photoshop on desktop and iPad, plus the entire collection of creative apps. Learn more
All Apps
Get Photoshop on desktop and iPad, plus the entire collection of creative apps. Learn more
Rp868.686/mo
Rp299.478/mo.
Save over 60% on the entire collection of Creative Cloud apps. Learn more
Students and teachers
Save over 60% on the entire collection of Creative Cloud apps. Learn more
Rp299.478/mo