OPASTUSARTIKKELI
Aloittelija
8 min
Animate a camera
Apply basic camera rigging techniques in Adobe After Effects to animate a one-node or two-node camera in 3D space.

Lataa mallitiedostoja
Playing around with 3D cameras in After Effects means thinking like a cinematographer. Does your scene have a particular point of interest (POI) or does the camera drift around? Will your camera push in dramatically, move sideways, or orbit around your subject? The answer determines the type of camera you’ll use.
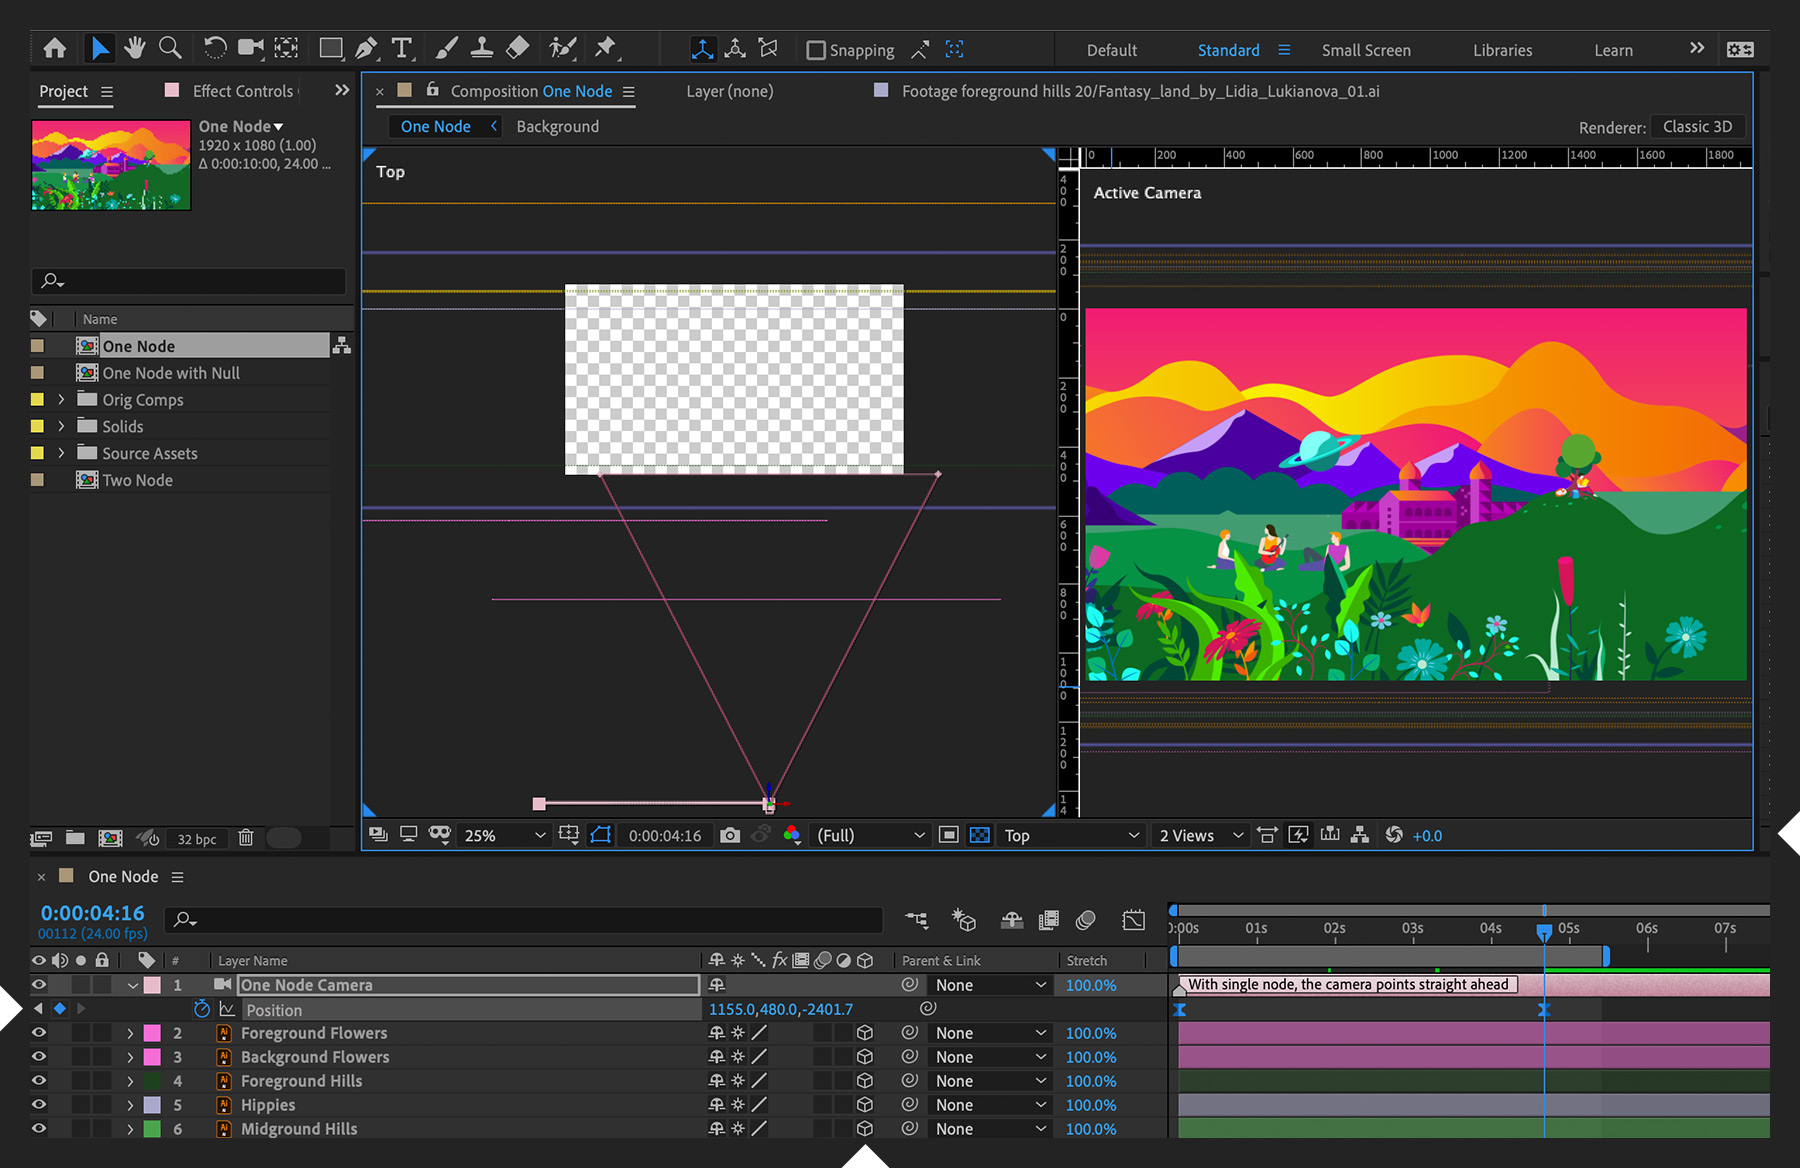
A one-node camera never changes its orientation no matter where you move it. Imagine a camera placed on an office chair that rolls but doesn’t swivel. No matter how you roll that chair, the camera always faces the same way. This camera works great for a sideways “trucking” shot, as if shooting a landscape out of a car window, or zooming into a big 3D movie title.
Create a scene within a composition that has foreground, middle, and background planes. Convert the layers to 3D, if they aren’t already, by selecting them and choosing Layer > 3D Layer. Feel free to use the “Fantasy Land” asset we’ve provided. Create a new camera (Layer > New > Camera) and choose One-Node Camera as the Type, leaving Enable Depth of Field unchecked. It should be the top layer in the Timeline panel. To see what your camera is doing, go to the bottom of the Composition window and select 2 Views - Horizontal in the View Layout pop-up menu. Set one half of the panel as the Top and the other as the Active Camera. Reveal the Position parameter (press P) of the Camera layer. As you reposition the camera, notice how it consistently points in the same direction. Set a Position keyframe, move the playhead later in the timeline, and change the camera’s X position. As you preview your animation, see how you’ve achieved a sideways camera move.

A two-node camera establishes a POI as the second node. You can still move that chair in any direction but since the seat swivels, the camera is able to point at the POI at all times.
Duplicate your one-node camera composition (Edit > Duplicate), select the camera layer, choose Layer > Camera Settings, and specify Two-Node Camera in the dialog box. Twirl open the camera’s Transform options in the Timeline panel and see that you now have a parameter called Point of Interest. Change the POI settings until an object appears in the middle of the camera’s view. As you preview your animation, see how even though the camera moves the same as before, it now swivels slightly so it remains focused on the object. Set a POI keyframe, move forward in time, and then set another keyframe where the POI is a different object. Now as you preview, you’ll see the camera shift its gaze from one to the other as it moves through the scene.

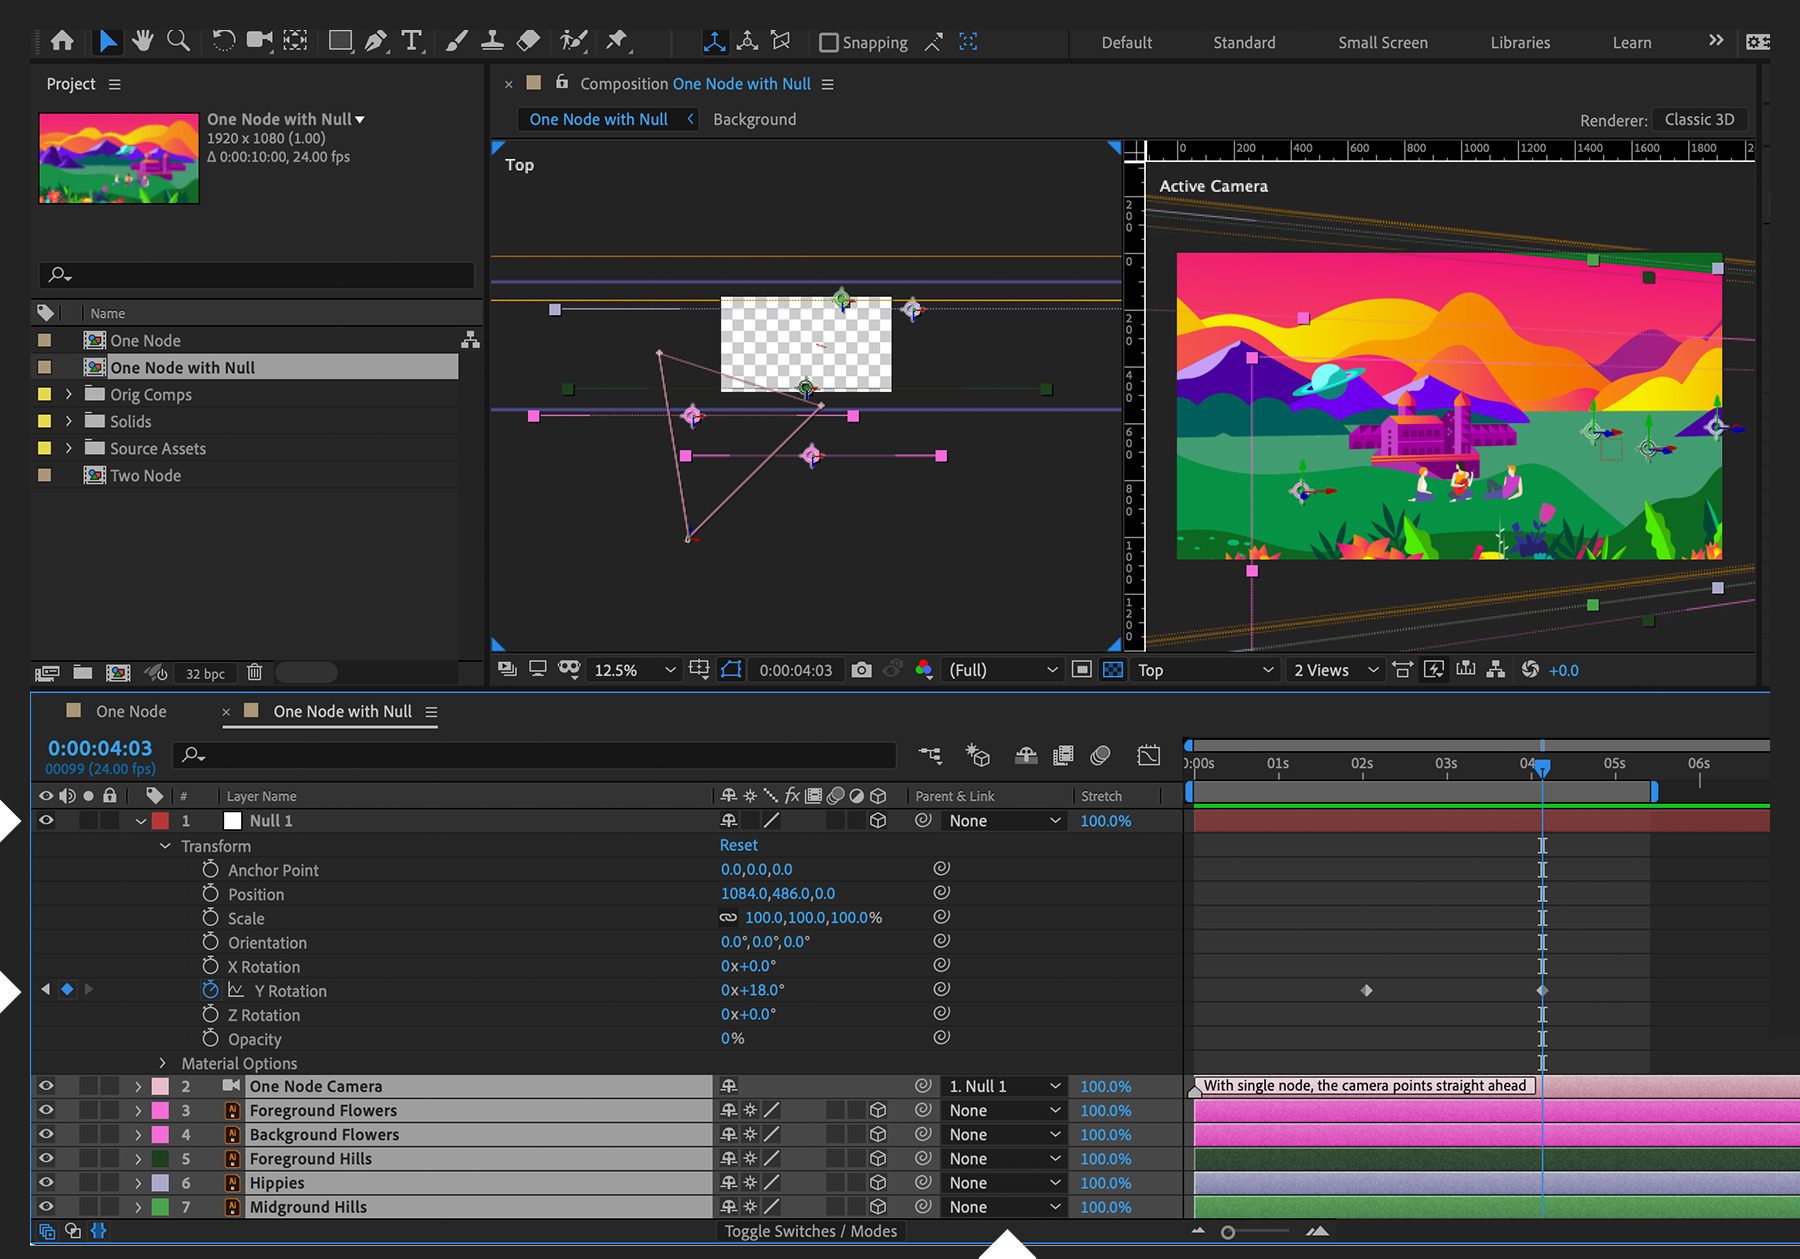
Either camera type allows you to use a null object to move it around. Continuing with the chair metaphor, imagine attaching a stick to the front of your rolling swivel chair and grabbing the handle at the other end (the null object). As you move the chair by pushing the handle toward or away from you, or by rotating in place, the camera always points toward you. This option is great for a shot that orbits a point of interest.
Duplicate the one-node camera composition and delete the existing camera keyframes. Make the camera face an object in the center. Create a null object (Layer > New > Null Object) and make it a 3D layer. Click the Parent & Link pop-up menu on your camera layer and select the null object as its parent. Twirl open your null’s Transform properties and set a Y Rotation keyframe. Move ahead in time and set another Y Rotation keyframe. As you preview your animation, see how the camera orbits your subject. Select all layers and look at the Top view in the Composition panel to get a better idea of how the null affects your camera’s position.

See how we set up our camera to move through the sample scene:
