#1e1e1e
Photography
Use Adobe Photoshop to create a duotone effect.
Whether it’s your favorite band’s avatar or your best friend’s new profile pic, the duotone effect is everywhere. Thankfully, it doesn’t take a full studio to create—all you need is your creativity. Learn how graphic artist Erica Larson uses Adobe Photoshop to add color gradients to her images, creating a duotone look.

Take a peek at the Photoshop technique behind this duotone effect in our one-minute video; the steps are written out below.
Erica Larson dreams up inspired designs every day as an Associate Creative Director on the Adobe Studio team. She makes stuff that makes others want to make stuff.
Before you start.
The duotone effect works best on high-contrast images. Use this sample image if you’d like, or practice with your own.
Step 1: Prep your image
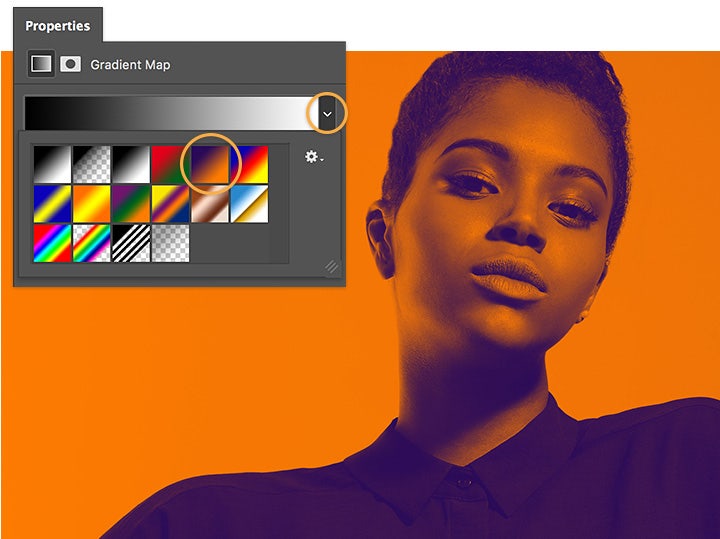
Larson started by adding a Gradient Map Adjustment Layer (different from a regular Gradient). This allows her to map colors onto the grayscale values, while preserving the original image.

Step 2: Add a splash of color
Click on different Presets in the Properties panel to see how each one affects your image. Larson selected the Violet, Orange gradient as her starting point.
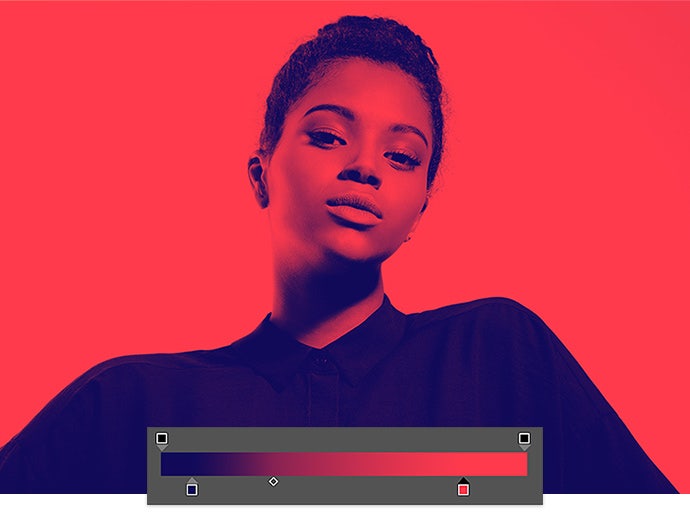
Step 3: Choose your shade
Click on the gradient to open the Gradient Editor. This preset has two color stops by default. Larson double-clicked on each of the color stops, and then chose a new color using the Color Picker.

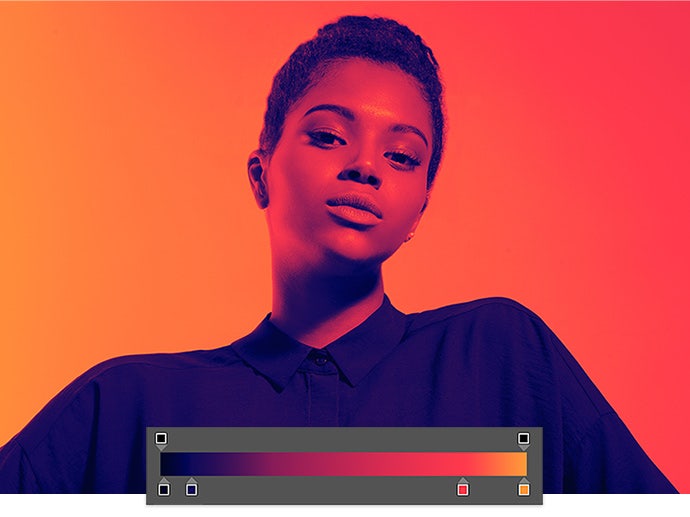
Step 4: Enhance the spectrum
You can shift the color stops and the Color Midpoint (the center diamond) to add a bit more range to your image’s color spectrum. Larson went further, adding two more color stops by simply clicking just below the gradient, and again selecting from the Color Picker.
Create your dynamic duotone.
See how this dramatic, colorful effect can give any high-contrast, black-and-white image a bold new look.

Note: Project files included with this tutorial are for practice purposes only.
You may also like
title
Whether it’s your favorite band’s avatar or your best friend’s new profile pic, the duotone effect is everywhere. Thankfully, it doesn’t take a full studio to create—all you need is your creativity. Learn how graphic artist Erica Larson uses Adobe Photoshop to add color gradients to her images, creating a duotone look.
ContentType
Article
tags
caas:content-type/article,caas:product-categories/photo,caas:products/creative-cloud,caas:products/photoshop
description
Whether it’s your favorite band’s avatar or your best friend’s new profile pic, the duotone effect is everywhere. Thankfully, it doesn’t take a full studio to create—all you need is your creativity. Learn how graphic artist Erica Larson uses Adobe Photoshop to add color gradients to her images, creating a duotone look.
cardImage
cardImageAltText
Duotone effect