By Matte Rae
11 Aug.2021 ·
5 min read
Artwork by Simona Toader
Adobe XD is designed to help you to work as efficiently as possible, from the lean, contextual controls and interface, to the powerful productivity boosting features like Repeat Grid and Content-Aware Layout.
Beyond the intuitive interface, XD comes equipped with many powerful keyboard shortcuts to help advanced users accelerate their workflow even further. This guide will cover some of the stand out shortcuts that can boost your design productivity in Adobe XD.
MacOS and Windows
Adobe XD is supported on both MacOS and Windows platforms. The keyboard shortcuts or hotkeys that will be covered in this guide are nearly identical across platforms, with the exception of two modifier keys. On MacOS, the Command key is used commonly as a modifier key for actions, whereas the equivalent on Windows is the Control key. In the same way that Command and Control are interchangeable, Alt and Option are also interchangeable. In MacOS shortcuts, Option will be used and Alt will be used for the Windows equivalent.
Navigation shortcuts
Whether you’re an advanced user or just starting out, understanding navigation hotkeys can help you move through the application faster, leaving more time to focus on the creative process.
Design, Prototype, Share
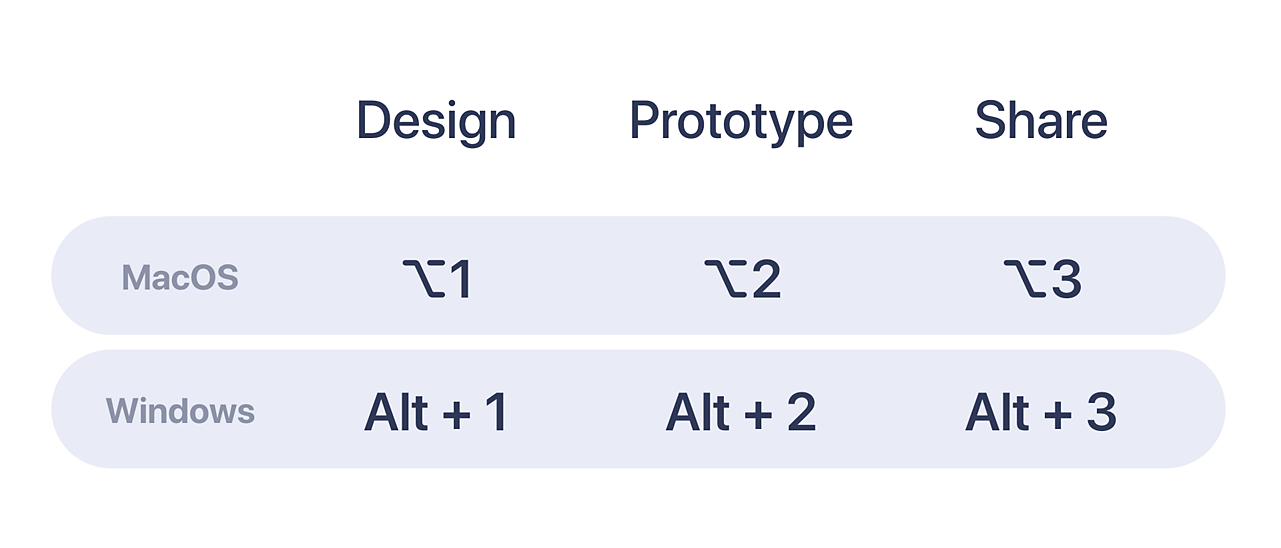
Moving between stages of the design process in Adobe XD is as easy as toggling between Design, Prototype and Share in the top left of the interface. However toggling between these modes is even easier with keyboard shortcuts.
- Design (⌥+1/Alt + 1)
- Prototype (⌥+ 2/Alt + 2)
- Share (⌥ +3/Alt + 3)
Libraries, layers and plugins
Navigating between the Library, Layers panel and Plugin panel can also be achieved using just keyboard shortcuts. These panels can be toggled on and off and toggled between one another using the following keyboard shortcuts:
- Show/Hide Libraries: ( ⇧ + ⌘ + Y / ⇧ + Ctrl + Y )
- Show/Hide Layers: ( ⌘ + Y / Ctrl + Y )
- Show/Hide Plugin: ( ⇧ + ⌘ + P / ⇧ + Ctrl + P)
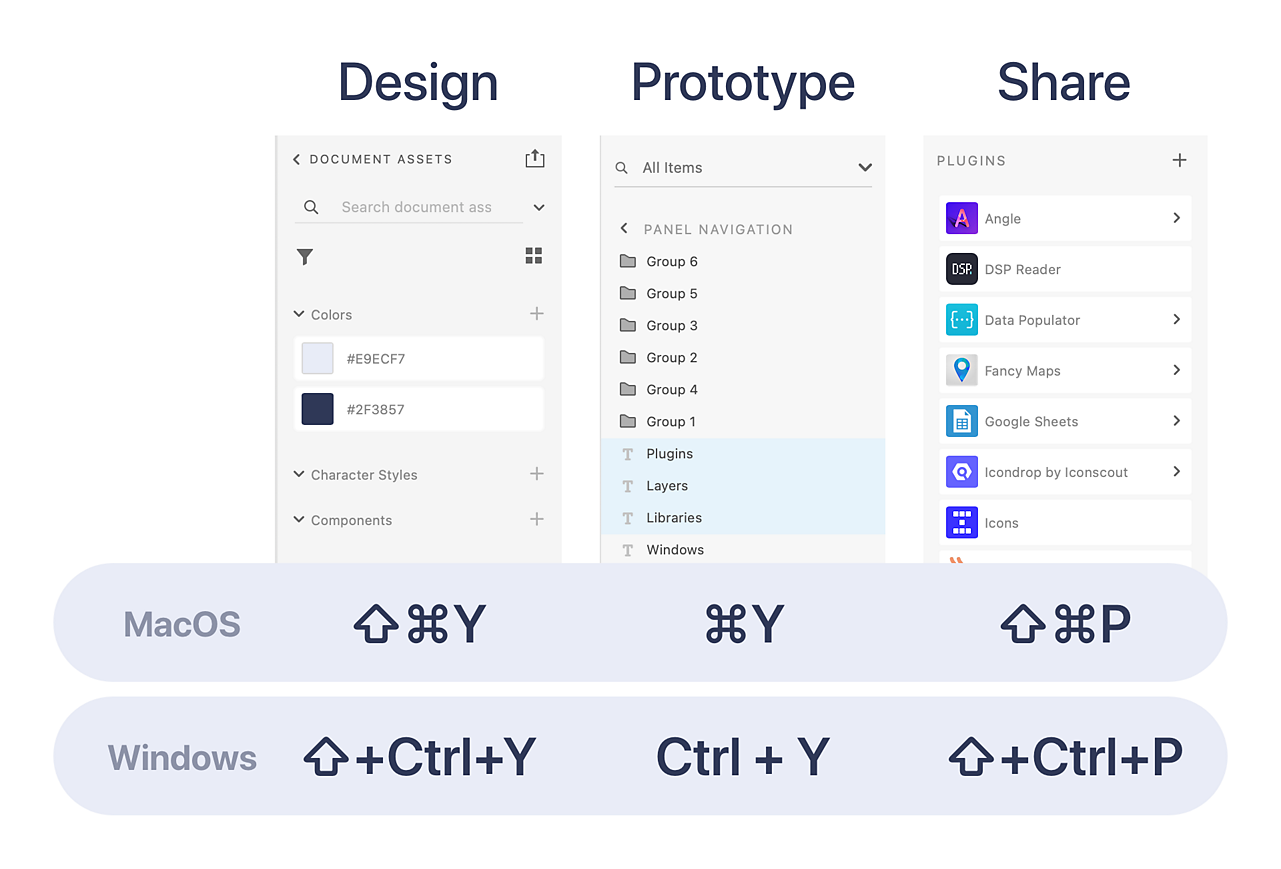
To close any of the above panels, simply use the shortcode again to toggle it closed.
Zoom controls
Being able to find what you’re looking for quickly on the XD canvas can help to accelerate your workflow. Adobe XD provides several keyboard shortcuts for zooming onto selections and focusing content into view on canvas.
Zoom tool (Z)
The Zoom tool provides granular zoom control, zooming to fit on the highlighted area. To use this tool, hit Z on the keyboard and drag around the desired zoom area.
Zoom to fit all (⌘0/Ctrl + 0)
The Zoom to fit all shortcut zooms the canvas so that all assets included in the document are visible in the viewport. This is a handy hotkey if you’re lost on the canvas and need to quickly get back to the design content.
Zoom to 100% (⌘1/Ctrl + 1)
With a selection made on canvas, using the Zoom to 100% hotkey will zoom that selection to 100% of its pixel size. How this appears will differ for each device, but is a great tool for showing the true-to-life size of the design.
Zoom to 200% (⌘2/Ctrl + 2)
Like the previous hotkey, this one zooms a selection to 2x the size, allowing it to be inspected in finer detail for high resolution displays.
Zoom to fit (⌘3/Ctrl + 3)
This Zoom hotkey is a designer’s best friend and allows a selected element to be fit into view with the click of a button. Select a layer on canvas or in the layers panel and use this shortcut to focus on the selected element.
Preview window
A valuable feature of Adobe XD is the ability to view a preview of your design and prototype in real time using the built in Preview window. Use the keyboard shortcut to bring the Preview window up without clicking the Play button in the top right corner: (⌘+Return/Control+Enter)
This keyboard shortcut will also restart a prototype containing multiple artboards, returning the preview to the designated home screen or the first artboard in the canvas.
Resizing and positioning
A key part of any workflow involves manipulating objects on canvas, whether they’re being resized or positioned on an artboard. Though all of this work can be done using a mouse and controls in the Properties Inspector, it can all be accelerated by using hotkeys for resizing and positioning.
Resize objects
Resize objects by 1px (⌘/Ctrl + Arrow Keys)
Resizing a selected element is as simple as holding the command or control keys while pressing the associated arrow key in the direction you wish to resize the item. So if you’re resizing a rectangle to the right, hold command or control and use the arrow key to resize it one pixel at a time.
Resize objects by 10px (⇧ + ⌘ + Arrow Keys/⇧ + Ctrl + Arrow Keys)
The same resizing approach can be applied to resize elements in increments of 10px with the addition of the Shift key. Holding Shift and command or control while using the arrow keys will resize the element, in increments of 10px in the direction of the arrow keys.
The exception to this is when a square grid is applied to an artboard. In that case the element will resize in increments matching the size of the grid. If the grid is set to 8px, elements will resize in increments of 8px, rather than the default 10px.

Move objects
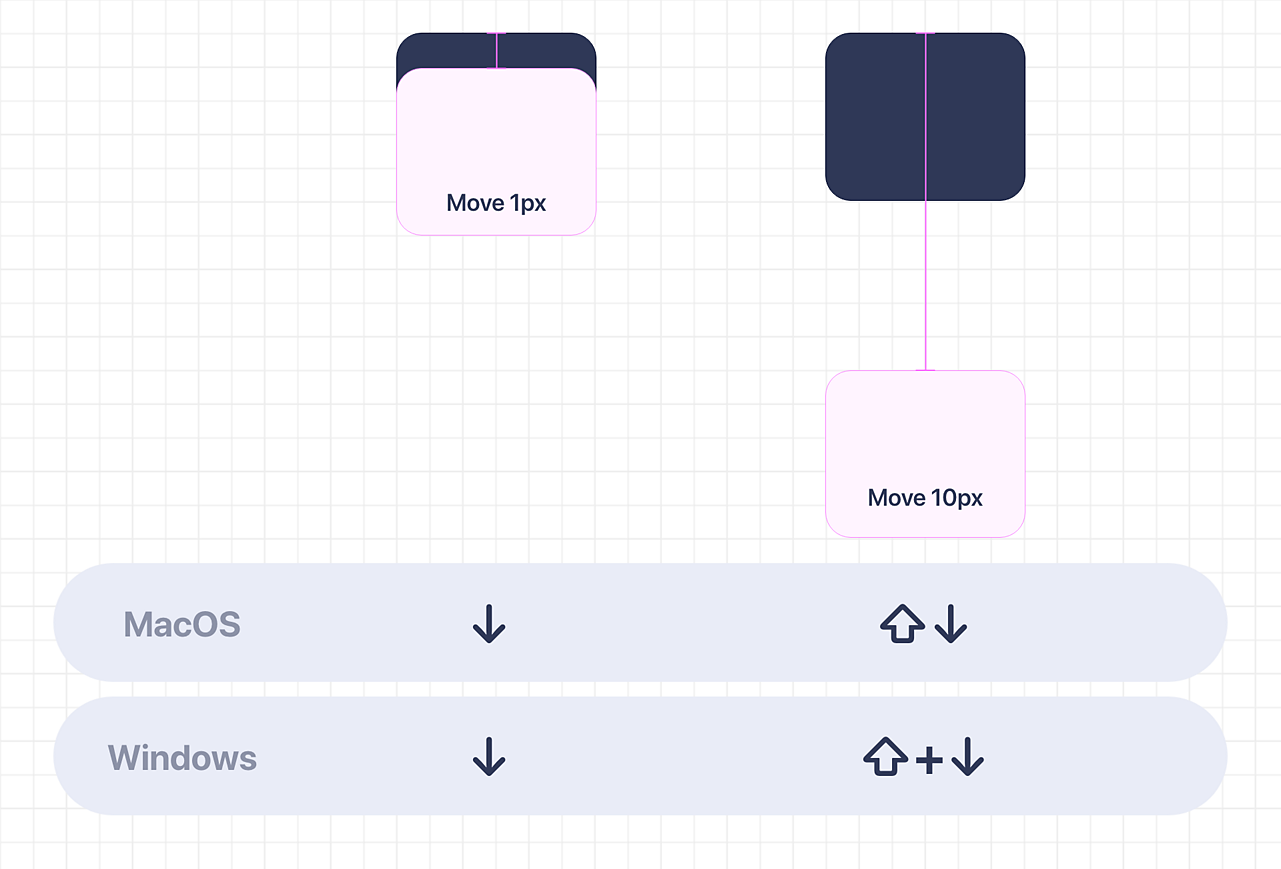
Move or nudge objects by 1px (Arrow Keys)
Just like resizing, elements can be moved in increments of a single pixel. To move a selected element, simply use the arrow key for the direction the object should move. No modifier keys are required.
Move objects by 10px (⇧ + Arrow Keys)
The same 10px increment can be applied to element positioning by holding Shift as a modifier key with the directional arrow keys. By default the increment is set to 10px, but just like with resizing of elements, if a square grid is applied, the position increment will match the grid size.
Reorder layers
Reordering layers can be done by dragging elements up and down in the Layers panel to change their stacking order, but this can also be done using a series of hotkeys directly on canvas. With an element selected it can be moved to the back or brought to the front using the square bracket keys. This is especially handy when rearranging layers within a component, which cannot be rearranged in the Layers panel.
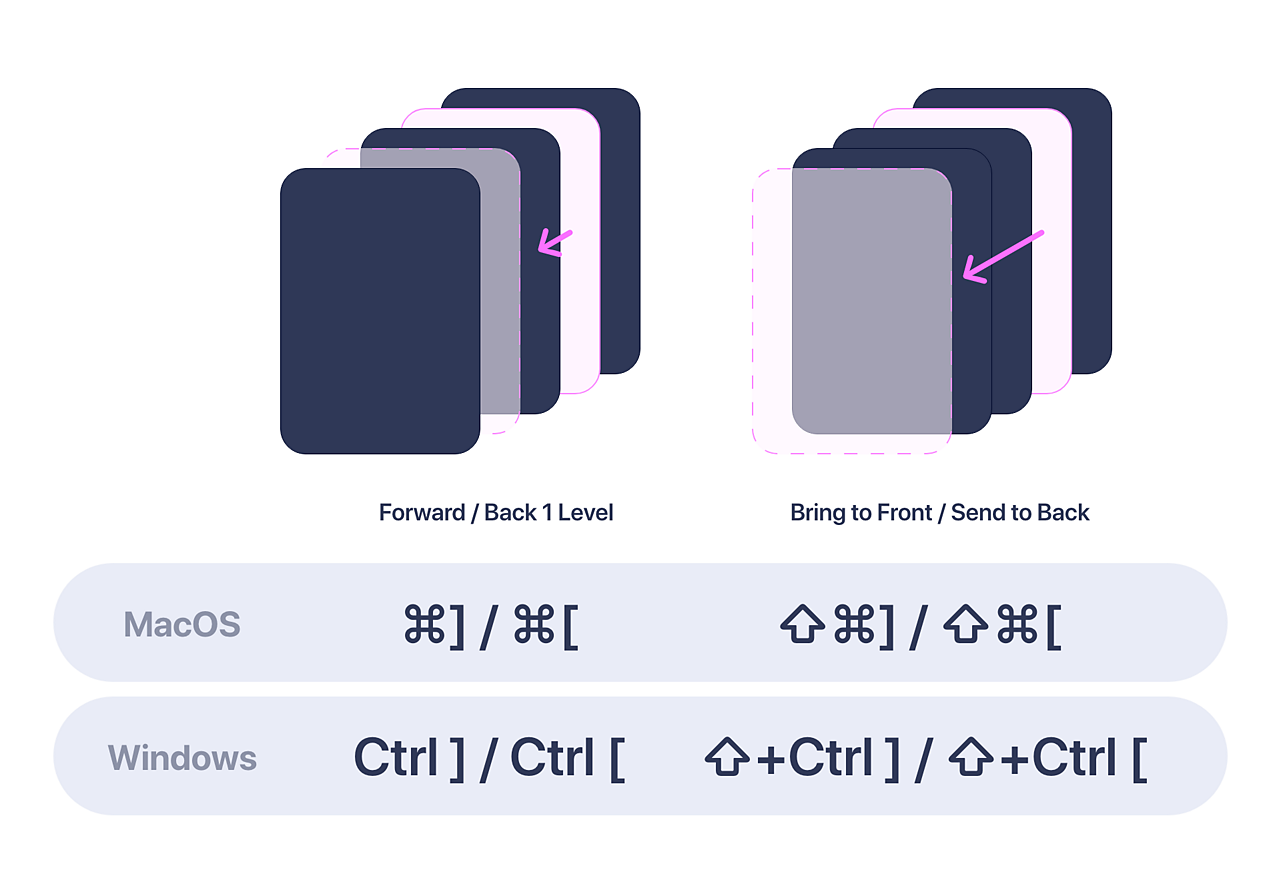
Move backwards (⌘ + [/Ctrl + [ )
To move an element backwards one layer at a time, use the Command and left square bracket combination.
Move forwards (⌘ + ] / Ctrl + ] )
To move an element forwards one layer at a time, use the Command and right square bracket combination.
Move to the back (⇧ + ⌘ + [ / ⇧ + Ctrl + [ )
To send an element directly to the back of all layers in a group or artboard, add the Shift modifier and the left square bracket.
Move to the front (⇧ + ⌘ + ] / ⇧ + Ctrl + ] )
To bring an element to the forefront of a group or artboard, use this hotkey combining shift, Command or Control and the right square bracket.
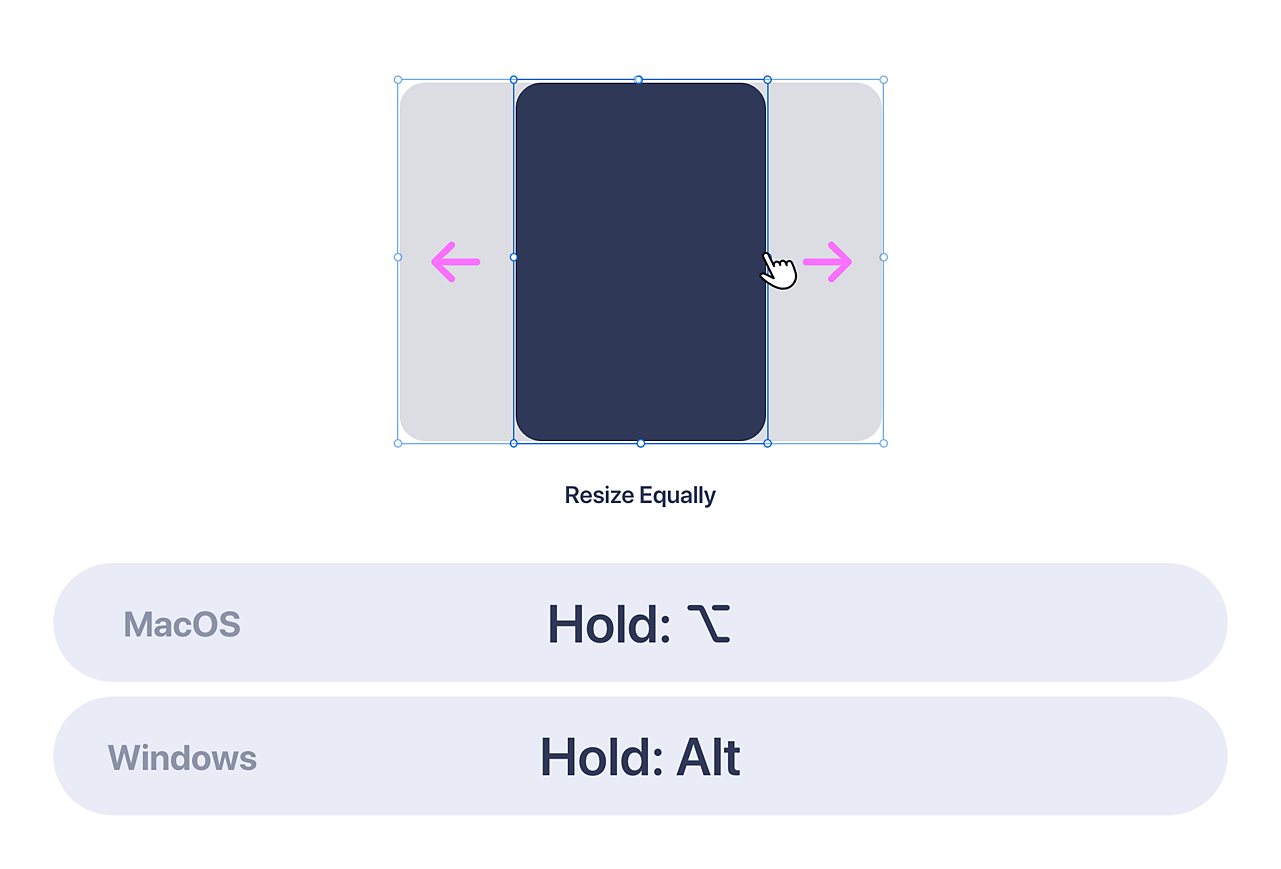
Symmetrical resizing ( Hold ⌥/Hold Alt )
When resizing an element with the mouse, holding the option or alt key while dragging to resize will enable a symmetrical resize. This is great for resizing a centre aligned button or text element to ensure that it resizes equally on both sides.
Appearance
Editing the appearance of elements in XD is simple using a variety of keyboard shortcuts.
Fill Eyedropper ( I )
With an element selected, picking a fill colour from another object or element can be done using the I key on your keyboard. This will pull up the Eyedropper tool to select a colour from any portion of the screen - even outside of the XD interface.
Paste appearance ( ⌘ + ⌥ + V / Ctrl + Alt + V )
To copy and paste the appearance from one element to another, simply use the built in copy function to copy one element and the paste appearance keyboard shortcut to paste the appearance to another object.
Adjust opacity ( Number Keys 0 - 9 )
Adjusting the opacity of an element or group of elements is as simple as entering in a single digit integer. Adobe XD supports keys 0-9 for adjusting the opacity in increments of 10%, with 1-9 representing 10-90% and 0 representing 100%, simply press the corresponding number key to adjust the opacity of the selected element.
Hide layer ( ⌘ + ,/Ctrl + , )
Hiding and showing layers is helpful when changing instances or states of components and for easily hiding groups or foreground layers when editing an element in the background. To quickly hide and show selected layers, use Command or Control and the comma key. This acts as a toggle so the same hotkey will show the hidden layers as well.
Lock layer ( ⌘ + L / Ctrl + L )
When you’re editing many layers or have many layers stacked it can be helpful to lock background layers to make selecting other layers easier. To do this, select the layer or layers you want to lock, use this shortcut (or the lock icon in the Layers panel) to lock the layers.
Path editing
Vector paths are a great way to edit shapes with granular control. Any shape element in Adobe XD can be converted into a path and these paths can make use of boolean operations and be used to mask imagery and text to create complex objects in your design. This series of keyboard shortcuts will make working with paths even more efficient in Adobe XD. Note that these keyboard shortcuts, as well as path editing, are not currently supported within a 3D Transformed object.
Convert object to path ( ⌘ + 8 / Ctrl + 8 )
To convert a shape or text object to an editable vector path, use Command or Control+8. Once converted, individual vector points can be manipulated and edited.
Mask with shape ( ⇧ + ⌘ + M / ⇧ + Ctrl + M )
To mask an object with a vector path layer or shape, place the masking shape on top of the element to be masked, then use Shift+Command/Control+M to mask the bottom layer with the top shape.
Asymmetric curve adjustment (⌥/Alt )
When editing vector points, double clicking a point will convert it between a straight point and a curved point. When editing the curve, by default the handles will adjust symmetrically. To edit each one independently, hold option or alt while dragging the handle for asymmetric control.

Additional tools
There are many keyboard shortcuts available beyond what has been covered in this guide. When hovering over features and functions within the interface or menus, Adobe XD will display the associated hotkeys where applicable so that you can easily discover other hotkeys and shortcuts. Below are some other important hotkeys you may want to integrate into your workflow.
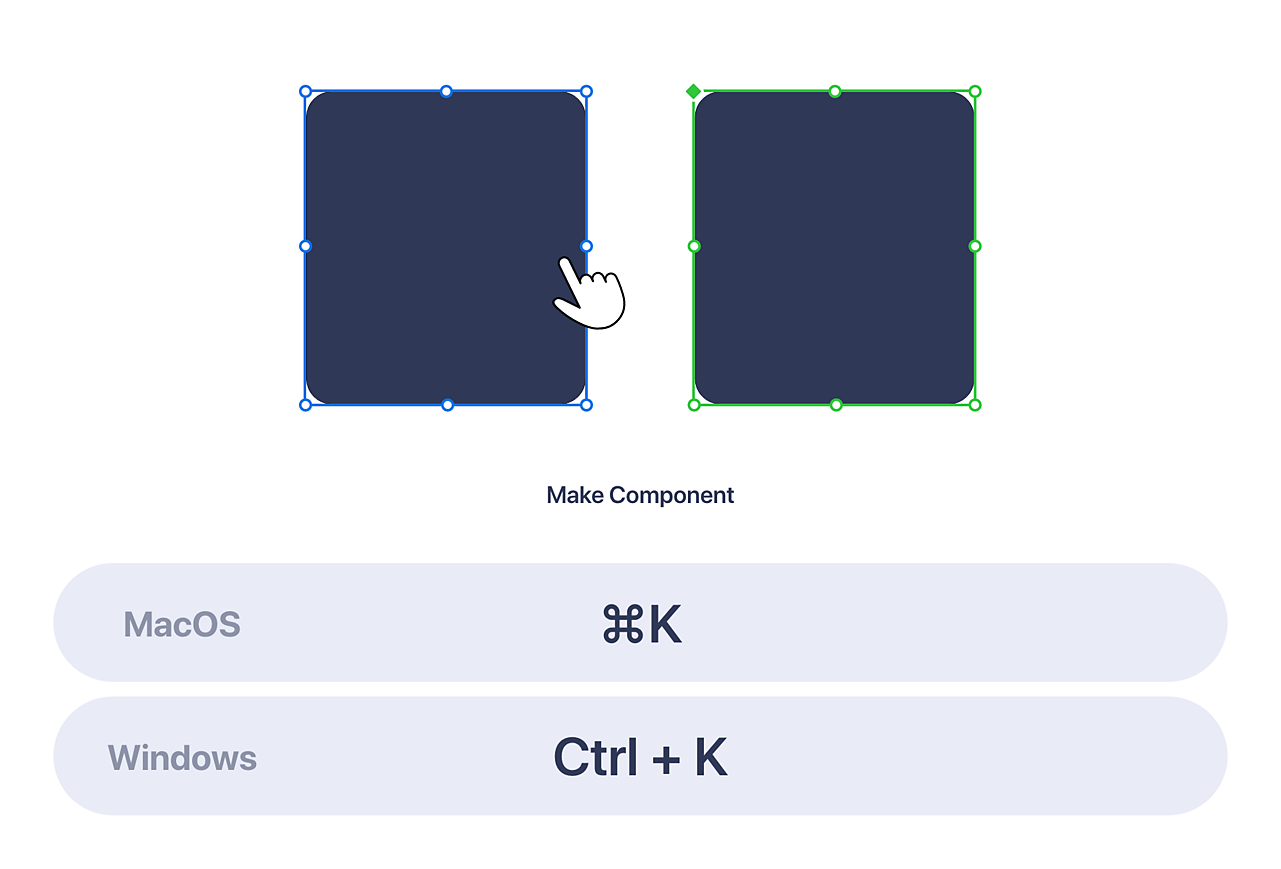
Create component ( ⌘ + K / Ctrl + K )
Quickly convert a group or element into a reusable component.
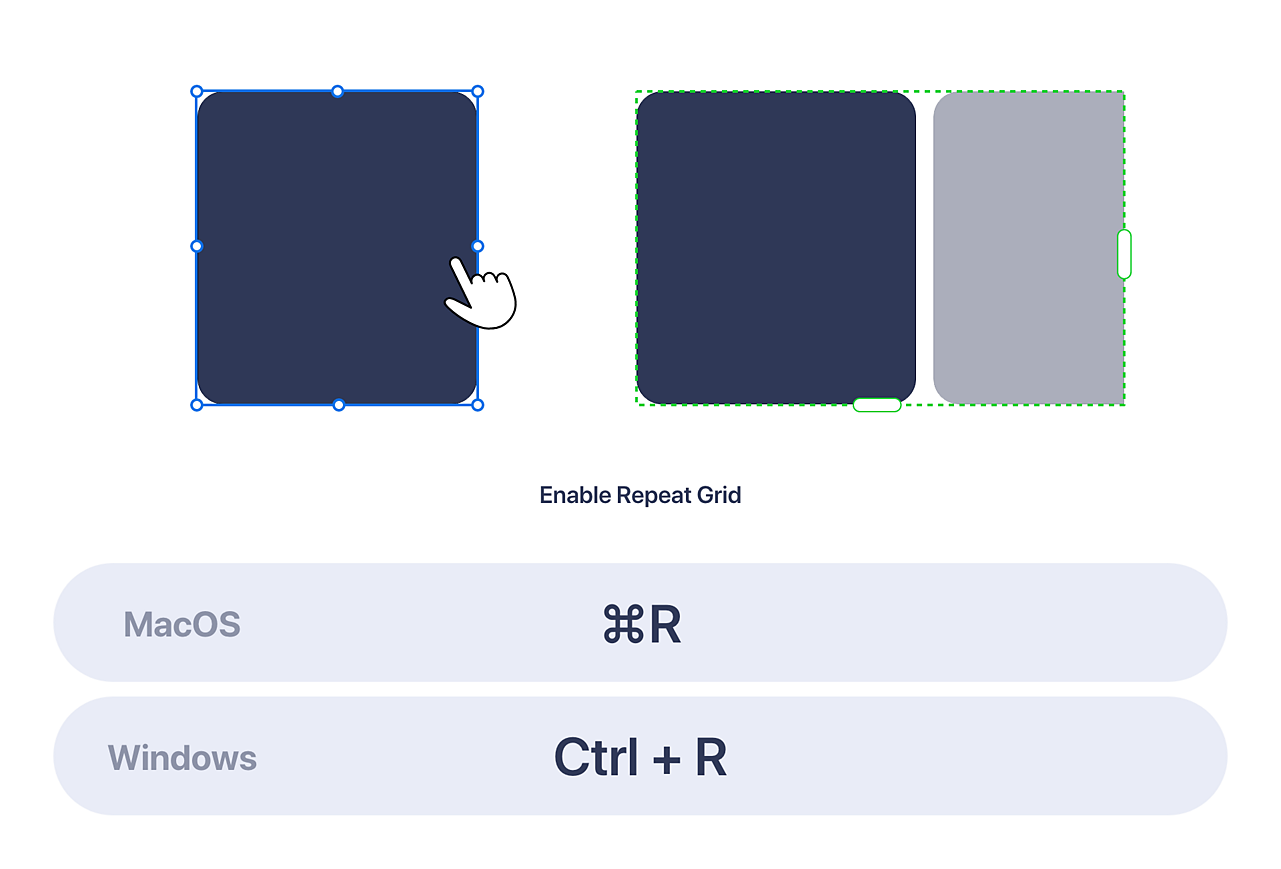
Enable Repeat Grid ( ⌘ + R / Ctrl + R )
Toggle Repeat Grid on for a selected element or group of elements.
Mark for export (⌥ + ⌘ + E/Alt + Ctrl + E)
Mark the selected element or group for export. This will label the selected element or group as exportable for batch export and developer handoff functionality.
Add colour to assets ( ⇧ + ⌘ + C / ⇧ + Ctrl + C )
Quickly add a colour or multiple colours, to Document Assets in the Library panel. This allows the colours to be published to a library and used across the design.
Add character style to assets ( ⇧ + ⌘ + T / ⇧ + Ctrl + T )
Quickly add a character style to the Document Assets in the Library panel. Character styles saved to assets can be used across the design document and published to a library.
Create scroll groups
With an element selected, a scroll group can be created vertically, horizontally or both vertically and horizontally. Using the following hotkeys.
- Vertical scroll group ( ⇧ + ⌘ + V / ⇧ + Ctrl + V )
- Horizontal scroll group ( ⇧ + ⌘ + H / ⇧ + Ctrl + H )
- Horizontal and vertical scroll group ( ⇧ + ⌘ + D / ⇧ + Ctrl + D )
There are many keyboard shortcuts available within Adobe XD, this is far from an exhaustive list, but leveraging these keyboard power-ups should help you to find some added efficiencies in your design workflows. For added convenience, these keyboard shortcuts can be mapped to speciality buttons on devices like gaming mice or modular controls like the Monogram Creative Console to give you additional physical controls for powering up your design process.
View all available keyboard shortcuts here or check out the keyboard shortcuts plugin in Adobe XD to get a full list of available hotkeys.


Related content
