PHOTOGRAPHY
Turn a photo into a painting in just a few clicks.
Make a snapshot look like a piece of art using Adobe Photoshop.

PHOTOGRAPHY
Make a snapshot look like a piece of art using Adobe Photoshop.
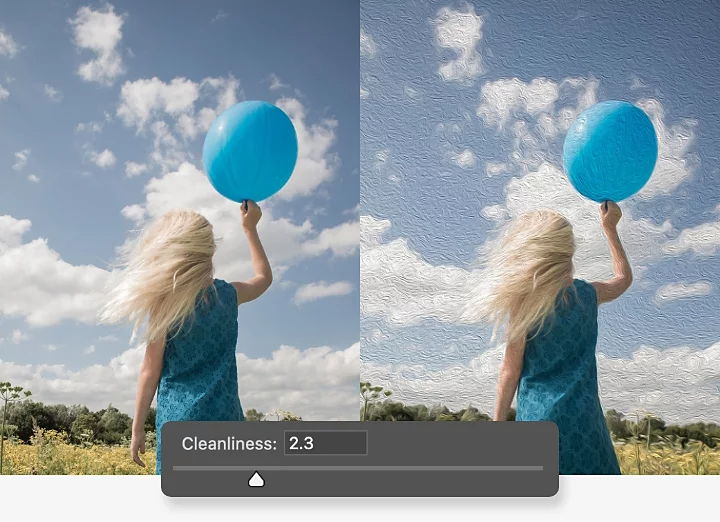
Whether you need a new profile picture or want to spruce up a pet portrait, you can bring a new creative approach to your favourite photos with Photoshop. Upload photos and then apply customisable filters to turn your shots into beautiful paintings or even pencil sketches.
You don’t need to use brushes to create a realistic watercolour painting in Photoshop. The quickest way to achieve a painterly look is with a filter. Apply one to your own photography or practice with photographs downloaded from Adobe Stock.

1. Open the photo you’d like to transform in Photoshop.
2. Duplicate the Background layer by pressing Ctrl+J on Windows or Command+J on Mac. You’ll still have your unaltered photo underneath your new layer to go back to at any time.
3. Apply the Basic Watercolour Filter to the newly copied layer. Go to Filter › Filter Gallery › Artistic › Watercolour.
4. Adjust the sliders for Brush Detail, Shadow Intensity and Texture to get the effect you want.
5. Click OK to apply your filter.

Create gorgeous images, rich graphics and incredible art.
Try the Oil Paint filter for the look of thicker brushstrokes from oil paint or acrylic.

1. Open your photo in Photoshop and press Ctrl+J on Windows or Command+J on Mac to duplicate the background layer.
2. Apply the filter to your new layer. Go to Filter › Stylise › Oil Paint.
3. Adjust the Brush sliders.
4. Adjust the sliders for Lighting.
5. Click OK to apply your filter.

Try these additional tips and techniques to make your photo painting stand out from other filterised photos.
Thicker outlines around objects in your photo can give your painting a more cartoonish or illustration-like quality.
1. Duplicate your original background again and drag the new layer above your painting filter layer.
2. On your new layer, apply Filter › Stylise › Find Edges.
3. Blend these new outlines in with your painting. Change the blending mode on the Layer panel from Normal to Multiple using the drop-down menu. This will blend the dark outlines only into your painting.
To add a special touch to your new artwork, paint your own brushstrokes into the mix with the Brush tool. Work with any number of built-in brushes that mimic real-world watercolour brushes or oil paint brushes. Customise the settings of any brush for the right amount of colour blending or import brushes made by others.
Venture into the realm of Andy Warhol or Roy Lichtenstein — follow a simple tutorial to add a pop art effect to a photo. Cut out your subject from your background, simplify the details like hair, facial features and clothing and then colourise each of the elements to your liking.
Whether you want to change a headshot into a portrait painting or transform an old family photo into an artistic holiday gift, Photoshop offers easy-to-use filters and brushes. You’ll be amazed at what you can create with some simple photo transformations.