PHOTOGRAPHY
How to cut out an image quickly in Photoshop.
Learn the selection and masking skills you need to create picture-perfect cutouts for all your creative projects.
Meet the 2 tools you need to make cutouts.
Your favourite selection tool and a Layer Mask are all you need to make a pristine cutout you can use anywhere. Simply select the object you want to cut out, apply a Layer Mask and presto — you’re done. Learn all the ins and outs of cutouts below.
A cutout is simply a photo with the background removed — just like when you were a kid making collages with scissors, glue and old magazines. With the magic of digital technology, you can easily create simple cutouts of an object on a plain background, like a bowl of strawberries on a white counter. Or, you can make more complex cutouts, like a rose bush in a botanical garden — no scissors needed.
Knowing how to cut out an image is a skill you’ll use time and again. When you isolate part of a photo — say, a flower, a car or a person — you can use that cutout in all kinds of creative ways. And, unlike paper cutouts that you can only use once, you can use digital cutouts over and over, whether you’re making a poster, designing a social media post or creating a digital collage.
While you can use tools that instantly remove backgrounds from pictures, learning how to do it yourself can be a big help when you want to control every detail. Photoshop offers many different ways to capture the exact cutout you want so your next project looks as amazing as possible.

What to know about cutouts before you start.
There’s no actual cutting involved in making cutouts — which is great news if you’ve ever cut off something you shouldn’t have when working with scissors. In Photoshop, you have the freedom to experiment, change your mind and undo. Here are the three big things to know about digital cutouts:
Selection tools
A good cutout starts with a good selection — which simply means drawing a boundary around the object you want to select. Think of your selection like a precision blade that defines the exact area where you’re going to cut. Just choose the best Photoshop selection tool for the job — they all offer different levels of control, with some being faster to use than others.
Layer Masks
Layer Masks are what do the “cutting,” though they function more like a piece of paper that blocks out everything beneath it. When you apply a Layer Mask to an image with a selection, you isolate just the part you’ve selected, effectively cutting it out from the background. And, because it’s digital, you can adjust your Layer Mask as much as you need.
Layer Masks rely on the Photoshop brush tool and two colours — black and white — to determine which parts of the image get hidden and which get to stay. Black conceals everything beneath it while white reveals it. Or you can change the opacity of the brush tool to let only some of the image show through, which can be useful when you’re trying to avoid harsh edges.
Non-destructive editing
Working with Layer Masks is considered non-destructive editing, which means that you don’t permanently delete any part of your photo. This way, you can change your mind about your cutout at any point. It’s as simple as painting your Layer Mask black or white until you get it just right.

The basic Photoshop cutout technique.
This technique works best on photos of simple objects with defined edges on plain backgrounds, like a studio photograph that uses a single-colour backdrop or even a smartphone image taken against a white or solid-colour floor or wall.
1. Open the image you want to cut out in Photoshop.
Make sure to select the exact layer you want to work with in the Layers panel.
2. Make your selection.
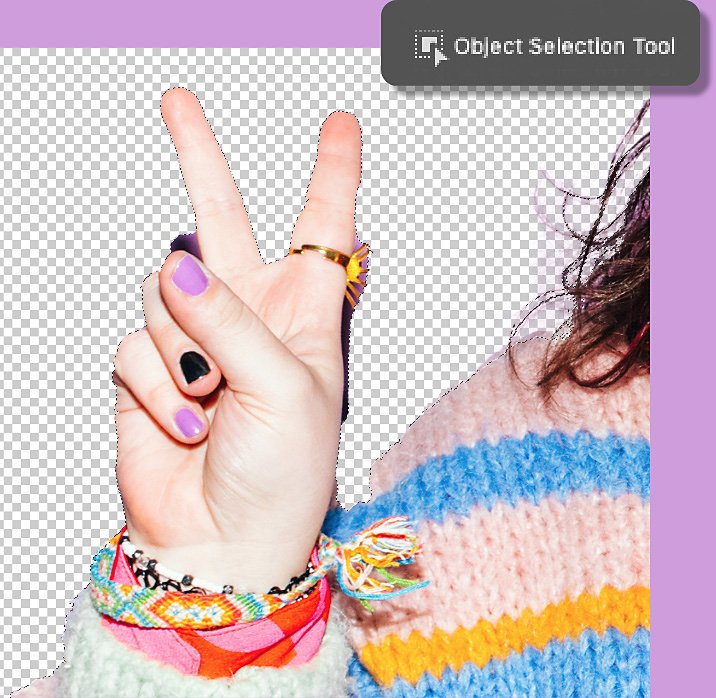
Hover over the item you’d like to cut out with the Object Selection tool or drag the Quick Selection tool across it. Then go to Select > Inverse so that the only thing selected is your background.
3. Create a Layer Mask.
Click the Layer Mask icon in your Layers panel to make your cutout. If you have layers underneath the one you’re working on, make sure that you turn them off to see how your cutout looks.
Remember that you can adjust your Layer Mask at any time by clicking it and painting in black or white.
5 steps to make cutouts on complex backgrounds.
While you can use many different techniques to make more complex cutouts, this is a good starting point for most types of images, no matter the subject or background.
1. Open your image in Photoshop.
Make sure to select the exact layer you want to work with in the Layers panel.
2. Select the object you want to cut out.
Depending on how intricate the shape is, you can use any of the Photoshop selection tools — Object Selection, Quick Selection, Magic Wand or any of the Lasso tools.
3. Invert your selection.
With your shape selected, go to Select > Inverse so that only the image's background is selected.
4. Click the Select and Mask... button in the toolbar.
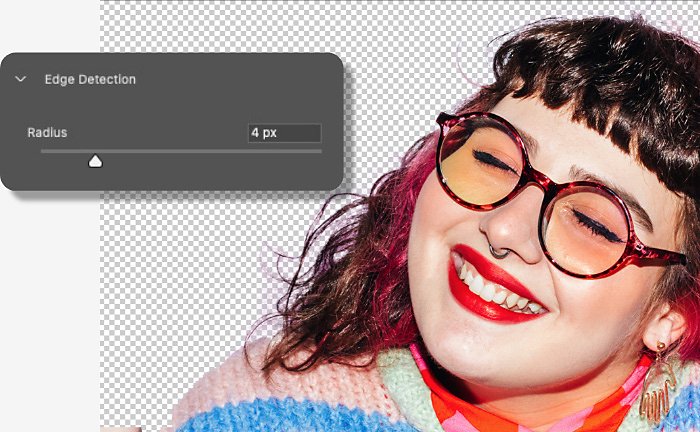
In the Select and Mask... workspace, you can refine your selection to make sure there are no stray pieces of the background. Play with the Radius, Smooth, Feather, Contrast and Shift Edge sliders to perfect all the details. If you need to add or remove parts of your mask, just use the Quick Selection, Refine Edge, Object Selection and other tools on the left side of the panel.
5. Output your selection as a Layer Mask.
With your selection perfected, simply scroll to the bottom of the Select and Mask... workspace and choose to output it to a Layer Mask. Now you have a perfect cutout, no matter the original background.

Photoshop cutout tips and tricks.
Wispy hair, tight corners and intricate shapes can be a cutout challenge — but it’s nothing you can’t handle with a little help from Photoshop.
Hair
When you’re working with hair, the Refine Edge tool is your friend. Here’s how to use it:
- Make your selection and be careful not to select any background pieces, even if there's hair there.
- Click the Select and Mask... button from the toolbar.
- Inside the Select and Mask... workspace, choose the Refine Edge brush from the left-hand side of the panel.
- Brush over any stray hairs around the edges of your subject.
- Return to the Select and Mask properties panel on the right, scroll to the bottom and choose Output to Layer Mask.
Tight corners and angles
Use the Polygonal Lasso tool for geometric subjects made up of straight lines, like a book or a picture frame. Simply click around your shape until you come back to where you started. Once you've clicked back on your starting point, you’ll have a selection made up of perfectly straight lines.
Helpful tip: Hold down the shift button after clicking with the Polygonal Lasso tool to make perfect 90 and 180-degree lines.
Intricate or unconnected shapes
You can use any of the Lasso tools and then the Quick Selection tool to cut out complex shapes or even make two separate selections at the same time (for example, if you wanted to cut out just two eyes but not the rest of the face).
The Quick Selection tool makes it easy to add to your selection or remove areas from your selection, so you don't have to get it right on your first try. Just click the Quick Selection tool with the plus sign (+) to add and the Quick Selection tool with the minus sign (-) to subtract.
You can even make selections with holes in the centre using these tools. Give it a try and you’ll be able to make perfect cutouts of donuts, pretzels and more in no time.
Not sure which apps are best for you?
Not sure which apps are best for you?
Take a minute. We'll help you to figure it out.
Take a minute. We'll help you to figure it out.