Beautiful flowers: How to draw roses.
Create a rose drawing by learning more about its basic shapes, from the petals to the thorns. And discover new illustration practices to improve your flora drawing skills.
Illustrating roses requires research and practice.
Drawing roses can seem complex compared to drawing other flowers, but creating beautiful rose illustrations is possible for anyone who takes a closer look at how the plant is structured. Dive into the anatomy of the rose flower to understand its underlying geometric shapes and how its petals form, and see how sketching roses digitally offers invaluable tools like layering that help make it easier.
Know the rose to draw the rose.
The first step to drawing anything is research. Look at a rose, or a photograph of one, and find the simple shapes that make up the whole. Don’t get caught up in how you think the rose should look on your paper. Instead, just start drawing the curved lines and shapes that you see.

The anatomy of the rose.
The most basic rose is the dog rose, which has just five heart-shaped petals. Look at the dog rose to see how to shape single petals. Notice how they bloom out from the top of the rosehip and surround the pistils and anthers in the center of the rose, which hold the pollen. Roses with more petals are simply an exaggerated version of this minimalistic rose.
Here’s an overview of each part of the rose:
- Stem: The stem of the rose is cylindrical. Thorns are sharp, cone-like structures protruding in a spiral around the entirety of the stem. While almost every rose has its thorn, some have been bred not to.
- Ovule: The ovule is the bulbous green orb where the bottoms of the petals are attached.
- Anthers: Anthers are small fibers located in the center of the flower that hold pollen.
- Sepals: Sepals are the skinny green leaves coming out of the ovule, beneath the petals.
- Petals: Rose petals can be tear-shaped, heart-shaped, or slightly pointed on top. They may or may not have veining.
- Leaves: Most rose leaves are serrated and have asymmetrical veining. Young rosebuds typically have one to three leaves growing off their stems, while a full bloom has closer to five leaves.
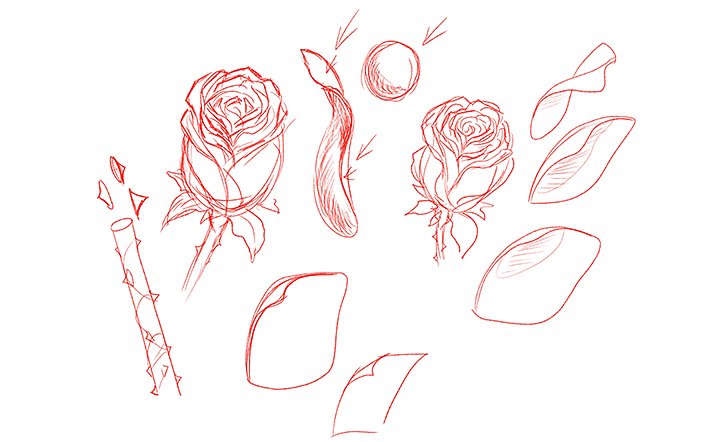
Image by Jonathan Case
The outer shape of the rose.
When you’re looking at roses to draw — in real life or online — it helps to recognize the shape of its rough outline or silhouette. Illustrator Kevin Jay Stanton has made a career of drawing roses and other flowers. He often starts with a round, pentagonal, or oval shape, but always keeps his eyes open for new types of roses. “One of the most beautiful blooms I saw recently was extremely triangular with a teardrop interior, and I thought ‘Oh, that’s unique,’” says Stanton.
A step-by-step guide to drawing a rose.
These versatile methods can help you explore depictions of roses — no matter what type you’re drawing or what your illustration style is. Draw your own rose digitally in an application like Adobe Fresco to easily layer your sketch.
Create a layer of basic shapes.
Lay down the basic shapes and simple lines that will make up your rose drawing. Try starting each rose with a circle, pentagon, or triangle shape. “I block in the shapes before I block in the details,” says Stanton. “There's something about the shapes in plants that I really like. Foundationally, my work lies in the importance of shape and how shapes relate to each other.”
Add a center and petal direction.
Draw the center of your rose where your petals come together. Often this looks like a smaller triangle or pentagon in the center of your main shape. The younger the bloom, the tighter this open space will be. At this stage, you may also want to add in some lines indicating the general direction of your petals.
Start a new layer to add petals.
In Adobe Fresco, lighten the opacity of your first layer, and start a new one. Add petals one by one, starting with the outer petals. Think of each petal as a tiny piece of paper, slowly peeling away from the center bud. Go with an easier shape for your petals and then you can round out their edges later. Or, start with smoothly rounded petals and add more structure later.
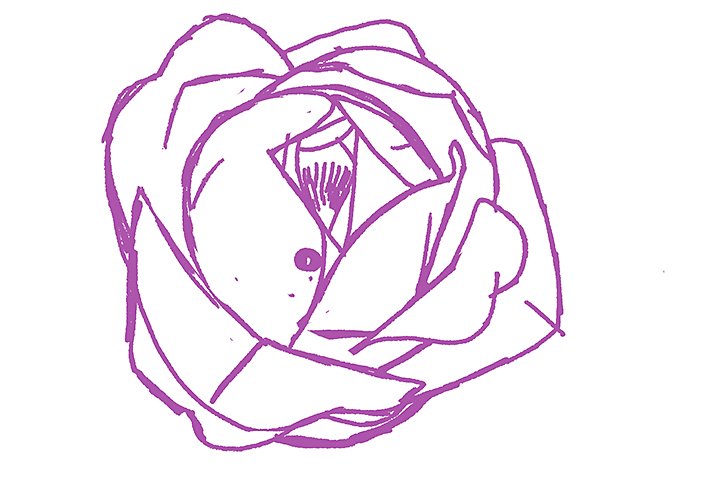
Image by Kevin Jay Stanton
Get more detailed with several layers.
Try adding each petal on a separate layer, so you can fill them with color and move them around individually. Enabling Auto-Select Layer will allow you to quickly jump from layer to layer by clicking each petal. To really understand the rose’s form, you may want to go in with another semi-translucent layer and draw the inner parts of the rose, like the anthers and ovule, as if you could see through the petals.

Image by Kevin Jay Stanton
Add color or texture with layer masks.
If you’ve created each petal on a separate layer in Adobe Fresco, you can also use layer masks and brushes to add shading or texture that adheres to the lines of your petals. Alternatively, you can use hatch marks with the Pencil tool to shade. “Think about what parts are concave and what parts are convex on each rose petal,” says illustrator and comic artist Jonathan Case. “You’re going to shade the outer petals almost like you would a sphere, depending on where the light is hitting. Where each petal bends is likely going to be your darkest shadow.”
Practice makes perfectly imperfect.
Following a drawing tutorial online to draw a rose step by step is only one aspect of learning to draw roses. Practice different techniques on your own, and don’t get caught up in every detail. “Don’t try to get every single piece exactly right,” warns illustrator and drawing instructor Lucas Elliott. “It’s more about the idea of what the flower looks like and looking at the composition of the whole.” No perfect rose exists in nature — each one is different — so quirks in illustrated roses can enhance their realism.
Sketch yourself a dozen roses.
“If you’re having trouble, draw it again and again. Fill a page with roses. Fill a sketchbook with roses,” says Elliott. “One of the best things that I've found for my students is gesture drawing where you quickly draw the essence of the object. If you draw it quickly, in 30 seconds to a few minutes, it forces you to consider what’s important, and you start to understand the shape of the rose.”
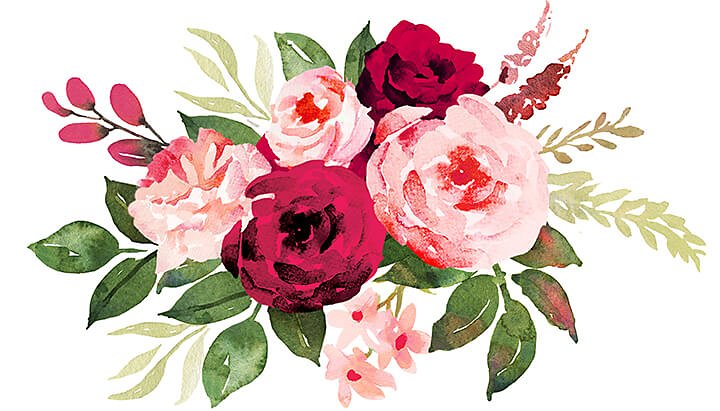
Get started sketching digitally.
Learn how to start sketching in Adobe Fresco so you can take advantage of digital tools to make stunning drawings and quick doodles. Then take a deeper look at how to transform elements of your drawings in Adobe Fresco.
Contributors
Kevin Jay Stanton, Jonathan Case, Lucas Elliott
You might also be interested in…
Take your skills to the next level with drawing exercises and advice from professional illustrators.
Exploring watercolour techniques.
Capture the flowing brush strokes and rich texture of watercolours with these tips.
Learn more about creating art and illustration with this versatile file type.
Try your hand at pencil sketching.
Pencil drawing is an essential first step for most artists. See how this skill can improve your art.
