How to Edit PDF Images.
PDFs can be dynamic and interactive documents, both visually and in how you interact with them. Getting the images right is one of those polishing touches that make the overall presentation perfect. Do you have a PDF image that you need to edit or change? It’s possible to do so either online or in an Adobe Acrobat application. Read on to learn how.

What you’ll learn
- Uses for images in PDFs
- Ways to add images to PDFs
- Editing images in PDFs online
- Image editing in Adobe Acrobat applications
- Editing images outside Adobe Acrobat
- Tips and best practices for editing images in PDFs.
Uses for images in PDFs.
Whether you’re working on professional reports, procedure manuals, educational materials, creative portfolios, student assignments, or PDFs at home, images help to create engaging, informative, and professional PDF documents for your readers. The strategic placement of pictures in PDFs can serve to —
- Illustrate specific points
- Reinforce understanding
- Present graphs
- Promote your branding
- Enhance visual appeal
- Break up lengthy text.
Ways to add images to PDFs.
Adding and inserting images into PDFs is simple and easy to do with Adobe Acrobat Online and downloaded Adobe Acrobat applications.
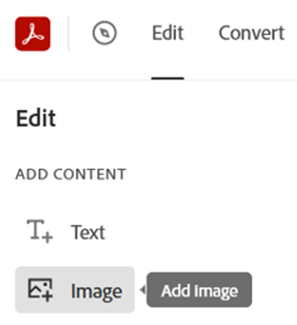
You’ve also got options to change and convert files to and from PDF as whole pages. You can, for example —
Edit PDF images online.
You can rotate and reposition images using Adobe Acrobat online. Here’s how —
- Drag and drop or upload your PDF file to the Online PDF editor.
- Click on the Edit tool.
- Select the image in your document by clicking on it.
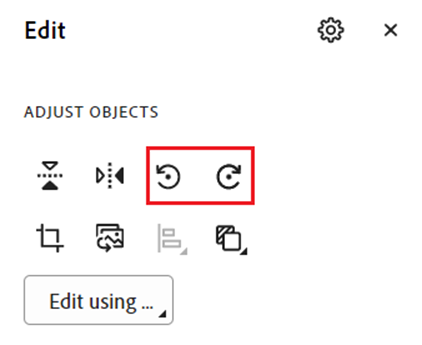
- Use the rounded arrow icon to rotate your image.
- To move the image, drag it to where you want it to be.
- To resize an image, position your cursor on the blue frame around the outside of your image, then drag the image to the size you want it.

Edit images in Adobe Acrobat applications.
With downloaded Adobe Acrobat applications, you have tools to rotate, flip, crop, resize, position images in front of or behind text, align images and objects, and edit your images further in Adobe Acrobat or another application. Here’s how —
- Open your PDF file in Adobe Acrobat and click on the Edit tool.
- You’ll see various icons with options to adjust objects.

Resize PDF images.
To resize images in a PDF, click the blue frame around the outside of the image, and then drag the borders to the size you want.
Flip PDF images vertically or horizontally.
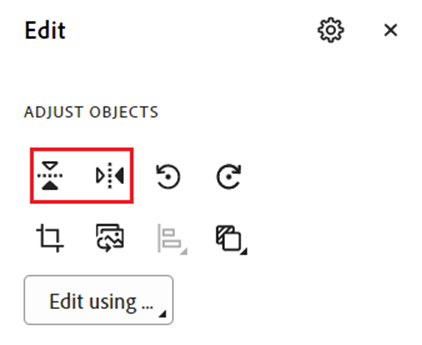
Rotate PDF images.
Crop PDF images.
Click on the icon depicting a box to crop an image. Then drag to frame the portion of the image you want to keep.
Align PDF images.
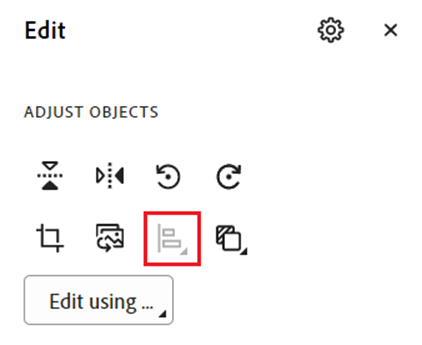
Arrange PDF images.
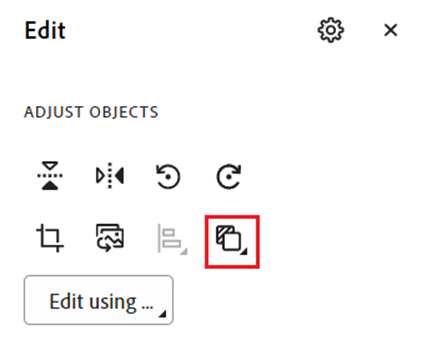
Edit an image outside Acrobat.
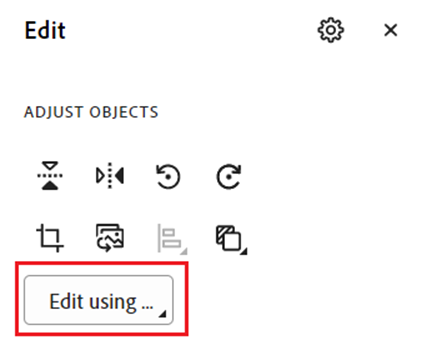
To edit the design elements of an image, click on the “Edit using” icon to open a graphics application you have on your device, such as Photoshop, Paint, or Illustrator.
When you’re finished, use the Save function in your editing application and the image will be updated in your PDF in Adobe Acrobat.
Replace a PDF image.

Extract a PDF image.
There are a few ways to extract images from PDFs to use in other applications.
- Copy and paste a PDF image.
You can select an image in a PDF and copy and paste it into another application (unless the creator of the PDF has set permissions to limit copying).
- Export a PDF image.
To export a PDF image, you can select the image on the PDF, right-click, and select the export icon. Or, it’s easy to extract PDF pages online or use the extract option in the Organize Pages tool in an Adobe Acrobat app.
Draw an image in a PDF.
Use the drawing tool in an Adobe Acrobat application or Adobe Acrobat Online to create your own freeform drawing or insert shapes such as arrows, lines, and rectangles.
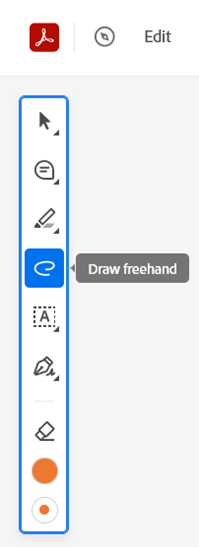
First, select the colour and line thickness for your drawing or shape.
Then draw freehand or insert the shape on your PDF page.
To move the image or use any other of the image editing options covered previously, select the image with the pointer tool, and then resize, arrange, and align it as needed.
Tips and best practices for editing images in PDFs.
Images in PDF files can have a significant impact and make a difference in the overall presentation of a document. You want the images in PDFs to be of the best quality and as professional-looking as possible. Here are some tips for editing PDF images to get you started —
- Use supported image file formats.
Be sure to choose and use image file formats that are supported in Adobe Acrobat. Choose the appropriate format based on the type of image and its intended use.
- Use good-quality images.
The images you add and edit in PDFs should be high resolution, especially for photographs and detailed visuals and graphics. This will help to maintain the clarity of the image when it is zoomed in on.
- Place images strategically.
Position images strategically in your PDFs. Align them with relevant text or in a way that will guide your reader’s attention to your key points. From the Tools menu in Adobe Acrobat, choose “Edit a PDF” to select and reposition images.
- Consider accessibility.
Add alternative text (alt text) descriptions to all images in your PDFs. This text is then read out loud for visually impaired individuals using screen readers. You can add alt text to images before you insert them into PDFs. To set alternate text in Acrobat, from the Tools menu, select from the options in “Prepare for accessibility”.
- Manage your overall file size.
Find a balance between image and file sizes to ensure your PDFs are shareable and downloadable and remain good quality. You can easily compress a PDF to reduce the file size and make it easier to share without compromising on quality.
Related content
Work on your PDFs like a pro. Some of our other articles to help with using Adobe Acrobat include —
