Creative Cloud All Apps
R1 271,90/mo
Get Photoshop and the entire collection of creative apps across desktop and mobile. Learn more
You don’t need a travel budget to find new backgrounds for your photos. See how graphic artist Erica Larson uses Adobe Photoshop to place the subject of a photo in an entirely new environment.

Erica Larson dreams up inspired designs every day as an Associate Creative Director on the Adobe Studio team. She makes stuff that makes others want to make stuff.
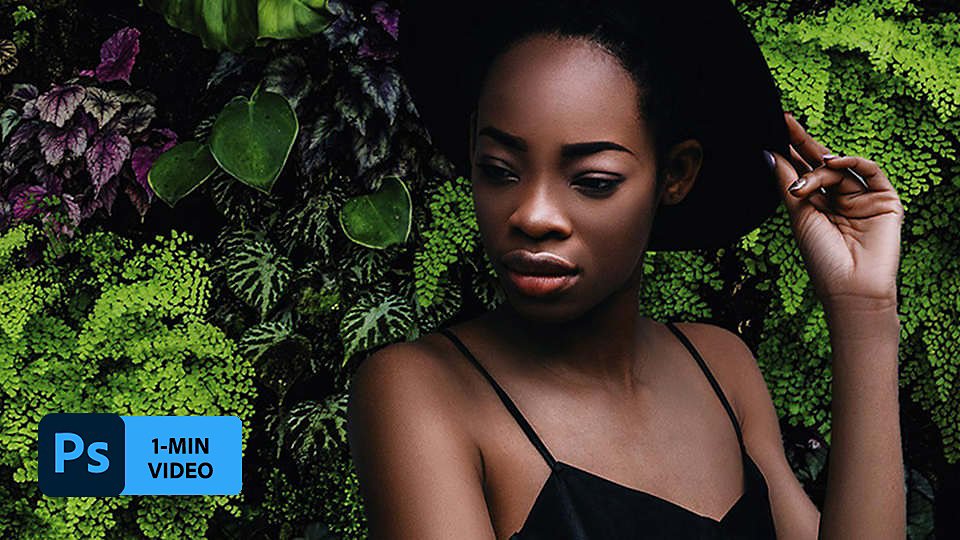
From blank walls to lush gardens, take your photos on a journey. The steps are written out below this one-minute video.
Need images? Use these sample images or practice with your own.
Step 1: Hide the wall
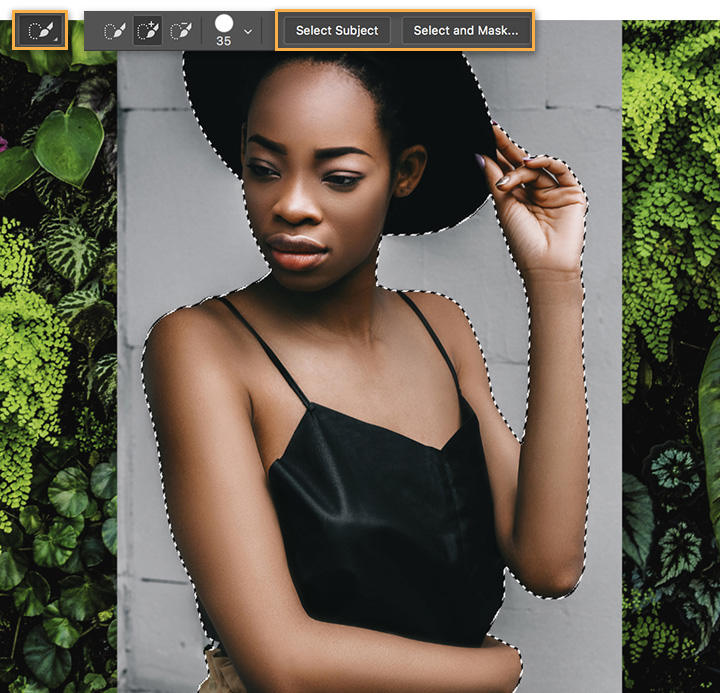
Larson’s first step is hiding the plain gray wall. Use the Quick Selection tool to select just the shape of the model. Choose Select Subject and then choose Select And Mask to enter the Select And Mask workspace.
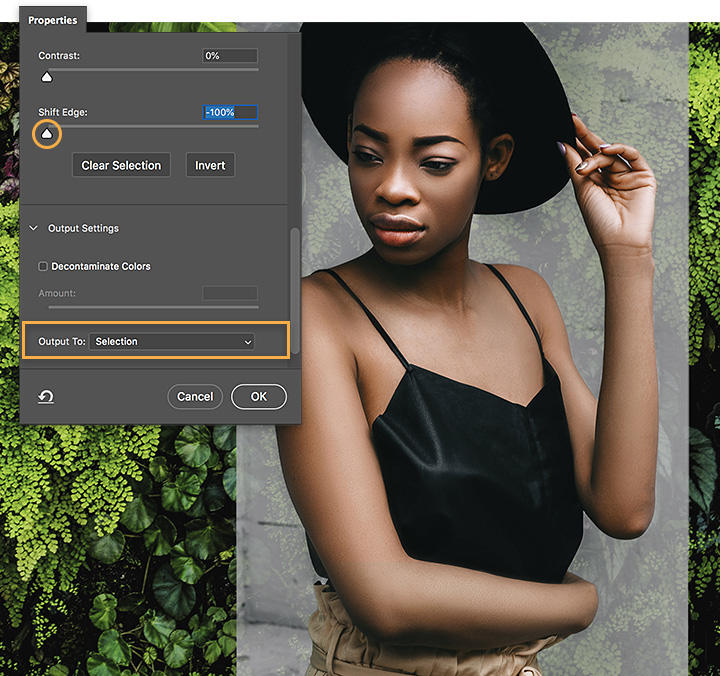
In the Properties panel of the Select And Mask workspace, move the Shift Edge slider to the left to refine the edges of the selection, and choose Output To Selection. Note: when leaving Select And Mask, the original background comes back; you’ll fix this in the next step.
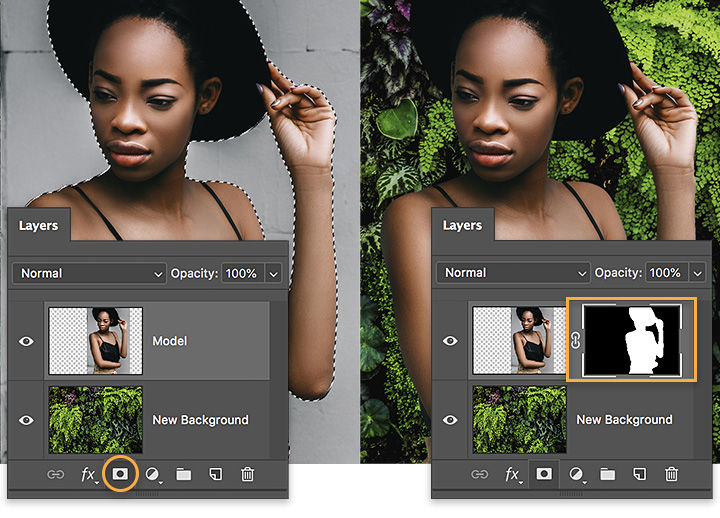
With the model layer selected, click on the Add Layer Mask icon. Since Larson had output the model as a selection from the Select And Mask workspace, Photoshop masked (or hid) anything that was not selected so the gray wall disappeared and the selected model remained.
Larson wanted to match the lighting of the model with that of the background. To do this, duplicate the New Background layer, move it above the model layer, and choose Filter > Blur > Average. Option-click (or alt-click) between the green layer and the model layer to create a clipping mask.
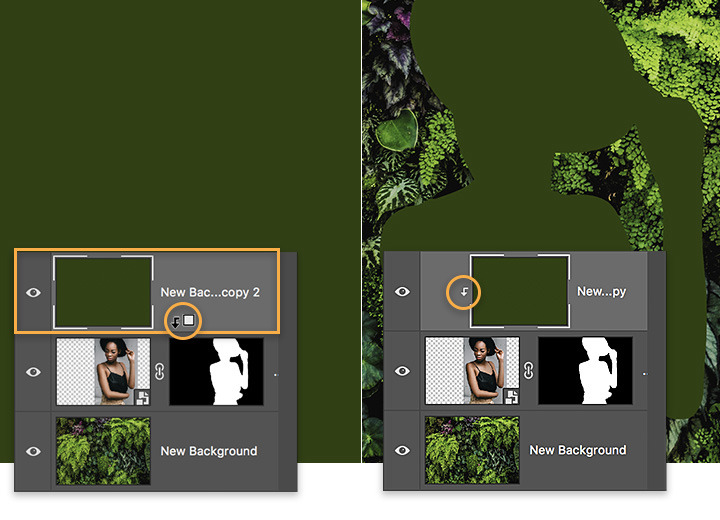
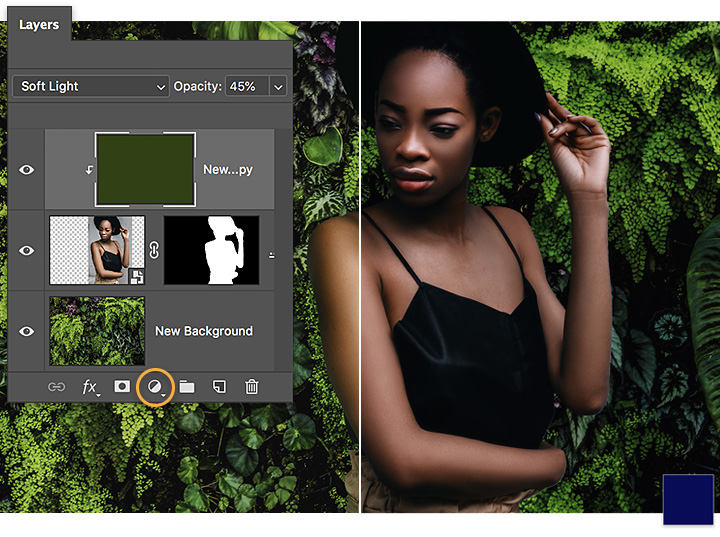
With the green layer selected, set the Blend Mode to Soft Light, and reduce the Opacity setting. Larson applied a dark blue Solid Color adjustment layer to give each of the layers below it a finishing color cast. Set the Blend Mode to Soft Light and also reduce the adjustment layer’s Opacity setting.
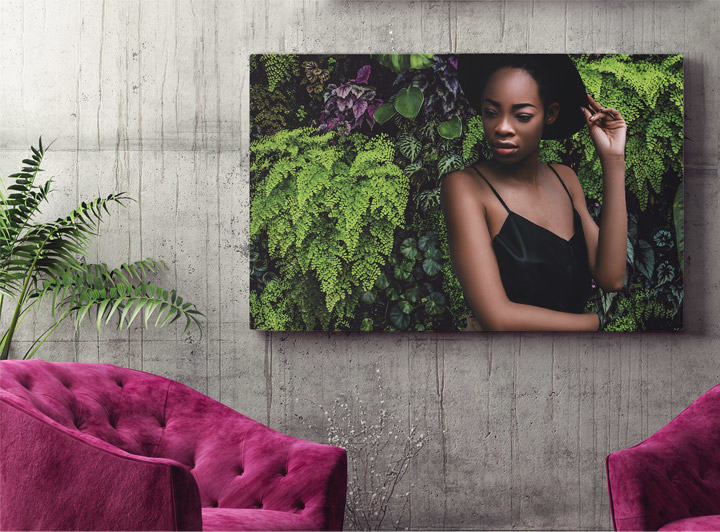
Take your photos places.
With a new background, you can take your photos’ subjects anywhere in the world (or even out of this world). Start exploring today.
Note: Project files included with this tutorial are for practice purposes only.
Create beautiful images with Photoshop brushes, Content-Aware Fill, Photo effects, Neural Filter, Sky replacement and the many tools photographers rely on.
Explore the Photoshop family of apps.
Adjusting the elements of your photos can create new worlds in your images.
Before committing ink to skin, design the illusion of a tattoo.
Learn to create surreal images by compositing two photographs.
Get your glow on with this simple technique.
R503,70/mo
Get Photoshop on desktop and iPad as part of Creative Cloud.
R1 271,90/mo
Get Photoshop and the entire collection of creative apps across desktop and mobile. Learn more
R788,90/mo
Get Photoshop and 20+ Creative Cloud apps plus exclusive business features.
See what's included | Learn more