Adobe® InDesign® CC software supports accessible cross-media publication, allowing you to export InDesign documents to ePub, HTML, or accessible PDF. Reduce the time it takes to create PDF documents that people with disabilities can use more effectively. Apply accessibility features within your InDesign document, rather than having to make major changes in Adobe Acrobat® software. PDF tags, alt tags, and the content order you assign stay with the document as you revise it.
Used in combination with Acrobat for touch-up of the exported PDF files and Adobe Dreamweaver® software for HTML output, users can achieve maximum accessibility for the exported content.
Learn how to use InDesign and Acrobat to prepare content for people with disabilities.
The Accessibility Touchup Action Wizard in Acrobat is ideal for adding finishing touches to accessible PDF files created using InDesign CS6. Get more information about the Accessibility Touchup Action Wizard.
Overview
InDesign CC supports accessible cross-media publication, allowing you to export InDesign documents to PDF, XHTML, and XML. Users can add tags and alternative text attributes to InDesign documents that support the production of accessible content in these exported formats. Tight integration with Acrobat and Dreamweaver helps you get your content distributed in a variety of media, including print, web, video, and mobile.
InDesign CS5.5 introduced the Articles panel, which makes tagging PDF documents easier than ever — you no longer have to use the Structure pane or Tags panel.
Now you can easily map styles to PDF tags. When InDesign exports the tagged PDF, those mapped tags automatically define the role map in Acrobat.
Articles provide designers and production artists an easy way to create relationships among page items. These relationships define the content to be used while exporting to ePub, HTML, or accessible PDFs, and define the order of the content.
You can create articles from a combination of existing page items within a layout, including images, graphics, or text. Once an article has been created, page items can be added, removed, or reordered. While articles can be created manually by dragging one or more page items to an article in the Articles panel, there are also mechanisms for adding bulk content to an article, including adding all selected content to an article or adding an entire document to an article.
The Articles panel is designed to be simpler and easier to use for people without XML skills. Note that the ability to use the XML Structure panel has not been removed; it is now an additional option that complements the use of the Articles panel during the export process.

Mapping styles to tags
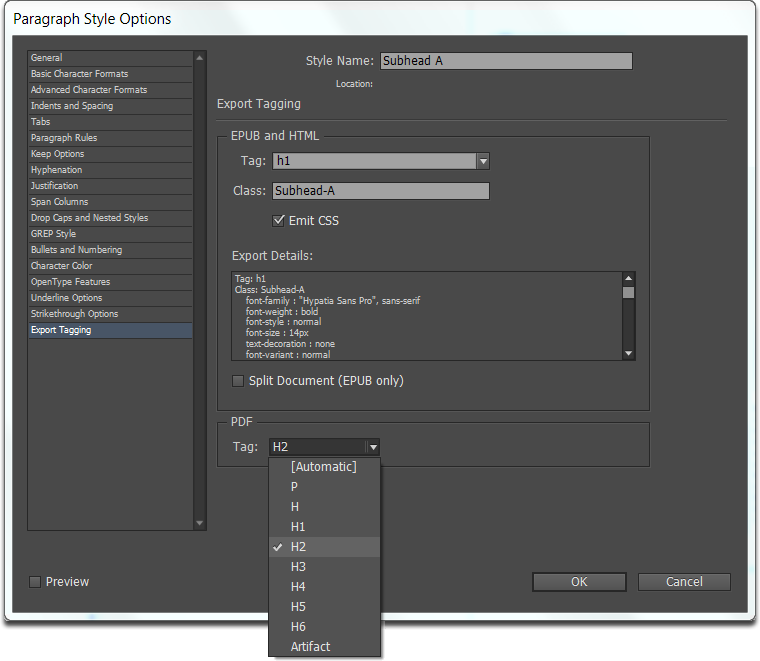
The traditional Paragraph and Character Style dialog boxes have a new sub-feature— Export Tagging.
Export Tagging provides the means of defining how text with InDesign Styles should be marked up when exported to either HTML/EPUB or tagged PDF.
The markup is displayed as a simple drop list that contains the most commonly used tags such as <h1> through <h6> and <p>. Unlike all of the other sub-features in the style dialog boxes, Export Tagging cannot be previewed within the InDesign layout, as it only impacts what is marked up in the exported file (EPUB, HTML, or PDF).

People with visual disabilities cannot discern graphics and images, so accessible PDF files need to include alternate text descriptions that assistive technology such as screen readers or text-to-speech engines can vocalize in order to describe the image to the user. It’s easier to add alt text to images in InDesign CC, especially if alt text has already been added to the metadata for an image in Adobe Bridge, or has been added to images from files imported from Microsoft Word or another application that writes XML metadata. After you’ve added alt text to an image, the alt text stays with that image as you design your layout.
Object Export Options consolidate two major functions when exporting images to EPUB/HTML and Tagged PDF:
- The first function is the requirement to add alternative text to placed images and graphics.
- The second function is the ability to create different conversion settings on each object, with special attention spent on settings useful for different screen sizes and pixel densities (ppi).
The dialog box has been made modeless, so that you can select different individual frames or images while leaving the dialog box active.
The Object Export Options can be applied to both graphic and text frames, as well as to groups. You can also apply conversion options to text frames, which is useful when you want to control the quality of rasterization applied to text effects like Drop Shadows, in the exported HTML and EPUB files.
The Object Export Options dialog box provides four options for adding alt text to frames in InDesign CC:
- From Microsoft Word: When InDesign users import Word documents with graphic images that have had the alt text assigned in Word, the alt text descriptions from Word are converted to native InDesign alt text. (Note: Currently supported only on the Windows® version of Word).
- From Structure: This option is for legacy INDD files where users have already created all of the alt text using the Structure pane.
- From XMP (Title | Description | Headline): Common XMP metadata fields are used to capture text about the image or graphic. If the XMP data is updated in another application like Adobe Bridge, updating the link in InDesign results in the alt text string being updated.
- From Other XMP: This option should be used only by XMP experts. It requires understanding the XMP path namespace and the array value. For example, the Bridge user interface supports IPTC Core, which contains a field titled “IPTC Subject Code.” If this field is where the alt text string is stored, then in InDesign, the value would have to be written as “Iptc4xmpCore:SubjectCode[1].” For adventurous mortals, in Adobe Photoshop®, you can view the full namespace in an image under File Info > Raw Data.
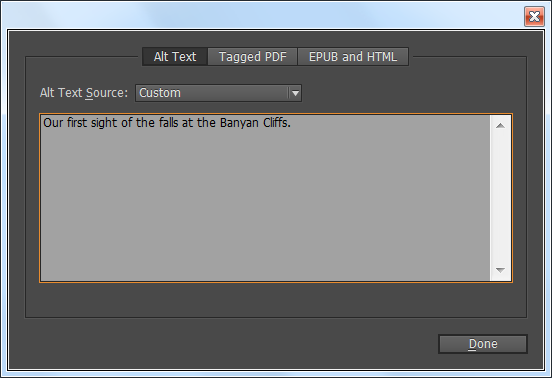
Users can also enter their own custom alt text string. This is useful when there is no preexisting data, or when the metadata text is lacking quality.
To add alt text by typing it directly into InDesign:
- Select an image that does not have alt text.
- With the Selection tool, select the image.
- Choose Object > Object Export Options.
- Select the Alt Text tab in the Object Export Options dialog box.
- Choose Custom from the Alt Text Source menu.
- Enter the description in the text field, and click Done.

The alt text you entered is included whenever you export your InDesign file as an EPUB, HTML, or PDF document. However, it is not added to the metadata for the image file itself, so you’ll need to enter it again if you use the image in a different document. To ensure the alt text remains with the image, enter it as metadata in Adobe Bridge.
You can also import alt text; if alt text was entered for an image in Adobe Bridge, for example, you can easily assign the same text in InDesign CC.
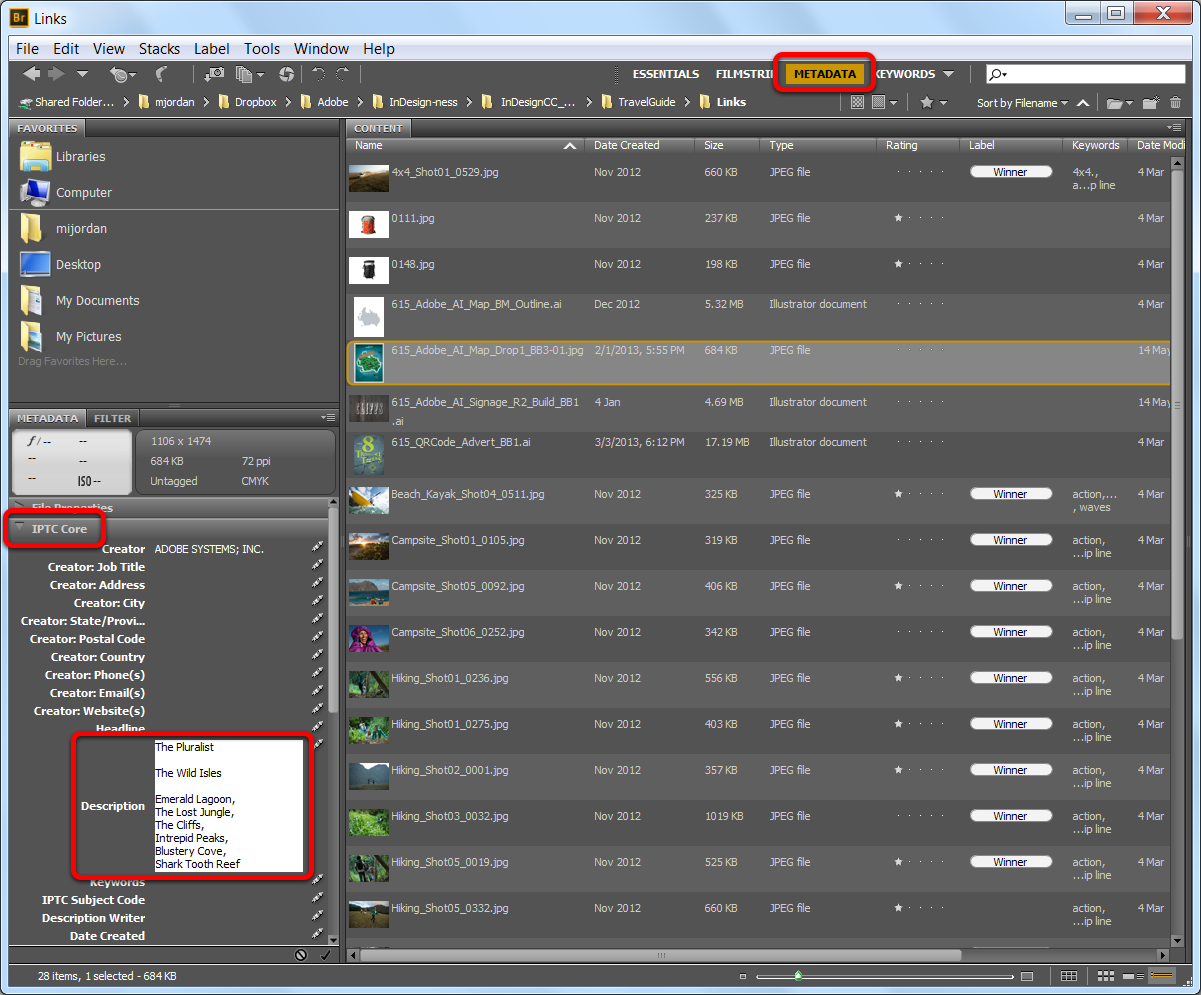
Using Adobe Bridge, you can assign alt text to an image by making an entry in the Description field of the IPTC Core for XMP Metadata. To display this field, select the Metadata view in Adobe Bridge. Under the Metadata panel, expand the IPTC Core entry and click the pencil icon to the far right of the description field.

To specify that this description should be used as the alt text for this image in InDesign CC, do the following:
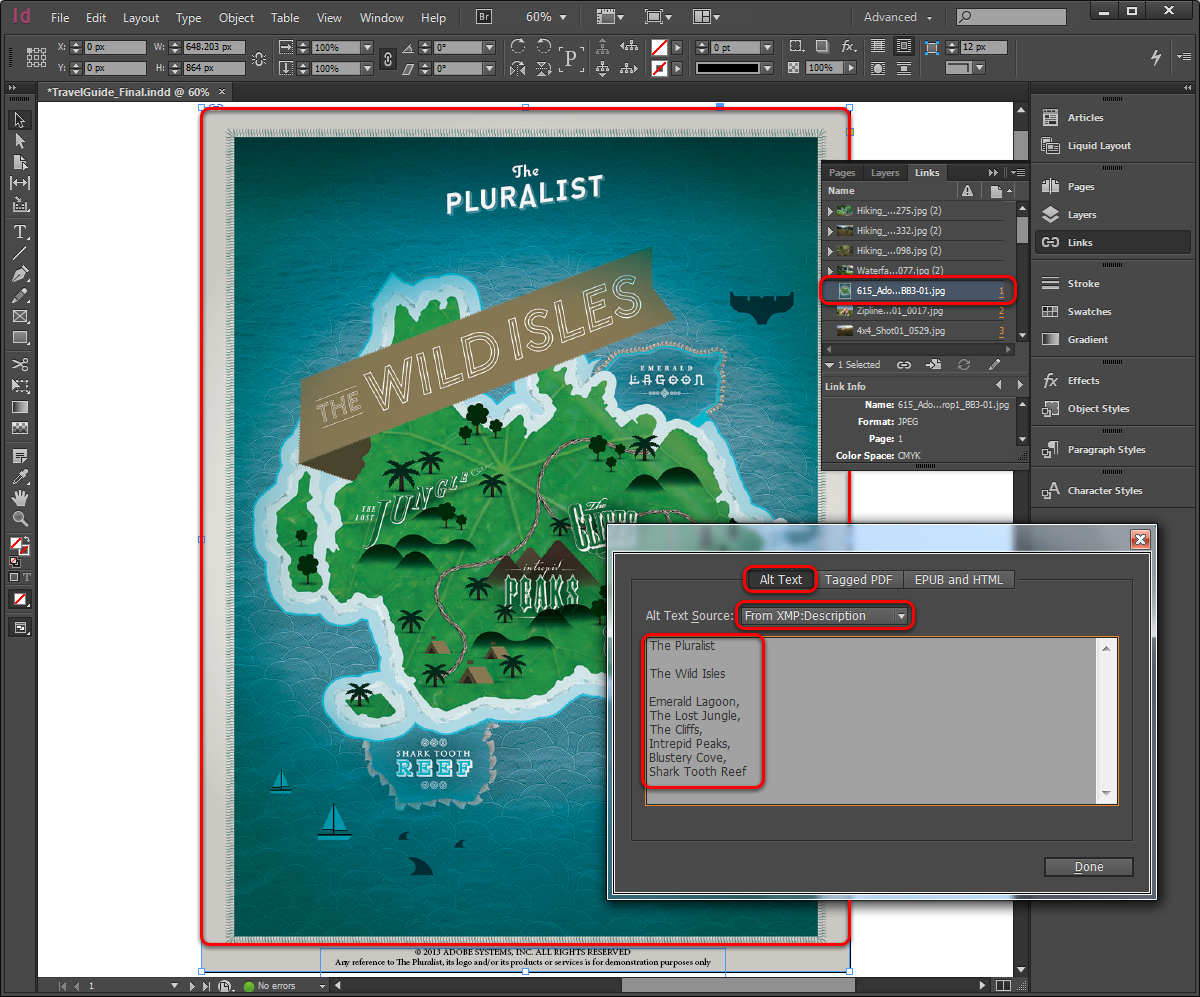
- Open the InDesign Links panel and select the image that has alt text.
- Choose Object > Object Export Options.
- Select the Alt text tab.
- Choose From XMP: Description from the Alt Text Source menu.
- Click Done.

When you export the document, the Alt Text you've assigned will travel with the image.
When you’ve organized and tagged the content in a PDF file, you’re ready to export. There are two options for exporting a PDF — interactive and print. You can export a tagged PDF file using either option.
InDesign CC supports cross-media publishing by enabling you to export structured InDesign documents as XML or XHTML.
Export to XML
For advanced repurposing workflows, export the content from InDesign in XML format, which you can then import into an HTML editor such as Dreamweaver.
Export to XHTML
Export a selection or the entire document to a basic, unformatted HTML document. You can link to images on a server or create a separate folder for images. You can then use any HTML editor, such as Dreamweaver, to format the content for the web.